
Fotolia
How to build a CI/CD pipeline with Azure and GitHub
Some organizations need to build and deploy apps to specific cloud platforms. This walkthrough shows you step by step how to create a CI/CD pipeline using GitHub and Azure DevOps.
Continuous integration/continuous delivery (CI/CD) pipelines are the foundation of modern software development, delivering business value in many ways: streamlined releases, software with fewer bugs and automation that removes many time-consuming and error-prone manual steps. You can develop software without CI/CD, but a CI/CD pipeline makes life much easier if your business uses Agile, cloud-native apps or any distributed application architectures such as microservices.
There is no one-size-fits-all approach to building a CI/CD pipeline. A typical CI/CD pipeline example relies on some prescriptive components -- a CI engine, code repository, test framework -- but an organization's CI/CD plan will likely branch out, depending on its infrastructure and tools and the choice between continuous delivery or deployment. Organizations that rely on cloud-based applications and services may want to run CI/CD through their chosen cloud platform.
Most cloud providers offer a template to quickly set up a CI/CD pipeline. Consider, for example, a CI/CD pipeline that uses GitHub and deploys an application to Microsoft Azure. A service called DevOps Starter provides CI/CD starter templates that enable you to integrate with either GitHub or Azure DevOps and bootstrap a repository with a demo application from source code along with the pipeline definition as code and infrastructure as code (Azure Resource Manager templates). With these in place, the service stitches everything together to present an end-to-end deployment pipeline.
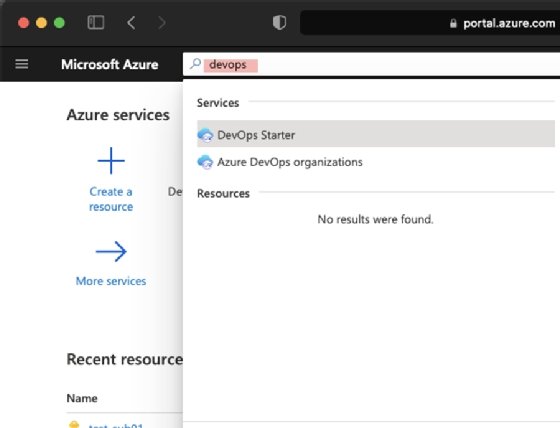
So, let's get started with this step-by-step walkthrough of how to set up a CI/CD pipeline in Azure with GitHub for version control and repository. First, go to the Azure portal, search for devops and select the "DevOps Starter" service.
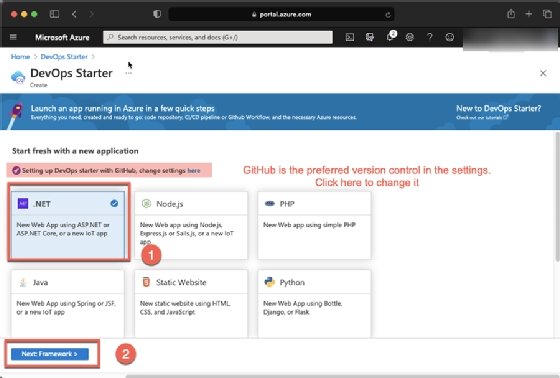
In the DevOps Starter service pane, click Add which presents a bunch of preloaded templates to choose from. Select the programming language for your application -- in this example, I chose .NET, as well as GitHub for version control and GitHub Actions for pipelines (Azure DevOps is an option as well). Hit the Next: Framework button.
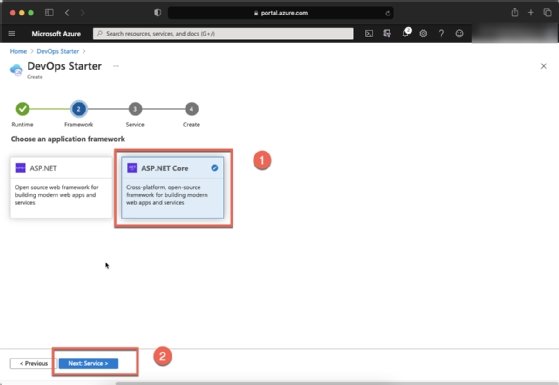
Now, choose the ASP.NET Core framework for our .NET app, as this is a cross-platform framework; later, we can deploy our application on top of Linux containers. Then click Next: Service.
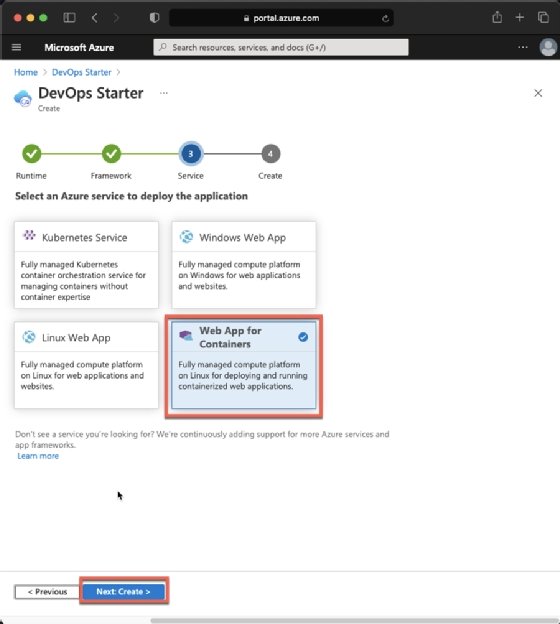
You can select from several Azure services to deploy your application. For this exercise, we will choose Web App for containers, which deploys containers to an Azure App Service, a managed application-hosting platform. Click Next: Create.
Because we chose GitHub for version control and pipelines, the next step will prompt us to authorize connection to GitHub in the Azure portal. Click Authorize and log into GitHub.
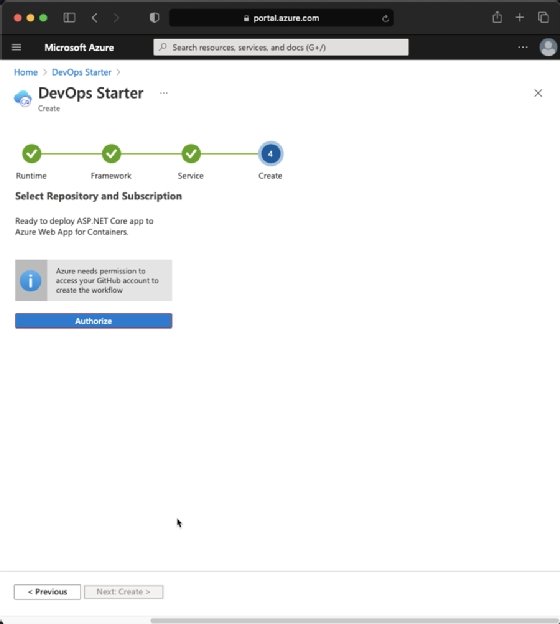
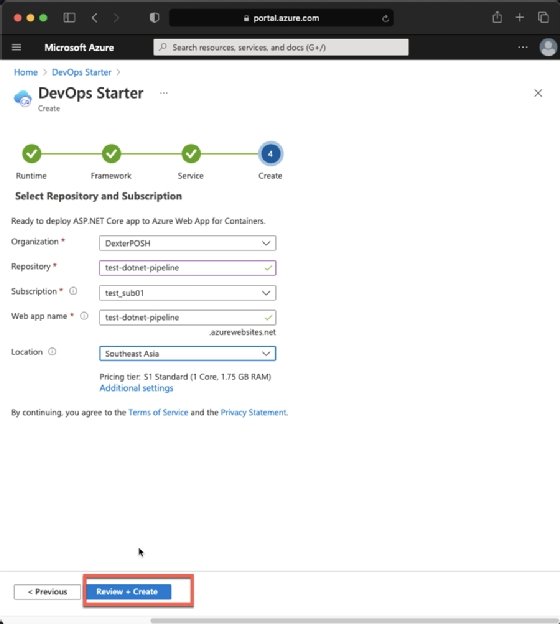
Once we have authorized to GitHub, we are presented with several parameters (the final three are specific to deployment on Azure):
- Organization: GitHub organization to use
- Repository: Specify the repository name (Azure does not generate a name for you)
- Subscription: Azure Subscription for hosting the cloud resources
- Web app name: Unique name where the application will be hosted
- Location: A specific Azure region where the required cloud resources will be created
Fill in the details and click Review + Create.
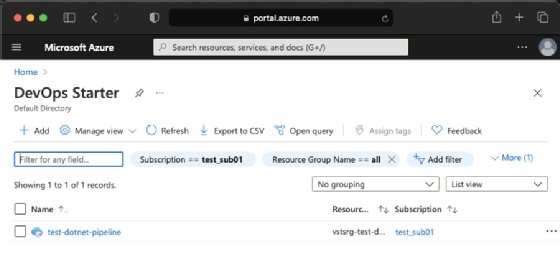
After the deployment completes, we can return to the DevOps Service and see that our instance has been created.
Clicking on the instance presents a landing page with the details of the GitHub workflow and corresponding Azure resources.
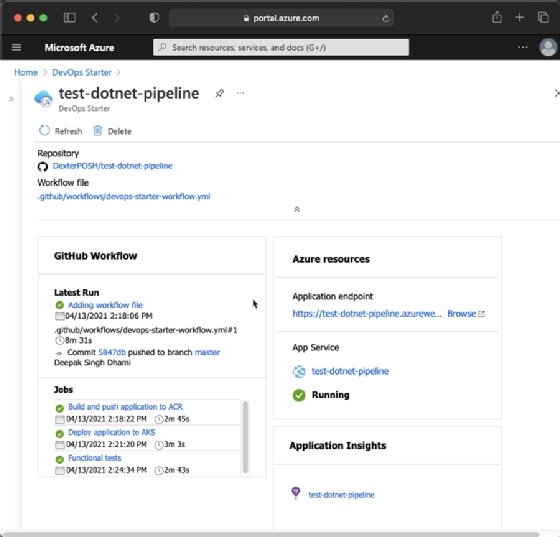
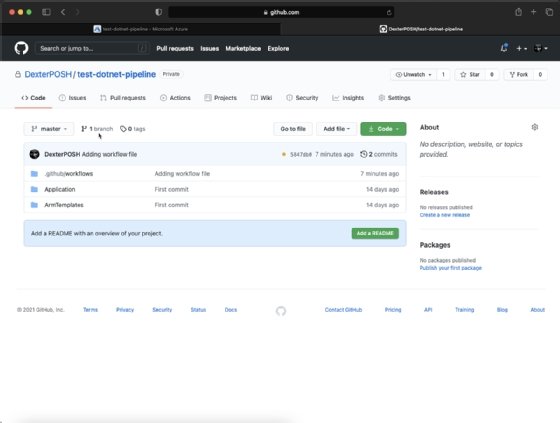
We confirm the Azure starter service has created a GitHub repository under our specified organization, and it has set up a GitHub Actions CI/CD pipeline to build, test and release our software. Here's the repository layout:
- .github/workflows: Folder that contains the pipeline definition
- Application: Folder that houses the app source code, unit tests and functional tests
- ArmTemplates: Folder with the infrastructure as code definitions to deploy to our cloud provider (Azure)
The image below shows the CI/CD task as it runs through GitHub Actions.
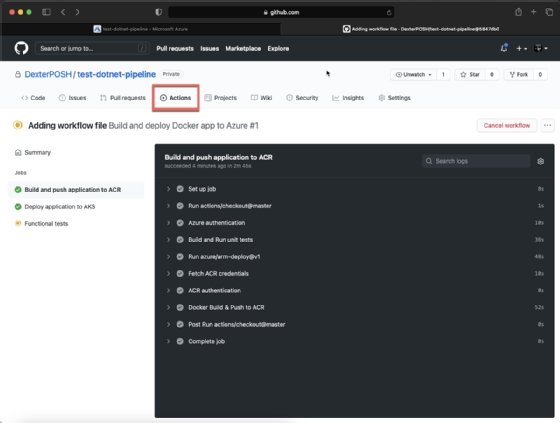
Build, deploy and test in a CI/CD pipeline for Azure and GitHub
Let's dive deeper to understand what's happening inside a single CI/CD build in our example and its three stages.
Build stage
This job runs a series of steps to build the application:
- Check out the source code from master branch.
- Authenticate to Azure (or your cloud provider of choice). GitHub Actions supports major cloud providers out of the box.
- Build and run unit tests using the dotnet command-line interface (CLI). In this example, the test framework is MSTest, but the dotnet CLI can work with different test frameworks and execute them in the same way. You also can use a different build tool for your .NET applications, such as Cake for GitHub Actions, instead of the dotnet CLI.
- Utilize Azure Resource Manager (ARM) templates to deploy the required container registry. Because we use Azure to deploy the container registry and as a managed platform to host our application, we use ARM templates to deploy our infrastructure in an idempotent manner. For CI/CD with other cloud providers such as AWS or Google Cloud Provider, we could use AWS CloudFormation templates or Terraform, for example.
- Fetch the container registry credential from the cloud provider and authenticate to it.
- Build the container image and push it to the container registry.
Deploy stage
The primary responsibility in this stage is to take the artifact (the container image from previous job) and deploy it in the environment on the cloud provider, with the required cloud resources, to host the app instance. Specific functions include:
- Check out the master branch
- Authenticate to the cloud provider
- Use ARM templates to deploy the required cloud App Service instance
- Fetch the container registry credentials
- Deploy the container image published to the container registry to the App Service Instance
Functional test stage
This job runs various functional tests to validate our deployed app is working. Steps include:
- Check out the master branch
- Set up the .NET version
- Use PowerShell to update the run settings to point to our application instance
- Run function tests using dotnet CLI
This example of a CI/CD pipeline in Azure with GitHub involves only a single environment, but you could chain multiple environments together, with gates on them to control the release of deployed software.


