
Getty Images/iStockphoto
Follow this Harness IO tutorial to get started with CI/CD
This tutorial gives an overview of the options and features available to users of Harness IO and walks through how to build and ship code in the CI/CD platform.

The following text is a transcript of the embedded video.
What we're going to be doing is taking a first look at Harness IO. If you're not familiar with Harness IO, it's essentially a CI/CD platform that you can use to build and ship code for both infrastructure engineers and developers. This can ship infrastructure code like Terraform, and then it can also ship application code like Go and Python, things like that.
Harness IO setup
I'm here at the startup page, and … we can see here that we could sign up for free, but one of the things that I want to do is I just want to quickly show the pricing here. … I'm going to click on Pricing. And, if you scroll down, you have a few options. Number one, you have continuous delivery, and you have continuous integration.
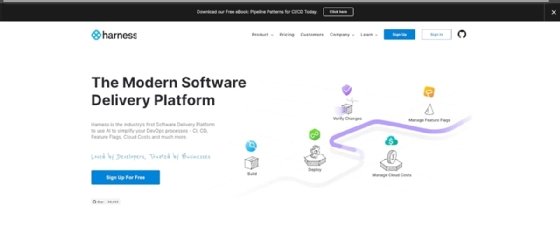
As you can see, it's powered by Drone. You have feature flags that are coming soon, which is really cool. This is a huge thing in the DevOps space right now. Feature flags are really popping up all over the place. If you have an interest in it, definitely feel free to take a look and Google this. And then, finally, cloud management costs. This is coming soon. I imagine that this is going to help a ton of people, especially because, as I'm sure everybody knows, cloud costs can get out of hand. I remember I've had a few $600, $700 or $800 bills in my AWS and Azure environments just in my labs.
One more thing that I want to do here is I want to click on Products. As you can see, these are pretty much all the products that we went through. But one of the things that I do want to point out about Harness is essentially it started out as a continuous delivery tool. Now, we can see that it's definitely expanding a ton, and that's really, really cool to see because I do believe that Harness is a pretty solid platform. What I'm going to do now is I'm going to click on Sign Up. And, as we can see, get ship done. That's a funny pun there. We can go ahead, and we can sign up a few different ways.
We can use Azure, we can use our Gmail, we could use LinkedIn, GitLab, Bitbucket or GitHub. I'm actually going to use GitHub. And then, as you can see, it wants to access my account and my "AdminTurnedDevOps" GitHub organization, I'm going to go ahead, and I'm going to click on Authorize. And, as we can see here, it's being directed to the authorized application. You may be wondering why I used GitHub?
GitHub with Harness IO
For me, I store all of my code in GitHub. It kind of makes sense to be able to authorize through GitHub. But again, you could use LinkedIn, you could use Azure, Gmail, whatever you feel comfortable with. As you can see, we have a few options here to essentially get started. I'm going to click on Continuous Integration, for example. And then, I'll click Continue. I could start a 14-day trial, if I want to. I don't. I really do enjoy the UI here. Even if I click on Home, for example, I'm not just stuck in builds.
I can use feature flags and cloud costs. I can go to the dashboard here. And I can see and set up a bunch of different dashboards if I want to. I'm not just stuck using CI, I can use other things as well. But, all in all, the dashboard, the homepage, everything is very, very clean on this platform. It's definitely an easy-to-use UI. And I do believe just playing around with Harness that it's definitely set up to make your life in the CI/CD space a little bit easier.
Create builds in Harness IO
I'm going to click on Builds and create a project. And then, I'm going to name this project python-test. I can choose a color. I do like blue, but I'm going to go ahead and I'm going to choose light blue. And then, the organization, I'll keep that as Default. We can give this a description: Test build with Python code. And then, we can say tags, say dev; we'll go ahead, and we'll keep dev as the tag for the environment.
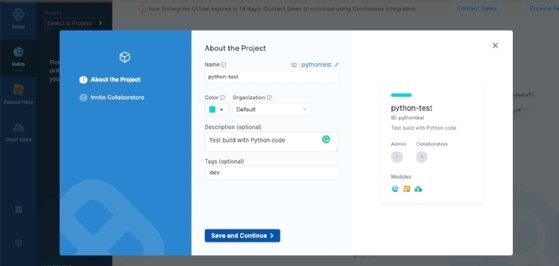
I'm going to click Save and Continue. And, as we can see, the project has been created successfully. One of the cool things that we can do right off the bat is we can also invite collaborators. If you have anybody on your team that also wants to play around with Harness, you absolutely can do that here. … Our dashboard shows the build health, successful builds, failed builds and active builds. Of course, we're not going to really see anything here all that much because we haven't actually done anything yet.
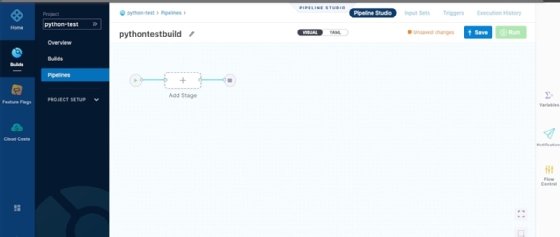
If I click on Builds here, I'll see that I have no builds in my current project. If I click on Run a Pipeline, we can see that, again, we have no pipeline. If you go ahead and you click on Pipelines, you can create a new pipeline. We'll give this a name python-test. And we'll click Start.
Perspectives in Harness IO
Now, one of the things that I really love about Harness, and we're not seeing this too much in other platforms -- it's available, but it's definitely being phased out -- you have a visual perspective, or you have a YAML perspective. If you feel more comfortable from a code perspective, you can edit the build pipeline using YAML. Or you can choose visual. For example, I can click Add Stage. And, in this stage here, I can do custom chained pipelines, approval or build.
I'm going to click Build here. And I'll give this stage a name; I'll call it dev. And then, I'm going to have to choose a connector. The connector is going to be where your code is located. So, whatever code you're building is where you want to choose for your connector. I'm going to click New Connector. I'm going to choose GitHub because that's where my code is. I'll give this a name: github-connection. Then I'll click Continue.
Authenticate the build
Now, at this point, I can authenticate. This authentication, I can do either a URL type or repository. Then, the connection type, I can do HTTP or SSH. I'll go ahead and do Account; I'll do HTTP. And now, I need my GitHub URL. … And then, the repository display name, as you can see, enter the full URL for a repo in your org. I'll go to repositories, and I'll choose pyweb. Click on that. I'll get that URL here. And then, I'll click Continue.
I need to be able to authenticate with my username and my password. I'm going to type in my username here. And then, I need to pass in my access token. Go ahead and create a Personal Access Token from your GitHub. You can add it in to Harness. I'm going to click on Create or Select a Secret. I'm going to give this a name. I'll add in my value here. And I'll click Save.
And now, we have our GitHub connection connector here. We could choose a repository name we want; we can choose pyweb. And then, I can click Set Up Stage, and I've got to give this a stage name again. At this point, I've set up my CI build.
I called it dev. That's the stage. And what it's going to be doing is it's going to be building the code in my pyweb repository. … That's how you can get started setting up a build process in Harness.
Dig Deeper on Software development lifecycle
-
![]()
Harness Artifact Registry strengthens supply chain governance
By: Beth Pariseau
-
![]()
DevSecOps AI agents add platform context, woo enterprises
By: Beth Pariseau
-
![]()
Market research: AI coding tools push production problems
By: Beth Pariseau
-
![]()
'403: No valid crumb' Jenkins GitHub webhook error fix
By: Cameron McKenzie