
Getty Images
How to set up autoscaling in Azure Kubernetes Service
Explore scaling options in AKS, such as the horizontal pod and the cluster autoscaler. Then, follow a step-by-step tutorial on how to manually and automatically scale resources.

Whether it's for a week, a month or a quarter, organizations will go through busy and slow times. Because of the jump from more users to fewer users, engineers need a way to manage infrastructure and applications to handle both types of traffic. This is where autoscaling comes into play.
Typically, when engineers think about autoscaling, they think about scaling up infrastructure or pods. However, that's not always the case. If it's a slow time for an organization, users can scale back infrastructure and pods to reduce cost and overhead. Autoscaling can be vertical, in which you add more resources, such as RAM or CPU, or horizontal.
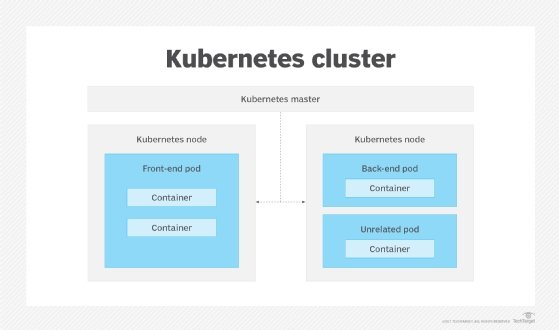
Horizontal scaling, the more popular option, is when you add or remove pods or servers. For example, if you have two worker nodes in an Azure Kubernetes Service (AKS) cluster, and the two worker nodes are at 75% capacity, you can add a third worker node. This allows pods to be scheduled on the new worker node instead of the two worker nodes that are under heavy load. From a pod perspective, you can add more pods in a ReplicaSet to handle the traffic that may be coming to the containerized application.
In AKS, there are various scaling options, such as the horizontal pod autoscaler and the cluster autoscaler. In the following steps, learn how to manually scale workloads to build a basic understanding of the scaling process, then review the automated way.
Cluster vs. horizontal pod autoscaler
Regardless of the workload, AKS will either create more worker nodes or remove worker nodes. The two primary ways that autoscaling monitors resource demands is with the horizontal pod autoscaler and the cluster autoscaler.
Horizontal pod autoscaler. The horizontal pod autoscaler is a default service on AKS that monitors a pod's resource needs. It checks the Metrics API every 15 seconds for any changes. If the containerized app is under heavy load, the number of pods automatically goes up. If the pods are no longer needed, it scales down.
Cluster autoscaler. The cluster autoscaler watches for pods that can't be scheduled via the Kubernetes scheduler because of resource -- such as CPU and memory -- constraints. If this occurs, the autoscaler automatically scales the cluster. It checks the Metrics API server every 10 seconds for any changes. It is usually used together with the horizontal pod autoscaler
How much AKS autoscaling you can do depends on your Azure account. With Azure, and every other cloud, an account limits how many VMs you can run. Confirm that you're able to create the needed VMs in Azure before you begin.
Scale manually
Before automating a workload, you must first learn how to manually configure it.
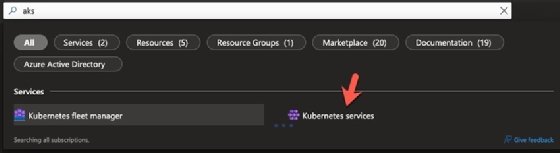
Step 1. Sign into Azure and go to the AKS service.
Step 2. Click the drop-down to create a new AKS cluster.
Step 3. Fill in the basic information for subscription, resource group and more.
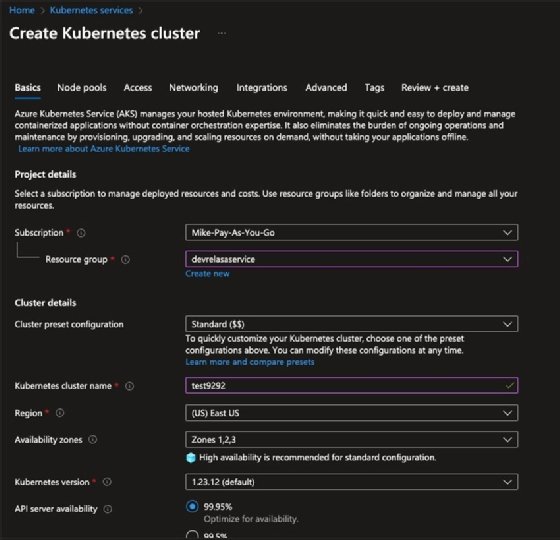
Step 4. Scroll down to the bottom of the Basics page.
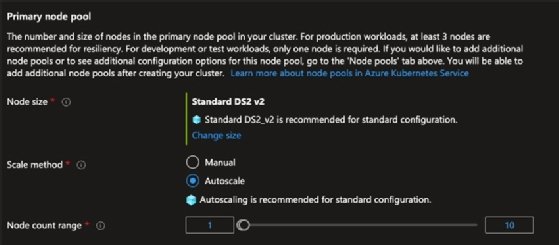
Step 5. Underneath the primary node pool, set whether you want autoscaling or not, along with the worker node range.
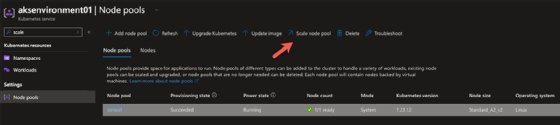
Step 6. The completed node pool will show on your node pool dashboard.
Scale automatically
See how to turn on autoscaling in Terraform for AKS.
Step 1. Specify the Azure Resource Manager provider.
provider "azurerm" {
 features {}
}
Step 2. Specify the AKS resource.
resource "azurerm_kubernetes_cluster" "k8s" {
 name        = var.name
 location      = var.location
 resource_group_name = var.resource_group_name
 dns_prefix     = "${var.name}-dns01"
 network_profile {
 network_plugin = "azure"
 network_policy = "azure"
Step 3. Specify the identity.
identity {
  type = "SystemAssigned"
}
Step 4. Within the node pool, turn on auto-scaling -- it can be true or false.
default_node_pool {
  name    = "default"
  node_count = var.node_count
  enable_auto_scaling = true
  vm_size  = "Standard_A2_v2"


