
Sergey Nivens - Fotolia
Kubernetes performance testing tutorial: Load test a cluster
Follow along step by step to run Kubernetes performance tests with Metrics Server and Horizontal Pod Autoscaler. This tutorial works for cloud-, data center- or locally hosted clusters.

Performance testing is critical for any software that goes to production. For an application deployed via a Kubernetes cluster, test to ensure that the cluster scales to meet changes in request volumes.
Kubernetes performance testing demands a place in the software development lifecycle for container-based applications. The goal of any type of performance test is to build highly available, scalable and stable software. Load, endurance and stress tests reveal how the system responds in various situations. For example, a web application might handle 100 requests at a time, but what happens when 1000 or more requests come in -- will it crash, or serve the incoming requests with a slower response time? The types of performance tests are:
- Load test. How the system responds to a sudden increase in requests.
- Endurance test. How the system survives a constant, moderate load for longer duration of times. It can also be referred to as a soak test, referring to the long time the software spends under test.
- Stress test. How the system responds under a heavy load, with an intent to find out the point at which system is stressed and ceases functioning.
To demonstrate load testing, this tutorial puts a lot of demand on a PHP application running in a Kubernetes cluster. The aim is for the cluster to scale horizontally when incoming requests exceed normal usage patterns.
Install the Metrics Server
The Kubernetes Metrics Server is the crucial component for a load test because it collects resource metrics from Kubernetes nodes and pods. Metrics Server provides APIs, through which Kubernetes queries the pods' resource use, like CPU percentage, and scales the number of pods deployed to manage the load. There are multiple ways to install it on a Kubernetes cluster.
Helm. Helm charts, collections of files for related Kubernetes resources, are a popular way to set up Metrics Server on a cluster. Run the following command:
helm install metrics-server stable/metrics-server
Helm charts are created and maintained by open source community contributors, hosted on GitHub.
DIY setup. To directly deploy the Metrics Server, use the following command and a YAML file hosted on GitHub:
kubectl apply -f
https://github.com/kubernetes-sigs/metrics-server/releases/download/v0.3.6/components.yaml
Once the above command executes successfully, run the following command to verify that Metrics Server was installed:
kubectl get deployment metrics-server -n kube-system
As a cloud service. Google Kubernetes Engine (GKE) and Microsoft's Azure Kubernetes Service (AKS) ship Metrics Server as a part of the GKE or AKS Kubernetes cluster, respectively, and therefore the user does not have to install it explicitly.
Amazon Elastic Kubernetes Service (EKS) from AWS supports Metrics Server. EKS users should set up Metrics Server following the DIY setup method offered above.
Locally. If the Kubernetes cluster runs on Minikube, a tool for local Kubernetes deployment, enable a Metrics Server add-on:
minikube addons enable metrics-server
With the Metrics Server installed and capturing the resource metrics in the Kubernetes cluster, deploy the application on which to run performance tests.
Create an application
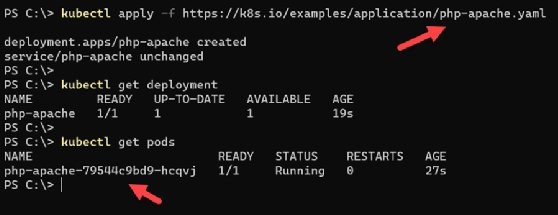
Run the following command to install a simple PHP web application in the Kubernetes cluster:
kubectl apply -f https://k8s.io/examples/application/php-apache.yaml
Then, verify the pods were created:
kubectl get pods
Set up horizontal pod autoscaling
The Kubernetes Horizontal Pod Autoscaler (HPA) automatically scales the number of pods in a deployment based on a custom metric or a resource metric from a pod using the Metrics Server. For example, if there is a sustained spike in CPU use over 80%, then the HPA deploys more pods to manage the load across more resources, maintaining application performance.
To create an autoscaling deployment for CPU, use the following command:
kubectl autoscale deployment php-apache --cpu-percent=80 --min=1 --max=4
This will increase pods to a maximum of four replicas (--max=4) when the PHP web application deployment experiences more than 80% CPU use (--cpu-percent=80) over a sustained period.
To check the status of Horizontal Pod Autoscaler, run the get command, which displays the current and target CPU consumption. Initially, you might observe an unknown value in the current state, as it takes some time to pull metrics from the Metrics Server and generate the percentage use.
kubectl get hpa
For a detailed status of the Horizontal Pod Autoscaler, use the describe command to find details such as metrics, events and conditions.
kubectl describe hpa
Add load to the application
Once the PHP web application is running in the cluster and we have set up an autoscaling deployment, introduce load on the web application. This tutorial uses a BusyBox image in a container and infinite web requests running from BusyBox to the PHP web application. BusyBox is a lightweight image of many common UNIX utilities, such as GNU Wget. Another tool that enables load testing is the open source Hey, which creates concurrent processes to send requests to an endpoint.
Use the following YAML content and save it in a file named infinite-calls.yaml -- note the command section at the bottom where we use wget in a 'while' loop to infinitely call the PHP application.
apiVersion: apps/v1
kind: Deployment
metadata:
  name: infinite-calls
  labels:
    app: infinite-calls
spec:
  replicas: 1
  selector:
    matchLabels:
      app: infinite-calls
  template
    metadata:
      name: infinite-calls
      labels:
        app: infinite-calls
spec:
      containers:
      - name: infinite-calls
        image: busybox
        command:
        - /bin/sh
        - -c
        - "while true; do wget -q -O- http://php-apache; done"
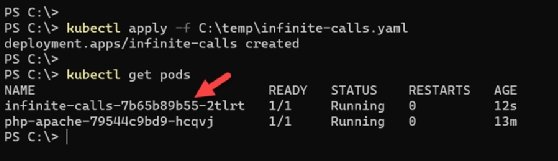
To deploy this YAML file, use the Kubectl apply command with a path to the file, as seen in Figure 2. A new container has been created to run it.
Kubectl apply -f <path to yaml>
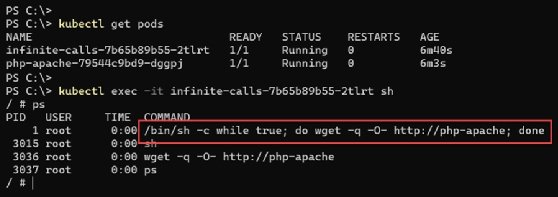
Once the container is up and running, we can run a shell using /bin/sh interactively in this container. Use the shell to verify that there is a process running to perform web requests to the PHP application infinitely. These never-ending calls introduce load on the application, which in turn consumes the processor resource for hosting the container.
kubectl exec -it <container name> sh
After just few minutes with the web application's pod under this load, Kubernetes Horizontal Pod Autoscaler observes an increase in CPU use. To manage the incoming load, it automatically creates the maximum number of pods to bring CPU use below the specified 80% threshold, as shown in Figure 4.
You can see the deployed pods, as well as current and target CPU use with the get command and -w flag: kubectl get hpa -w

Now, forward the service ports to the local host on port 80.
kubectl get services
kubectl.exe port-forward svc/php-apache 80:80
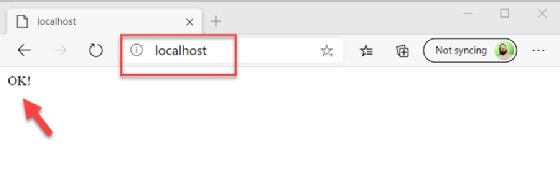
This load test shows the Horizontal Pod Autoscaler kept the application available under increased use conditions. The application still works, as we can see the "OK!" status message in the browser when accessing the PHP application at http://localhost, as shown in Figure 5.
Additional performance tests for Kubernetes
Load testing Kubernetes proved that the application can handle the demand from one container running with infinite web requests, thanks to HPA. What if we increase the load by scaling the 'deployment/infinite-calls' replicas to four, which will spawn three more containers sending web requests to the PHP application? This creates an endurance test.
To do so, run the following command:
kubectl scale deployment/infinite-calls --replicas 4
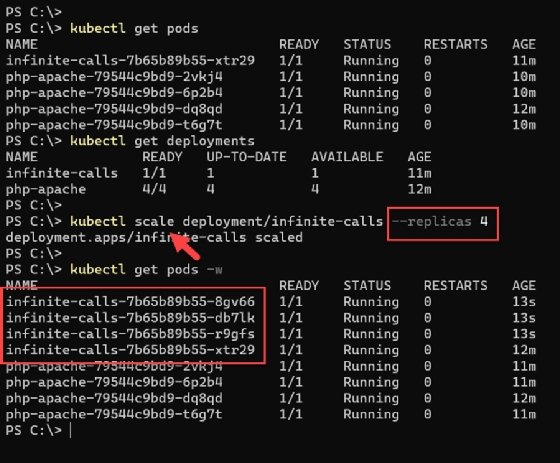
Check the Horizontal Pod Autoscaler status after scaling the load generator. In this tutorial setup, even after scaling the 'deployment/infinite-calls' to more than 100 replicas, there was only a slight delay in the response time of the web application. Otherwise, it ran without any crashes or major issues. This variation on the performance test proves that the PHP web application deployed via a Kubernetes pod can handle 100 times the normal load easily.
We can take this test further and keep increasing the load to find the load point after which the system crashes and is unable to fulfill any web requests. That is a stress test.
You can also test if Kubernetes scales down the pods for the application in step with demand. If we wind down the load generator, the HPA should start to reduce the number of pods deployed, since they are no longer required.