
Maksym Yemelyanov - stock.adobe.
Control Docker containers with the Nginx load balancer
Docker is an efficient container platform, but it isn't perfect. Follow this Nginx load balancer tutorial to provide your container environment with high availability across multiple nodes.

While Docker has become the de facto platform on which many enterprises deploy and manage containers, the technology is not highly available. The failure of a Docker host would result in loss of service. Operations teams, however, can use the Nginx load balancer in front of Docker to achieve high availability and scalability.
Nginx is an open source web server that provides Layer 7 request routing and load balancing to optimize application performance. To implement it for Docker high availability, start with a two-node setup, fronted by the load balancer.
Install Docker and Nginx
First, install two Ubuntu instances on separate hosts, and configure them with static addresses. Then, use the following commands on each to stand up a basic Docker instance running Nginx:
sudo apt-get update
sudo apt-get upgrade
sudo apt-get install docker.io -y
The install docker.io command installs Docker from the Ubuntu repository. Once Docker is installed, it's simple to deploy a Docker instance. However, before deployment, store the webpages outside of the Docker instance. This step ensures that all instances run the same code and enables developers to version control the code. On each host, create a new folder to hold HTML data:
mkdir -p /data/www
A default webpage will show where the front-end load balancer sent traffic in this two-node setup. Create a simple webpage for each node by echoing some basic HTML into a file that will become the index page:
echo "<h1>Hello 1</h1>" > /data/www/index.html
For the second host, change the instance number to 2 as in <h1>Hello 2</h1>. Then, use the following commands to run the load-balanced servers with HTML folders:
docker run --name nginx -v /data/www:/usr/share/nginx/html:ro -d -p 80:80 nginx
The above command runs the Docker instance and maps /usr/share/nginx/html to the /data/www folder on the host on a read-only basis. This setup saves space, as it prevents having potentially tens of instances. It also keeps the served files consistent across all instances, which prevents configuration drift.
Next, expose the Nginx web servers within the instance to port 80 so that the requests can be forwarded to it from the load balancer.
Set up the load balancer
At this point, turn your attention to the load-balancing front-end server. This server could run on a Docker container, but in this tutorial, the instance is a standard VM.
Install a third Ubuntu server, then use the following commands to install the components for Nginx:
sudo apt-get update
sudo apt-get upgrade -y
sudo apt-get install nginx -y
Reboot the VM, and ensure the Nginx load balancer displays correctly in a web browser. Then, configure the plain Nginx web server to become a load balancer. On a default Ubuntu server, the configuration file for Nginx is held in /etc/nginx/nginx.conf.
Nginx isn't overburdened with a huge and complex base configuration file. The load-balancing component consists of two key steps: Define a group of servers to participate in the load-balancing configuration, and tell Nginx to pass those requests to one of the load-balancing servers in the group.
By default, the Nginx load balancer uses a round-robin setup, wherein workloads are equally passed among the nodes, one after the next. There are other load-balancing options, including IP hash-based routing, which is used for sticky sessions -- or instances where the same server handles all requests for a particular user.
Back up the configuration file for Nginx, called nginx.conf. Then, delete the contents of the current file, and replace them with the code shown below:
http {
upstream backend {
server 192.168.0.97;
server 192.168.0.98;
}
server {
listen 80;
location / {
proxy_pass http://backend;
}
}
}
The upstream back end, which can have any name, sets up the group of servers that perform the load balancing. The next two lines of code define the servers, but it's also possible to use domain names, if desired.
The second group of commands specifies that the default port 80 will accept requests.
The next two lines essentially implement the proxy service. The location / forwards all traffic for that website or IP address to the Nginx load balancer. The proxy pass defines the group of servers to use, which are those configured in the previous group of commands.
Next, use the following command to restart the Nginx load balancer and make the service live:
sudo systemctl reload nginx
Test the load balancer
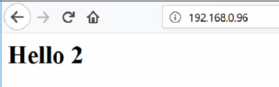
Lastly, open a web browser, and enter the IP address or URL of the front-facing load balancer. It should display Hello 1 or Hello 2, depending on which server the load balancer passes the request to.


