
Getty Images
Send automated messages with this Azure Logic Apps tutorial
Learn to use the Microsoft cloud-based product to automatically send an email or a message from Microsoft Teams when you need to know if a task completed properly.

While PowerShell can handle a seemingly unlimited number of administrative tasks, messaging isn't one of its strong suits.
It takes work to get the right modules configured and authenticated to set up notifications in PowerShell. If you want to get messages from scripts that run in multiple locations in your organization, then the setup process is even more complicated. For example, you might have scheduled scripts that run on the domain controllers and want the script to report any success or failure. Or, more simply, you may want an easier way to deploy scripts with a smaller footprint. One option that can help with these specialized automation jobs is to use Azure Logic Apps to accept an HTTP POST and send an email or message in Microsoft Teams.
How to create an automated workflow in Azure Logic Apps
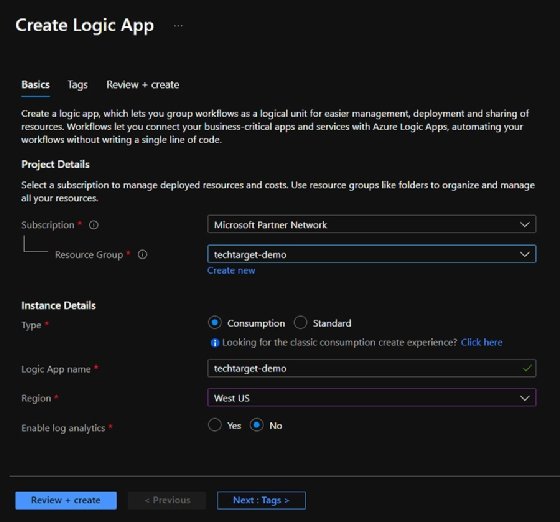
First, log into the Azure portal, click the Create a Resource button, search for Logic App and click on the Create button.
In the Create Logic App pane, select your resource group or create a new one if needed, set your type appropriately -- use Consumption unless you need Standard -- and give it a name:
Add any tags and create it. Select Go to Resource.
The first page that opens when you create an Azure Logic App contains some common triggers. For this Azure Logic Apps tutorial, we will use the When a HTTP request is received request trigger for the configuration of both Microsoft Teams and email.
How to use an Azure Logic App to send email
The power of Azure Logic Apps is its ease of use. To demonstrate, let's create an automated workflow with two steps. First, it will accept several parameters via the When a HTTP request is received action and then it will send an email. This tutorial will use the Office 365 email connector, but there are several other email connectors with a send-email action, such as the Gmail connector for Google's email service. Microsoft provides a full list of its Logic Apps connectors here.
For a more flexible workflow, this Azure Logic App should accept values for several email header fields, such as to, CC, BCC, subject and message. To tell the Azure Logic App how to pass the data, we format that object in JavaScript Object Notation (JSON) and input it as a sample payload.
{
     "To": "to",
     "CC": "cc",
     "BCC": "bcc",
     "Subject": "subject",
     "Message": "message"
 }
The Azure Logic App uses the values you supply to determine what type the property is.
Click on Use sample payload to generate schema and paste the JSON payload.

Click Done and you should see that the JSON schema updates to a format that is compatible with the Azure Logic App.
Add the email action by clicking on New Step and search for your email provider. For the purposes of this tutorial, search for Office 365 Outlook and select the Send an email (V2) action. If you haven't set up authentication for this action, a dialog box will prompt you to sign into an account. If you don't want to use your email account, then either sign in with a service account, or use the From parameter or select the Send an email from a shared mailbox (V2) and use a shared mailbox.
After authentication setup, the action will appear on the workflow.

You might notice the workflow doesn't have all the email header fields. Add those by clicking on the Add new parameter drop-down and check the parameters to add.
To use our defined parameters, click on one of the boxes, such as To, and a pop-up will suggest values that are hidden until you click the See more to reveal the custom parameters.
For each parameter, select the matching value from the list. For Body, I used the name Message to avoid confusion with the other Body value.

Click Save to check the Azure Logic App.
Test the automated workflow to send email
To check the workflow, we need its HTTP POST URL that calls the Azure Logic App. Open the When a HTTP request is received action to find it.

If there is no value in the HTTP POST URL box, try saving the workflow.
Next, copy the value, open a PowerShell script editor and assign the URL to a variable. Next, create the parameters to send to the Azure Logic App by creating a hashtable and using ConvertTo-Json:
$body = @{
To = '[email protected]'
CC = '[email protected]'
Subject = 'Test Subject'
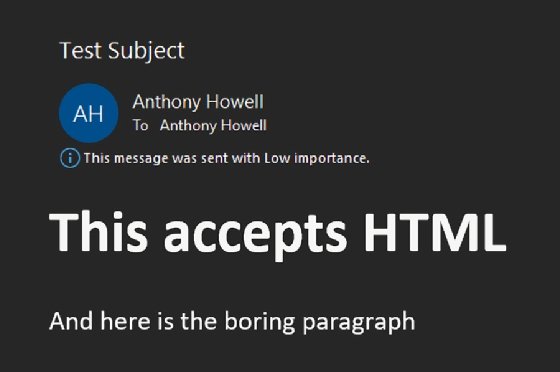
Message = '<h1>This accepts HTML</h1><p>And here is the boring paragraph</p>'
}
If you use Windows PowerShell v5.1, you need to specify the Content-Type of the message manually:
$headers = @{
   'Content-Type' = 'application/json'
}
If you use PowerShell 7, you can do that with the ContentType parameter on the Invoke-RestMethod command.
Next, run the Invoke-RestMethod command by using a splat to collect the parameter values.
$splat = @{<
    Uri = $uri
    Method = 'POST'
    Headers = $headers
    Body = $body | ConvertTo-Json
}
Invoke-RestMethod @splat
The finished script looks like the following:
$uri = '<uri from logic app>'
$body = @{
    To = '[email protected]'
    CC = '[email protected]'
    Subject = 'Test Subject'
    Message = '<h1>This accepts HTML</h1><p>And here is the boring paragraph</p>'
}
$headers = @{
    'Content-Type' = 'application/json'
}
$splat = @{
    Uri = $uri
    Method = 'POST'
    Headers = $headers
    Body = $body | ConvertTo-Json
}
Invoke-RestMethod @splat
Run a test by sending an email to yourself.
If the email doesn't arrive, check for errors in the run history on the Azure Logic App.
How to send an automated message in Microsoft Teams
Microsoft Teams has grown to be one of the more popular communications platforms for enterprises, and it's adaptable enough for use with Azure Logic Apps for automated messaging.
To start with this example workflow, set up the When a HTTP request is received action with a sample JSON payload of:
{
    "Message": "message",
    "Channel": "channel"
}
For the first action, search for Microsoft Teams and select the List channels action. Then select a team name. This returns the channels associated with that team.
To find a channel by name and get the ID, click the plus sign to add an action and then scroll to the Choose an operation box. Click the Data Operations Built-in icon.
Locate Filter array from the list. From the dynamic fields, add Channel List in the From section and set the Channel Name as equal to the Channel value from the HTTP POST action.
Next, add a for-each loop by scrolling down in the Choose an operation box, then select Control.
Choose the For each action. For the Select an output from previous steps parameter, choose the Body option from filter array.
You can select Add an action inside the for-each loop that will run for each channel that matches the name that was passed. This should be either 1 or 0.

From there, select Microsoft Teams and the Post message in a chat or channel action.
For the Team parameter, select the same team used in the List channels action.
Then for the Channel, you'll want to select the Enter custom value option.
From the dynamic content, you should see Channel Id under filter array.
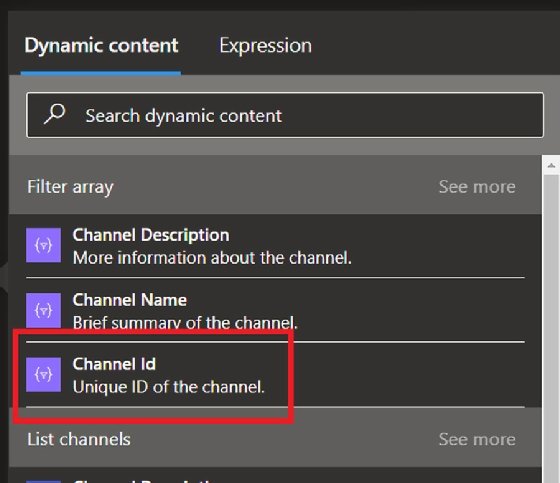
Select that value and then set the message to the Message property from the When a HTTP request is received trigger.
Save the workflow to keep your progress. Run a test with a slightly modified version of the script used in the email automated workflow.
$uri = '<uri from logic app>'

$body = @{
    Channel = 'General'
    Message = 'This is a message!'
}
$headers = @{
    'Content-Type' = 'application/json'
}

$splat = @{
    Uri = $uri
    Method = 'POST'
    Headers = $headers
    Body = $body | ConvertTo-Json
}
Invoke-RestMethod @splat
If successful, a message will appear in the Microsoft Teams channel.

Cloud-based automation can fill certain needs
Microsoft Azure Logic Apps simplifies automated messaging to make it easier to deploy to various places in your infrastructure. You will no longer worry about configuring extra modules to handle authentication to Exchange Online or Microsoft Teams or enabling SMTP authentication and then having to explain yourself to the security team.
The added benefit is your script can scale to the capacity of Azure, so sending out hundreds of emails in a single run will not overwhelm the system. You will have one less concern about your infrastructure and more time to think about the work that matters.