Deeper than deep sleep: Creating a zero-load microcontroller standby

Putting a microcontroller into sleep mode can help reduce the amount of power it consumes, saving energy and preserving battery life. However, even in a standby state, the microcontroller still siphons off some amount of power. Nominal power loss typically isn’t a problem, but if you have a device that only functions intermittently, perhaps as a part of a burglar alarm or remote IoT monitoring station, sleep mode can needlessly drain your batteries.
Source: Jeremy S. Cook
In this article, I’ll outline how you can go beyond a low-power sleep mode and actually turn your microcontroller entirely off in a zero-load standby. This application uses a pushbutton to activate an ESP8266 dev board, which then holds itself on for five seconds using a normally open (NO) relay. You may choose to replace this pushbutton with a reed switch or other sensor, depending on a project’s needs.
What you’ll need
We’re listing the parts we used for this build, but note that you can modify this design to fit your needs and supplies on hand.
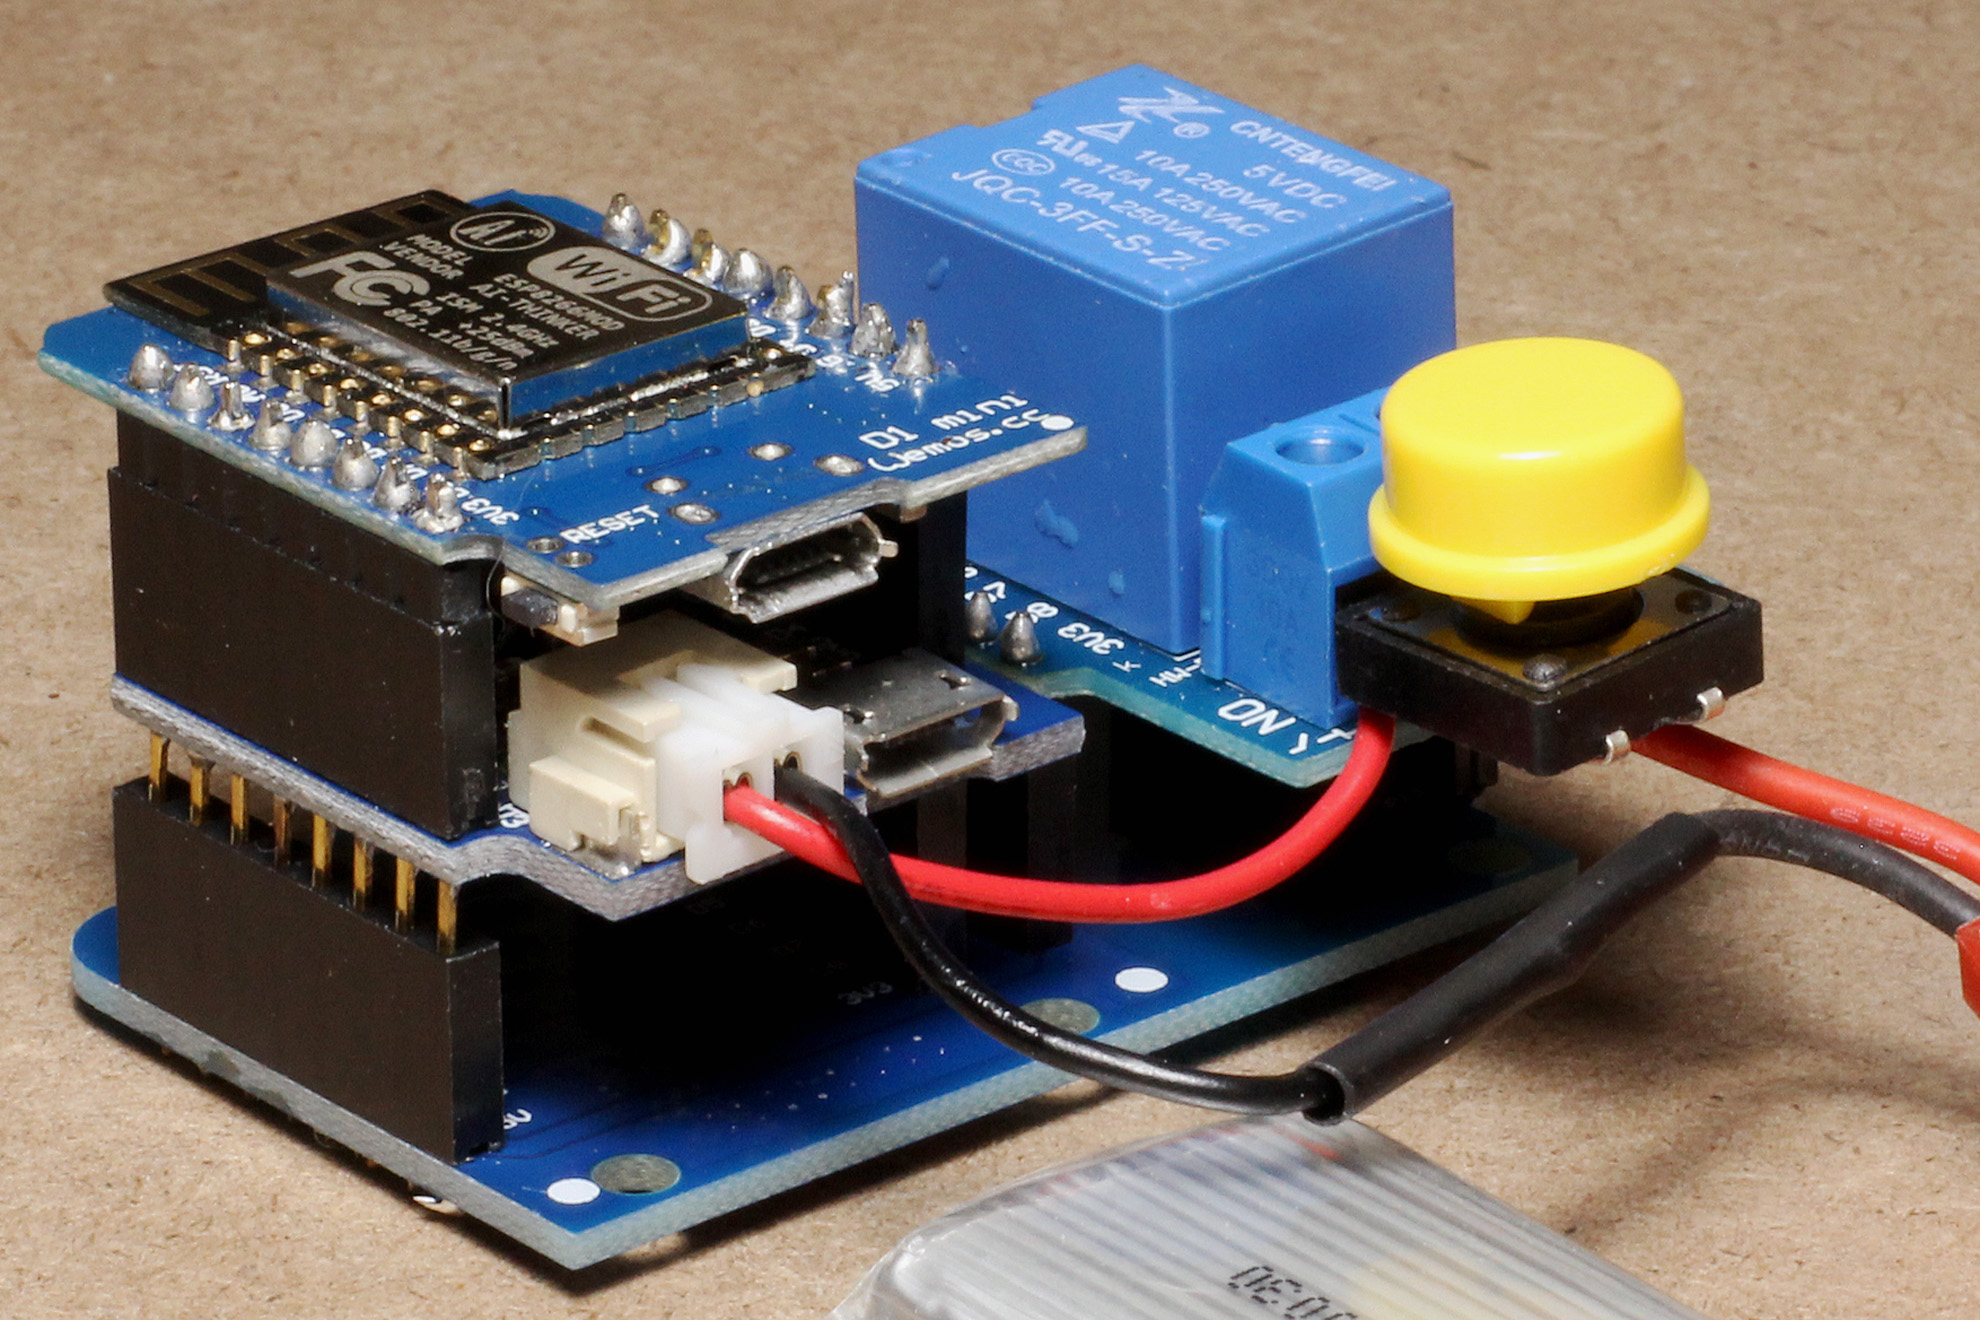
- Wemos D1 mini ESP8266 dev board
- Wemos D1 mini relay shield
- Wemos D1 mini LiPo battery shield
- Wemos D1 mini double socket dual base shield
- NO momentary pushbutton
- 3.7V LiPo battery
- Hookup wire
Source: Jeremy S. Cook

Follow these steps to construct the device
- Solder and stack the Wemos boards as shown in the image above, connecting the module, LiPo shield and relay shield via headers and the double socket base.
- Connect the LiPo ground directly to the shield’s ground connection, making sure to route the positive lead from the LiPo to the relay’s common pin.
- Connect the NO pin from the relay to the positive LiPo shield connector and add the NO pushbutton between the positive LiPo wire and the wire connected to the LiPo shield. This button provides a method to initially power the Wemos. As shown, the pushbutton we used straddles the common and NO relay screw terminals for a convenient connection method.
- Once you’ve properly wired the device, it’s time to add code. Upload this ZeroLoadStandby Code onto the Wemos board. When you push the button, the Wemos board will turn its D1 output on, activating the relay and closing the battery contacts.
Once complete, you now have a controllable source of current from the battery to the Wemos, allowing you to cut off its power at will.
In this example, we used a simple delay command to count down five seconds before turning D1 low (along with a .5 second pause afterward to make sure it’s off). In more practical applications, pressing a button or tripping a sensor would signal the Wemos to log onto your home network and transmit data like temperature readings or an open door. The Wemos powers itself down automatically and may wait for days, weeks or months to accomplish its next useful function. During that time, it won’t be draining your batteries.
Using a relay like this is a sophisticated solution for a simple task, but it’s a foolproof method to preserve power over a long time span. Alternatively, many microprocessors have excellent sleep or deep-sleep modes, and transistor-based technologies show excellent results as well. Explore all these systems to find which of them suit your needs best.
All IoT Agenda network contributors are responsible for the content and accuracy of their posts. Opinions are of the writers and do not necessarily convey the thoughts of IoT Agenda.