Getty Images/iStockphoto
Manage VMs with Azure Automation State Configuration
Admins can use the Azure Automation State Configuration tool to manage VMs in Azure, on premises and in other clouds. Follow this step-by-step tutorial to get started.

PowerShell Desired State Configuration is a programmatic way to declare ahead of time how a user wants to configure a resource, such as a VM. Used properly, DSC reduces configuration drift, which is the emergence of unnoticed or untracked configuration changes over time.
With DSC, the administrator declares the "what," and the DSC tool takes care of the "how." Azure Automation State Configuration (AASC), a configuration management tool, is essentially Microsoft's take on DSC. Other popular DSC systems include Terraform, Chef and Puppet.
AASC enables IT admins to frequently reevaluate AASC-managed servers, perform initial configuration and reconfigure resources to address configuration drift. AASC can run across most Windows versions, on physical and virtual servers, on premises, and in the cloud. It also supports other cloud environments, such as AWS.
Built on top of PowerShell DSC, AASC enables IT teams to write, manage and compile DSC configurations for nodes. It also imports DSC resources and assigns configurations to target nodes.
AASC can work with Linux-based machines, but this requires extra management and setup compared with Windows environments, in which the DSC plugin installs automatically when a DSC configuration is attached.
Implementing AASC involves several steps, depending on what the administrator is trying to achieve:
- Create a discrete resource group. It's best practice to keep resources with the same lifecycle together.
- Create an automation user account in Azure.
- Build and upload the Azure DSC configuration file.
- Compile the file into a machine-deployable configuration.
- Attach the configuration to a server and deploy to the desired machines.
This tutorial uses PowerShell rather than the Azure Portal and assumes the reader is already logged in to Azure in the PowerShell console.
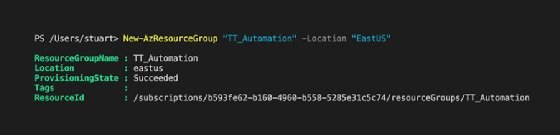
Step 1. Create a new resource group
Create the resource group using the New-AzResourceGroup command.
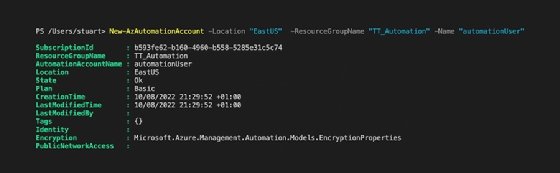
Step 2. Create the automation user
Automatic state configuration requires an automation user to manage AASC. Create an automation user with the following PowerShell command, substituting the values to suit the situation.
New-AzAutomationAccount -Location "EastUS" -ResourceGroupName "TT_Automation" -Name "automationUser"
Step 3. Create the automation file
The automation file contains the desired state of a group of VMs.
For a production environment, it requires some forethought to design and develop the Azure DSC source file. This file contains the desired state for a group of VMs. For example, an admin might want all Internet Information Services (IIS) servers to have a consistently accurate base configuration. This example uses AASC to install an IIS server on a Windows box.
While the creation of source code files is beyond the scope of this article, an example from Microsoft is shown below. Its purpose is to ensure IIS is installed.
configuration IISInstall
{
    node "localhost"
    {
        WindowsFeature IIS
        {
            Ensure = "Present"
            Name = "Web-Server"
        }
    }
}
Copy the text into the editor and save it with an appropriate name, ending with the .ps1 file extension. The file name and configuration name must be the same.
Step 4. Upload the configuration file to Azure
The next step is to upload the file to Azure. This process, also known as publishing, makes the configuration available within Azure.
To upload the file, use the following PowerShell command.
Import-AzAutomationDscConfiguration -SourcePath "./iisInstall.ps1" -ResourceGroupName "TT_Automation" -AutomationAccountName "automationUser" -Published

This step merely publishes the configuration within Azure -- it is not yet assigned to anything and won't have any immediate effects. It's possible to publish several configurations.
The next step involves compiling the code. Azure verifies everything is as expected and then creates the package and any dependencies needed to achieve the desired state.
Start-AzAutomationDscCompilationJob -ResourceGroupName "TT_Automation" -ConfigurationName "iisInstall" -AutomationAccountName "automationUser"

Depending on several variables, it could take several minutes to compile the automation configuration. Use the command Get-AzAutomationDscCompilationJob to get the status. For all available configurations, use the command Get-AzAutomationDscNodeConfiguration.
Step 5. Register the configuration against a VM
Next, deploy the prepared configuration against a VM using the following code.
Register-AzAutomationDscNode -AzureVMName "test5" -ResourceGroupName "TT_Automation" -AutomationAccountName "automationUser" -NodeConfigurationName install.localhost -ConfigurationMode ApplyAndAutocorrect
This action can be repeated -- and those feeling more adventurous can script the automatic registration of nodes, as needed. Applying configurations outside the resource group requires modified Azure Resource Manager templates. Deploying outside the resource group will fail and results in an automation account error message.
The results of the register process can be seen in the portal.

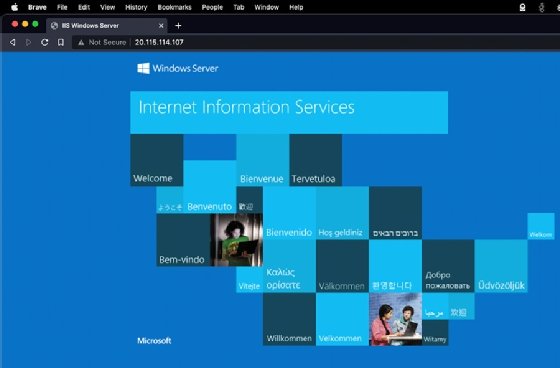
Alternatively, as IIS has been installed, connect to the IP in a browser to display the default IIS page.