Thin clients are simple and stripped-down endpoints, but IT still needs to put plenty of work in from a setup perspective. Learn how to run through this setup process.
Thin client environments are a cornerstone in modern enterprise IT, offering centralized control, enhanced security and simplified management. Administrators should learn the essential components and steps required to set up a thin client environment, from hardware choices to back-end configuration and client provisioning.
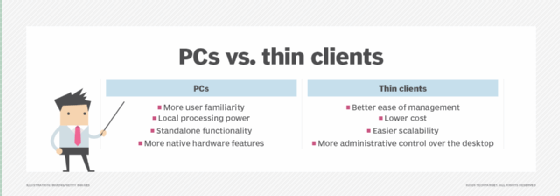
Thin clients can be many different types of devices, but they can be defined as any streamlined computing devices. These devices have several significant benefits, including lower hardware costs, simplified endpoint management and reduced power consumption. IT teams can update and enforce security policies via centralized management.
Infrastructure requirements for a thin client deployment
Connecting users to remote desktops requires front-end and back-end infrastructure.
At the user front end, thin clients require low to moderate CPU power, 2-8 GB of RAM depending on user workload, small solid-state drive (SSD) storage for the OS and boot files and dual displays, as well as USB, Ethernet and Wi-Fi support. Often, the devices are compact, fanless units that can be wall-mounted where space is restricted.
The back-end components for running a VDI/terminal server environment composed of both server and infrastructure elements include the following:
Hypervisor host, such as VMware vCenter or Hyper-V.
Connection broker, such as Omnissa Horizon Connection Server (formerly VMware Horizon Connection Server) or Citrix Delivery Controller.
Directory services, typically Microsoft Active Directory (AD) integration.
License server, such as Microsoft Remote Desktop Services (RDS) Client Access Licenses, or CALs, for servers or VDI license management servers.
Application delivery, such as Ominissa App Volumes or Citrix App Layering.
Firewalls,which protect both the endpoints and back-end infrastructure.
The VDI server requirements include multicore enterprise-grade processors, 64-512 GB of RAM, SSD storage arrays with RAID for redundancy and a virtualization hypervisor, such as VMware ESXi or Microsoft Hyper-V.
How to set up the back end of a thin client environment
These steps are to set up the back-end virtualization environment for thin client deployments:
Install hypervisor and create virtual desktops. Choose a hypervisor, and set up VMs or VDI templates.
Deploy connection broker. Set up to manage sessions and user authentication.
Configure firewalls. Use application layer firewalling for VDI gateway traffic, and allowlist only essential ports and ranges.
Join to domain and apply policies. Use Group Policy to manage security, mapped drives, printers, etc.
Monitor and optimize. Tools such as vCenter, Citrix Director, or Remote Desktop Protocol (RDP) monitoring for session analytics.
Setting up and provisioning thin client endpoints with 3 methods
IT admins must configure thin clients with an OS, network settings and connection software, such as the Microsoft RDP client. Provisioning refers to automating the deployment and configuration of many clients, which is also an essential process.
Manual configuration of thin clients is best for small environments, and this approach requires IT to set each device up individually.
1. USB flash drive imaging -- offline provisioning
This method provides a faster setup than a full manual setup, and IT can achieve this with a bootable USB that contains a preconfigured image. IT should use a tool to help with this, including Rufus, balenaEtcher or vendor-specific utilities.
Follow these steps to complete the process:
Prepare a preconfigured OS image with all settings and client software.
Write the image to a USB flash drive.
Plug it into each thin client, and boot to install.
This option is best for small to medium deployments or environments with limited network infrastructure.
2. PXE boot with an imaging server
This method enablesIT admins to boot thin clients from the network with Preboot Execution Environment (PXE) boot; in this case, an imaging server provides the OS image. Tools employed for this type of deployment include Clonezilla and Windows Deployment Services.
Follow these steps to complete the process:
Set up a PXE boot server on your network.
Boot thin clients via the network and receive the OS image.
Fully automate if properly configured.
This option is best for medium to large-scale rollouts where networking is available.
3. Centralized management software
This approach is recommended for the enterprise and is the most common way to provision thin clients. The software is provided by vendors such as Dell with its Wyse Management Suite (WMS) and HP with its Device Manager.
Follow these steps to complete the process:
Connect devices to the management server.
Have admin push profiles, settings, firmware updates and software.
This approach is best for organizations that require ongoing management and provisioning at scale.
Step-by-step guide for provisioning thin clients
While each thin client is different, this example uses Dell WMS. Other thin client setup processes are different, but this process can at least give administrators a sense of what the setup is like.
Before beginning, ensure the following:
A Dell WMS server is present and installed on-premises or in the cloud.
The thin clients support WMS, such as Wyse 3040, 5070, etc.
Devices are connected to the network.
There are valid admin credentials for WMS and the devices.
Step 1. Install Dell Wyse Management Suite
If the organization doesn't already have Dell WMS in place, it should follow these steps:
Option 165 uses HTTPS server address -- for example, https://wms.company.local.
Option 166 uses group tokens for autogroup assignment.
Reboot the thin client.
The device should now appear in Devices > Unassigned Devices or the target group.
Step 4. Apply configuration policy
Once the thin client is registered:
Go to Devices > Device List.
Find the device, and assign it to the appropriate group if not auto assigned.
WMS pushes down the assigned configuration automatically.
Reboot the client if required to apply settings.
Admins should always back up configuration profiles before making major changes and regularly update WMS and thin client firmware for stability and security.
Step 5. Monitor and maintain
Use the dashboard for real-time monitoring.
Schedule firmware updates via Apps & Firmware.
Generate reports or view logs for troubleshooting.
Beyond these monitoring and management tips, IT administrators should use group tokens to auto assign new devices to the correct group. Admins should always back up configuration profiles before making major changes and regularly update WMS and thin client firmware for stability and security.
Key considerations when implementing thin clients
To ensure virtual desktops are ready to be delivered smoothly to thin client endpoints, IT must address device-side concerns, and back-end considerations must be addressed when planning a thin client deployment.
Device-side concerns
Ensure the thin client OS supports the given virtual desktop platform -- Omnissa Horizon, Citrix, Microsoft RDP, etc. Regularly update the firmware to maintain compatibility. Install and configure the correct VDI client, and validate the protocol support. Check network settings on the client to ensure that it has the proper IP/DNS settings and that there is a reliable connection to the VDI broker. When possible, use a wired Ethernet connection; Wi-Fi must be enterprise-grade with a stable signal. If multifactor authentication, smart readers or single sign-on is part of the organization's security implementation, ensure these are compatible with the client.
Back-end considerations
Ensure VDI machines are created and available. Optimize VDI templates or golden images for performance and size. Verify that connection brokers -- Horizon Connection Server, Citrix Delivery Controller -- are accessible online. If an organization uses multiple brokers or hosts, ensure that the load balancers function. Check that sufficient VDI or RDS licenses are available and not expiring. Desktops and users must be properly joined and assigned in AD, and Group Policies should not conflict or slow login times.
Final readiness checklist for thin clients
Item
Device
Back end
VDI client installed
✓
Network connectivity
✓
✓
User authentication works
✓
✓
Desktop pools available
✓
Licensing active
✓
Broker reachable
✓
✓
Policy enforcement
✓
✓
Use tools such as VMware Aria, Citrix Director or built-in host monitoring to track resource usage and session health.
Helen Searle-Jones holds a group head of IT position in the manufacturing sector. She draws on 30 years of experience in enterprise and end-user computing, utilizing cloud and on-premises technologies to enhance IT performance.