Microsoft makes improvements to SharePoint workflows
The first thing to know about SharePoint workflows is that SharePoint 2013 actually contains two separate workflow platforms.

SharePoint workflows automate the handling of documents within an organization. For example, when the marketing department creates an advertisement, a workflow might send the document to the legal department for approval before the ad is released.
Making the most of SharePoint
SharePoint licensing is becoming cheaper and simpler
Use of SharePoint tags effectively
Make SharePoint search less problematic
Like its predecessors, SharePoint 2013 fully supports the use of such workflows. In fact, Microsoft has done a lot of work to the workflow engine.
The first thing to know about SharePoint workflows is that SharePoint 2013 actually contains two separate workflow platforms.
The first of these platforms is left over from SharePoint 2010. Microsoft has included this workflow platform for backward compatibility purposes. As such, any workflows that were created using SharePoint 2010 should continue to function normally after an upgrade to SharePoint 2013. In fact, the legacy workflow platform is installed by default, so administrators do not have to do anything special to allow SharePoint 2013 to use legacy workflows.
The new workflow platform is known simply as the SharePoint 2013 Workflow Platform. It allows for drag-and-drop workflow development, thanks to an add-on for Visio 2013. Furthermore, SharePoint 2013 workflows can make calls to Web services without requiring any code to be written. These are just a few of the new workflow capabilities.
Before you can take advantage of the new SharePoint workflow platform, you will have to install the SharePoint 2013 Workflow Manager. To do so, you'll need to open Internet Explorer and go to this page. You will see a prompt asking you if you want to save or run WorkFlowManager.exe. Choose the Run option.
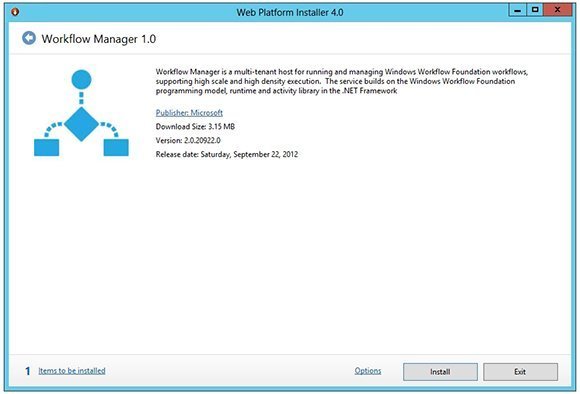
After a moment, Windows will launch the Web Platform Installer for Workflow Manager, as shown in Figure A. Click the Install button to launch the installation process.
At this point, you will see a list of the prerequisite components that must be installed in order to install Workflow Manager. Click the "I accept" button to accept the license agreement for these components.
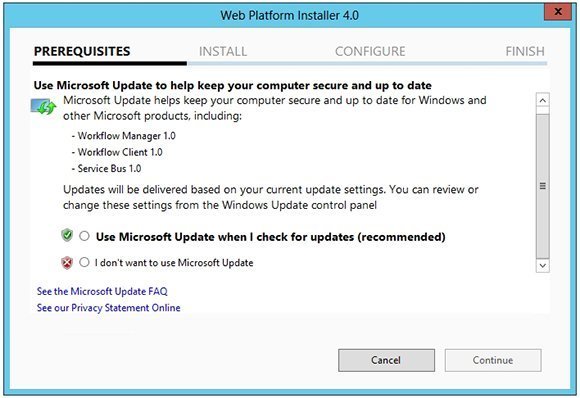
The next screen that you will see asks you if you want to use Microsoft Update to check for updates to Workflow Manager 1.0, Workflow Client 1.0 and Service Bus 1.0. Microsoft recommends using Windows Update, but you are free to make your own decision, as shown in Figure B. Make your selection and click Continue.
At this point, the installer will begin downloading all of the required components. When the download completes, click Continue.
You should now see the screen shown in Figure C, which asks you how you want to configure the Workflow Manager. As you can see in the figure, you have three choices. The first two choices create a Workflow Manager farm. The only difference between these two options is that one uses the default settings, while the other allows you to use custom settings. Microsoft generally recommends using the default settings.
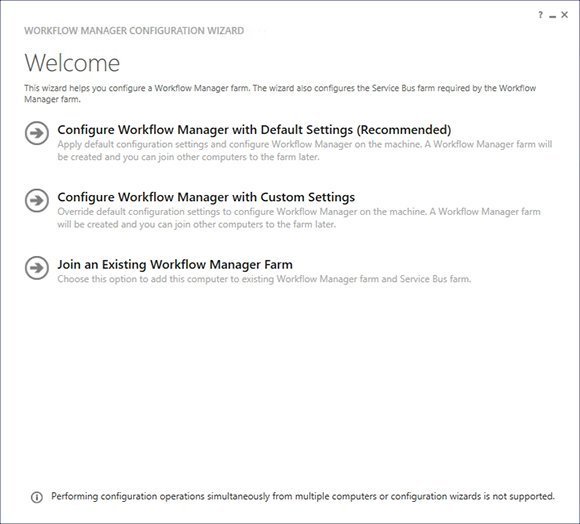
The third option allows you to join the server to an existing farm. To use this option, you must have already deployed the Workflow Manager onto at least one other SharePoint server and created a farm. After doing so, you can join additional SharePoint servers to that farm as you install the Workflow Manager on the servers.
The prompts that you will receive from this point forward will vary depending on the configuration option that you have chosen. If you choose the option to use the default settings, then you must simply provide a service account name and password and a certificate generation key, as shown in Figure D. Make note of your certificate generation key because it is used when you add additional servers to the farm.
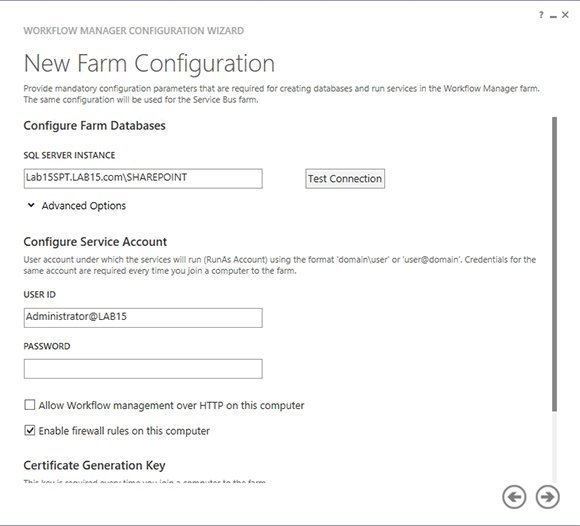
Figure D. Configuring the Workflow Manager requires you to enter some basic information.
Click the Continue icon and you will see a summary of the configuration options that you have chosen. Assuming that everything appears to be correct, click the Continue icon. When the configuration process completes, you should see a message indicating that the process was successful.
Now, we have to associate the Workflow Manager with SharePoint. Open the IIS Manager, click on the Workflow Manager site, and then click the Bindings link. Make note of the port numbers that are being used.
Next, open the SharePoint Management Shell and enter the following command:
Register-SPWorkFlowService –SPSite "<your site collection>" -WorkflowHostURI "<Your SharePoint Server URL>:<port number>" –AllowOauthHttp
When you execute this command, the SharePoint Management Shell will appear to lock up. After several minutes, however, the command will complete without providing any sort of confirmation. The absence of an error message indicates that the operation was successful.