
Getty Images
How to run Windows 365 on Mac
IT teams must be prepared to deliver Windows 365 Cloud PCs to all sorts of endpoints -- not just Windows desktops. Admins can take steps to facilitate this access on Mac desktops.
Delivering Windows OSes and applications to macOS endpoints can ensure that all users have access to the same versions of important software and services, regardless of whether they are running Windows or Mac on their local device.
With Windows 365 Cloud PCs, IT teams can deliver an entire Windows desktop from the cloud onto a non-Windows endpoint. Organizations may choose Windows 365 over Azure Virtual Desktop to perform this function due to the licensing model and simpler out-of-box experience with the technology. Organizations might also want Windows 365 to deploy locked-down desktops to consultants outside of the company network, using it as a secure workstation technology.
Once an IT team has valid Windows 365 licenses -- which only charge a flat per-user rate compared to Azure Virtual Desktop's usage-based licensing -- and the desired Windows desktop images in place, it should be ready to get the Cloud PCs up and running on Mac endpoints.
Options for deploying and running Windows 365 on a Mac
There are two options available for Mac devices to access a Windows 365 desktop, either using the web-based version or using the native desktop app called Windows App. There are feature differences between the two options, while the overall look and feel are quite different. Most features are available for both the native app and the web client; however, there are some differences as shown here.
| Feature | Windows App for Mac | Windows App web client |
| Multiple monitors | Yes | |
| Microsoft Teams optimization | Yes | |
| Smart card redirection | Yes | |
| Pen and touch redirection | Yes | |
| Smart card authentication | Yes | |
| Screen capture protection | Yes | |
| Remote Desktop Protocol (RDP) ShortPath -- utilizes User Datagram Protocol (UDP)-based transport | Yes |
Windows App web client to run Windows 365 on Mac
The first and most accessible option is the Windows App web client. The Windows App web client is directly available on any modern browser. When the user signs in to the portal, they receive a simple overview of the available Cloud PCs. That includes the self-service actions, such as favorite, restart, restore, rename, inspect connection, view details and settings, that are available for the different Cloud PCs (Figure 1).

Different self-service actions are available to the device admin:
- Restart. Remotely restarts the Cloud PC.
- Restore. Restores the Cloud PC to a certain moment in time but is only available if self-service restore has been configured. This is why it's not pictured in Figure 1.
- Inspect connection. Troubleshoots connectivity issues with the Cloud PC.
- View details. Retrieves some basic information about the Cloud PC. This includes information such as the name, license and most recent sign-in.
- Settings. Configures the Cloud PC that is used for specific Windows boot functionality -- however, boot functionality is not available for Mac devices.
Besides those self-service actions, the main action that admins need is to connect to the Cloud PC session. To establish that connection, click on Open in the browser. That brings an additional prompt the In Session Settings. Within that prompt, the user can select the devices and features that are available within the session to the Cloud PC (Figure 2). That includes the ability to redirect the printer, microphone, clipboard, camera, location and keyboard shortcuts to the session with the Cloud PC.

After clicking on Connect, the user connects to the Cloud PC.
Using Windows App to run Windows 365 on Mac
The second and generally preferable option is to use Windows App, which has now replaced the old Windows Remote App. The native application provides much better support for peripherals and a better graphical experience compared to the web client. This also enables it to utilize features such as RDP ShortPath, which provides UDP-based transport but also support for multiple monitors.
For those end users that want the best possible experience, the recommendation is to use the native Windows app.
After downloading and installing Windows App via the Mac App Store, desktop administrators can get connected to their Cloud PC by going through the following steps:
- Open Windows App.
- Click on the + sign, and then Add Work or School Account.
- In the authentication prompt, provide the corporate credentials attached to a Windows 365 license and the available Cloud PCs are added to Windows App.
- Double-click on a Cloud PC to start the connection.
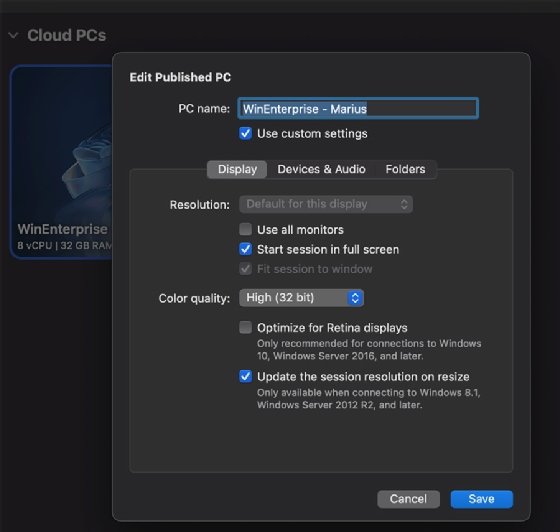
Within Windows App, you also have different settings available, such as the following:
- Monitoring configuration.
- Folder redirection -- only if admins want to make local folders available within the Cloud PC.
- Peripherals redirection.
And, once connected, there is also the option to display connection details. This enables admins to see if they are using ShortPath as a transport protocol and look at the overall latency.
Editor's note: This article was updated to improve the reader experience.
Marius Sandbu is a cloud evangelist for Sopra Steria in Norway who mainly focuses on end-user computing and cloud-native technology.
Peter van der Woude works as a mobility consultant and knows the ins and outs of the ConfigMgr and Microsoft Intune tools. He is a Microsoft MVP and a Windows expert as well.