
natali_mis - stock.adobe.com
Lighten up and install Exchange 2019 on Windows Server Core
Organizations looking to tighten up security in every aspect of their infrastructure now have the option to deploy their on-premises messaging system on Server Core 2019.

One of the biggest changes in Exchange Server 2019 from previous versions of the messaging platform is Microsoft supports -- and recommends -- deployments on Server Core.
For those who are comfortable with this deployment model, the option to install Exchange 2019 on a server without a GUI is a great advance. You can still manage the system with the Exchange Admin Console from another computer, so you really don't lose anything when you install Exchange this way. The upside to installing Exchange on a Server Core machine is a smaller attack surface with less resource overhead. For some IT shops, because Server Core has no GUI, it can present a challenge when troubleshooting issues.
This tutorial will explain how to install Exchange 2019 on Server Core in a lab environment instead of a production setting. The following instructions will work the same for either setting, but users new to Server Core should practice a few deployments in a lab before trying the deployment for real.
Getting started
For the sake of brevity, this tutorial does not cover the aspects related to the installation of the Server Core operating system -- it is identical to other Windows Server build processes -- and the standard Exchange Server sizing exercises and overall deployment planning.
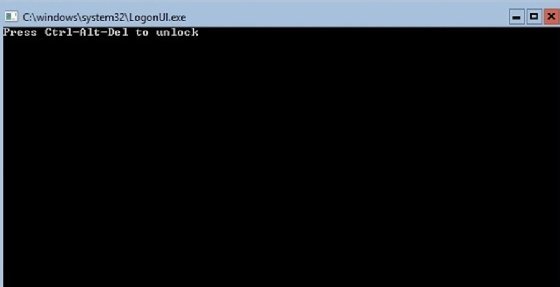
After installing a new Server Core 2019 build, you see the logon screen in Figure 1.
Most of the setup work on the server will come from PowerShell. After logging in, load PowerShell with the following command:
Start PowerShell
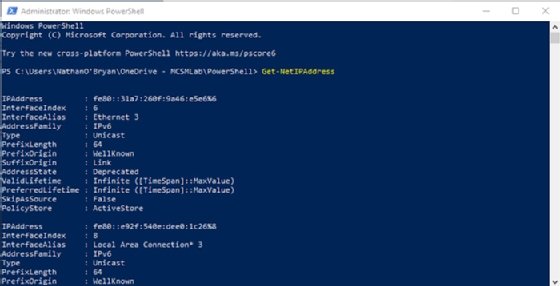
Next, this server needs an IP address. To check the current configuration, use the following command:
Get-NetIPAddress
This generates the server's IP address configuration for all its network interfaces.
Your deployment will have different information, so select an interface and use the New-NetIPAddress cmdlet to configure it. Your command should look something to the following:
New-NetIPAddress -InterfaceIndex {Number} -IPAddress {IP Address} -PrefixLength {Subnet mask length} -DefaultGateway {IP Address}
After setting up the network, change the computer name and join it to the domain:
Add-Computer -DomainName {Domain} -NewName {Server} -DomainCredential {Admin account}
Next, install the prerequisites for Exchange 2019. The following cmdlet adds the Window features we need:
Install-WindowsFeature Server-Media-Foundation, RSAT-ADDS
You can use the Exchange install wizard to add the other required Windows components or you can use the following PowerShell command to handle it:
Install-WindowsFeature Server-Media-Foundation, NET-Framework-45-Features, RPC-over-HTTP-proxy, RSAT-Clustering, RSAT-Clustering-CmdInterface, RSAT-Clustering-PowerShell, WAS-Process-Model, Web-Asp-Net45, Web-Basic-Auth, Web-Client-Auth, Web-Digest-Auth, Web-Dir-Browsing, Web-Dyn-Compression, Web-Http-Errors, Web-Http-Logging, Web-Http-Redirect, Web-Http-Tracing, Web-ISAPI-Ext, Web-ISAPI-Filter, Web-Metabase, Web-Mgmt-Service, Web-Net-Ext45, Web-Request-Monitor, Web-Server, Web-Stat-Compression, Web-Static-Content, Web-Windows-Auth, Web-WMI, RSAT-ADDS
Prepare to install Exchange 2019
The next step is to download Exchange Server 2019 and the required prerequisites to get the platform running. Be sure to check Microsoft's prerequisites for Exchange 2019 mailbox servers on Windows Server 2019 Core from this link because they have a tendency to change over time. The Server Core 2019 deployment needs the following software installed from the Microsoft link:
- .NET Framework 4.8 or later
- Visual C++ Redistributable Package for Visual Studio 2012
- Visual C++ Redistributable Package for Visual Studio 2013
Next, run the following PowerShell command to install the Media Foundation:
Install-WindowsFeature Server-Media-Foundation
Lastly, install the Unified Communications Managed API 4.0 from the following link.
To complete the installation process, reboot the server with the following command:
Restart-Computer -Force
Installing Exchange Server 2019
To proceed to the Exchange 2019 installation, download the ISO and mount the image:
Mount-DiskImage c:\<FolderPath>\ExchangeServer2019-x64.iso
Navigate to the mounted drive and start the Exchange setup with the following command:
.\Setup.exe /m:install /roles:m /IAcceptExchangeServerLicenseTerms
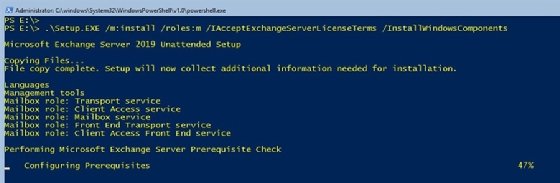
The installation should complete with Exchange Server 2019 operating on Windows Server Core.
Managing Exchange Server 2019 on Server Core
Once you complete the installation and reboot the server, you'll find the same logon screen as displayed in Figure 1.
This can be somewhat discomforting for an administrator who spent their whole career working with the standard Windows GUI interface. There isn't much you can do to manage your Exchange Server from the command prompt.
Your first management option is to use PowerShell locally on this server. From the command prompt, enter:
Start PowerShell
From the PowerShell window, enter the command:
Add-PSSnapin Microsoft.Exchange.Management.PowerShell.SnapIn
You need to run this command each time to use PowerShell on the headless Exchange Server when you want to run the Exchange Management Shell. To streamline this process, you can add that cmdlet to your PowerShell profile so that the Exchange Management snap-in loads automatically when you start PowerShell on that server. To find the location of your PowerShell profile, just type $Profile in PowerShell. That file may not exist if you've never created it; to do this, open Notepad.exe and create a file with the name $Profile and enter that previous Add-PSSnapin command.
The more reasonable management option for your headless Exchange Server is to never log into the server locally. You can run the Exchange Admin Center from a workstation to remotely manage the Exchange 2019 deployment.
Dig Deeper on IT operations and infrastructure management
-
![]()
How to properly implement Exchange Extended Protection
By: Helen Searle-Jones
-
![]()
How to deploy an Exchange Server cumulative update
By: Helen Searle-Jones
-
![]()
Microsoft Remote Desktop Web Access (Microsoft RD Web Access)
By: Rahul Awati
-
![]()
Microsoft tackles three zero-days for October Patch Tuesday
By: Tom Walat