
kentoh - Fotolia
Two simple ways to create custom APIs in Azure
Learn how to create custom APIs in Azure through both Azure Portal and Visual Studio Code, and review some post-deployment best practices that add value and security to those APIs.

APIs are a critical part of an application's success, particularly when your software teams work within a large, sophisticated cloud computing service like Microsoft Azure. In particular, the ability to create custom APIs in Azure brings much needed consistency across the various -- and, more importantly, diverse -- development teams, application components, programming languages and architecture styles that make up your software environment.
There are a number of different techniques, tools and methods you can use to create an API in Azure. Some examples of these include the Azure Portal dashboard extension, Visual Studio Code, the Azure Command-Line Interface, PowerShell and the Azure Resource Manager template.
In this article, we'll walk through the API build process in Azure Portal and Visual Studio Code. We'll also quickly review some of the best practices to follow once you've built your API through either one of these approaches.
Create an API in Azure Portal
Creating an API in Azure Portal is a relatively straightforward process that works through a simple graphic interface. We'll walk through the four quick steps involved here:
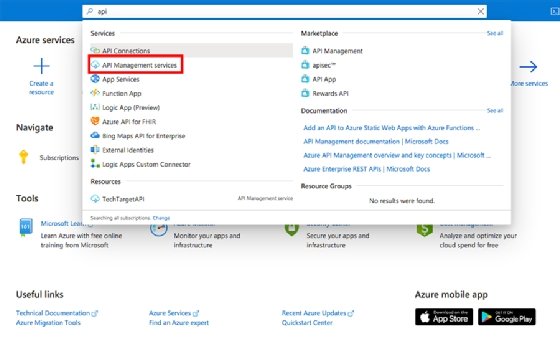
Step 1. Once you log into Azure, look for the API Management services section of the Azure Portal. Using the search bar is likely the quickest way to find this.
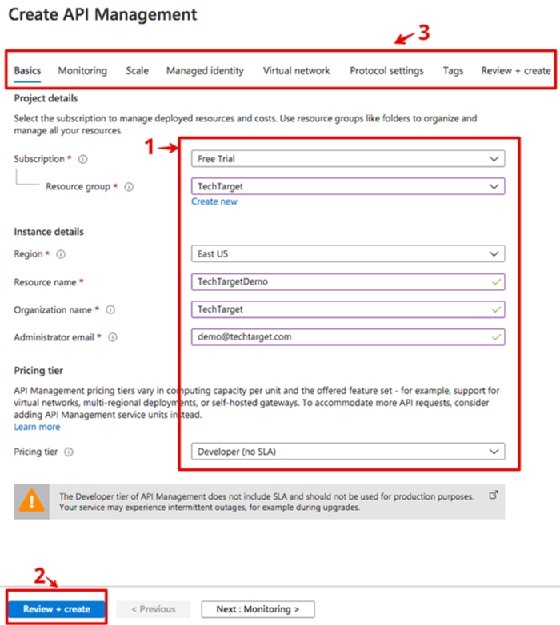
Step 2. Once you've accessed the API Management services section, you'll see a + Add Clicking this will open the form you'll use to create the API. Fill in the various detail fields (indicated as "1" in the following image) with the details of your new API, such as its subscription settings, resource group, resource name and administrator email. Then, simply hit the Review + create button (indicated as "2" in the image). If you'd like to further customize your API options, examine the options listed at the top of the page (indicated as "3").
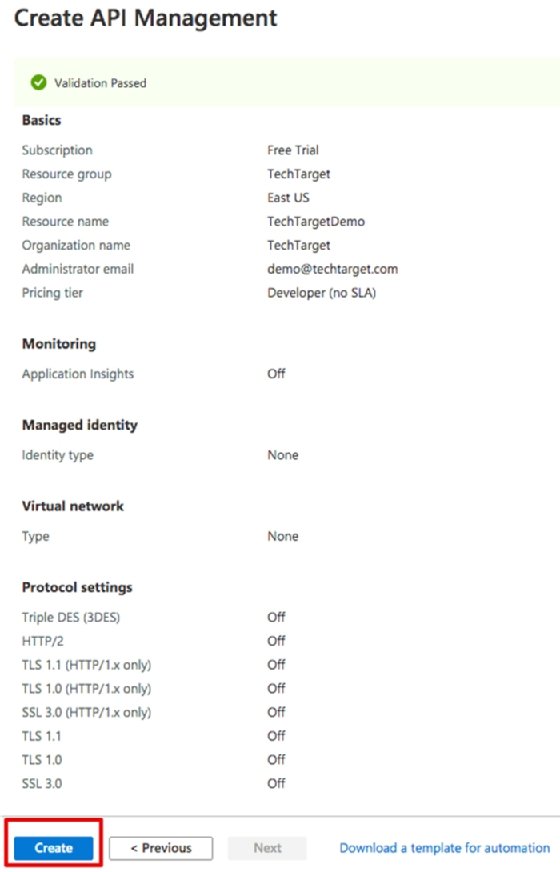
Step 3. Once you click Review + create, you'll arrive at a confirmation screen. If everything looks in order, click Create.
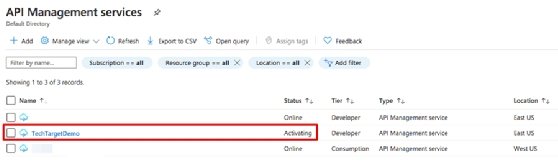
Step 4. Finally, you'll arrive at a screen that says "Deployment is in progress." You can now view your API in the API Management services section of Azure, which should indicate its status as "Activating," in roughly 30 minutes.
Create an API in Visual Studio Code
Creating an Azure API via Visual Studio Code will require you to install Visual Studio Code and add the Azure API Management extension before you can start building. However, like in Azure Portal, it's a pretty simple process from that point forward.
Here's a quick explanation and illustration of the steps involved.
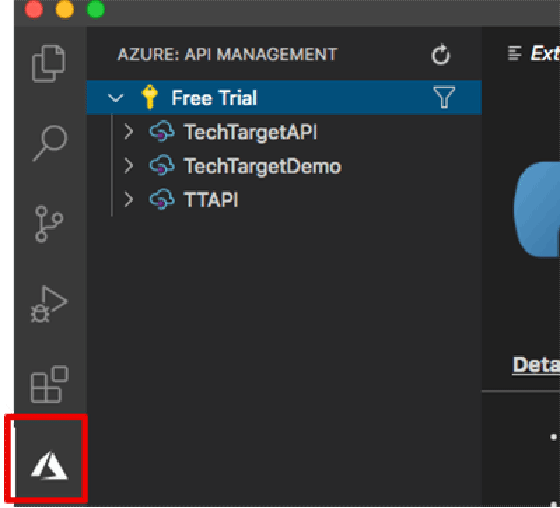
Step 1. After installing Visual Studio Code, click the Azure icon on the left side of the dashboard to access your Azure account.
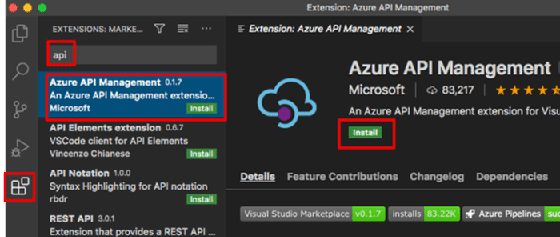
Step 2. Search for and install the Azure API Management extension.
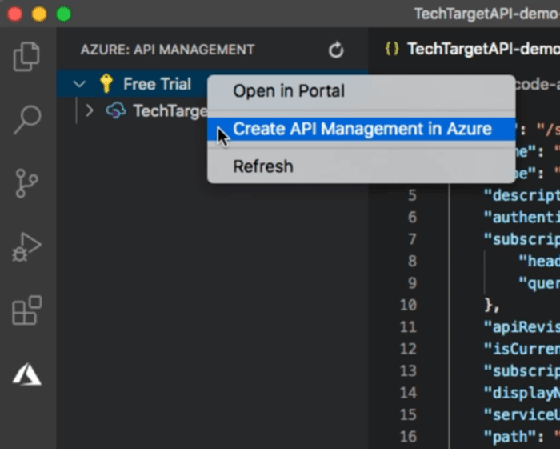
Step 3. Now, click on the Azure icon on the left side, and you'll see your Azure subscription. Right-click on it and select Create API Management in Azure.
Step 4. You'll now see a text box where you can enter the name of your new API. Once you hit Enter this creates your new API with the default options.

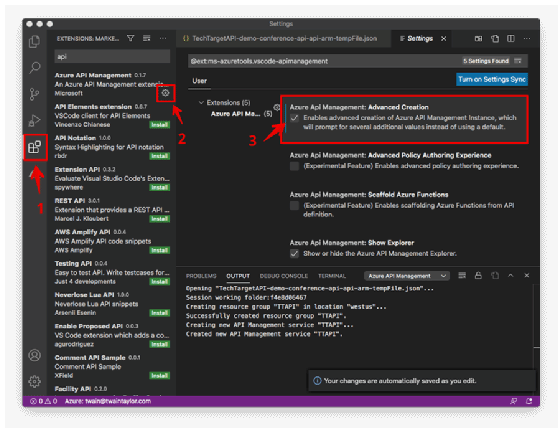
Step 5. If you'd like to customize the options, such as creating the API in a specific region, you can click on the Extensions option, select the settings icon under Azure API Management and check the box under Advanced Creation.
After API deployment
Once you create an API, you can share it via the Azure Developer Portal, which features an automated publishing and sharing process. You can also customize the portal with a What You See Is What You Get (WYSIWYG) editor.
You may also want to consider adding policies to create fine-grained controls and define them in an XML file. For instance, you can create policies that filter out suspicious IP addresses, or can find and replace strings in the body of an API request. Using multiple policies can help you create complex controls that would not be easy to create manually. These policies can also scale across various APIs and application types, which will reduce the stress placed on operations teams.
Know the Azure API terminology
Here are a few terms you might want to review before you build your first API in Azure.
- API gateway: Manages the flow of API calls through API key validation, caching and logging.
- Frontend: Receives the API request from the end user.
- Backend: Receives the API request from the frontend and processes it.
- Operations: Actions an API performs (i.e., URL mapping, querying, requests and responses).
- Product: A collection of one or more APIs that developers can subscribe to.
- Groups: Classifications for the users of each API, such as administrators, developers and guests.
- Policies: Sets limitations or restrictions to ensure APIs are secure.
- Developer portal: Allows access to published APIs and their respective documentation.
Dig Deeper on API design and management
-
![]()
Azure Developer Exam Dumps and AZ-204 Certification Braindumps
By: Cameron McKenzie
-
![]()
Microsoft intros Azure AI Foundry for building AI apps
By: Esther Shittu
-
![]()
Azure Functions overview: A guide for Microsoft admins
By: Liam Cleary
-
![]()
Create a private endpoint to secure Azure Functions apps
By: Liam Cleary