
Getty Images
Get started with SageMaker JumpStart
SageMaker JumpStart is a tool for both beginner and experienced machine learning software developers. Learn how the tool simplifies and accelerates the learning process.

Building, training, deploying and fine-tuning machine learning models is a process that involves a set of time-consuming and complex tasks. While Amazon SageMaker simplifies the end-to-end process of running any machine learning model, developing and fine-tuning these models are complicated tasks for virtually any software engineer.
However, there is a growing library of public algorithms and pre-trained models that is made available by multiple sources. Follow this step-by-step tutorial on how to get started with Amazon SageMaker JumpStart.
What is Amazon SageMaker JumpStart?
Amazon SageMaker JumpStart is a machine learning hub that provides access to a wide range of public ML models and seamlessly integrates them into AWS infrastructure managed by SageMaker. The hub is particularly useful for applications that need to implement common use cases, which publicly available models can solve. Browsing through the entire list of models is recommended even for teams that are not considering ML in their roadmaps, as it can deliver valuable ideas for future application improvements.
The Jupyter Notebook interface simplifies the software development process, and the available models have comments regarding each step in the source code. For more specific or advanced use cases, having experience with building and training ML models is necessary. Since JumpStart integrates seamlessly with SageMaker infrastructure, this simplifies the deployment and execution of models.
JumpStart gives application owners the flexibility to deploy pre-trained models or use available algorithms as a starting point to develop custom ones. While the notebook interface doesn't necessarily require coding experience, having at least some basic knowledge of the Python programming language certainly helps with understanding the steps executed in each task. JumpStart also enables sharing models and notebooks across multiple accounts.
Available models
The available models in SageMaker JumpStart include areas such as text classification, question answering, image classification, text summarization, time-series forecasting and anomaly detection. These models can solve a range of problems, such as detecting objects in images, forecasting outcomes based on existing trends, creating text summaries, detecting possible fraud scenarios and others.
Get started with SageMaker JumpStart
Developers can interact with JumpStart using the SageMaker Python SDK or through the AWS console. The SDK is the preferred option once models are ready to be executed in an automated way. One prerequisite before using the JumpStart UI is to enable SageMaker Studio, which requires the creation of a SageMaker domain so the tool can execute required actions on AWS resources.

Step 1
Create a SageMaker domain, domain name and user profile, and assign an Identity and Access Management role to it.

Step 2
Launch Studio from the SageMaker console.

Step 3
Click on the Open Studio link to open the SageMaker Studio UI.
Step 4
Click on JumpStart to launch the SageMaker JumpStart interface.
Step 5
Search for available models from the main SageMaker interface. For example, searching for image classification brings up several options.

Step 6
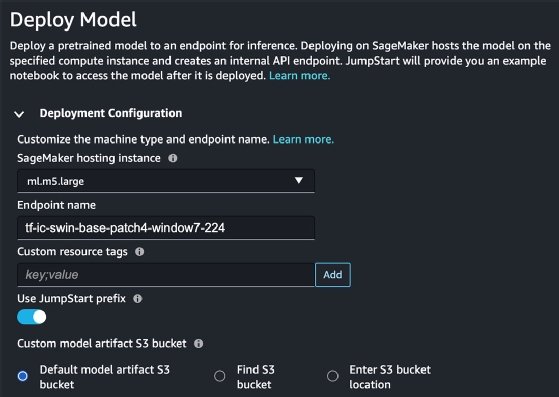
Select a model. JumpStart provides a description and other useful information regarding the model. Users can deploy the model from the same JumpStart interface and configure parameters, such as the instance type, endpoint name and other settings.
Step 7
Once you define the configurations, click on the Deploy button. This step triggers the SageMaker endpoint creation, which takes a few minutes to complete.
Step 8
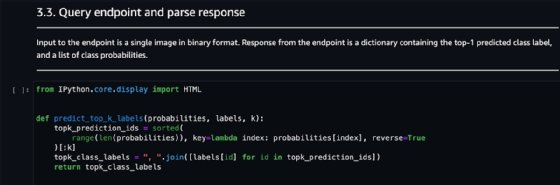
Open a notebook, and execute tasks on the deployed model. The notebook displays the relevant steps and source code for important tasks.
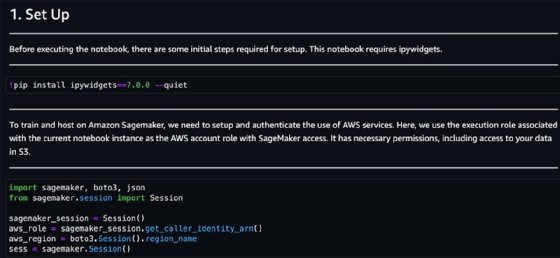
For this specific model, the available notebook provides the source code to execute initial setup, select a pre-trained model and query the endpoint. This source code gives developers a useful starting point on how to use the provided model.
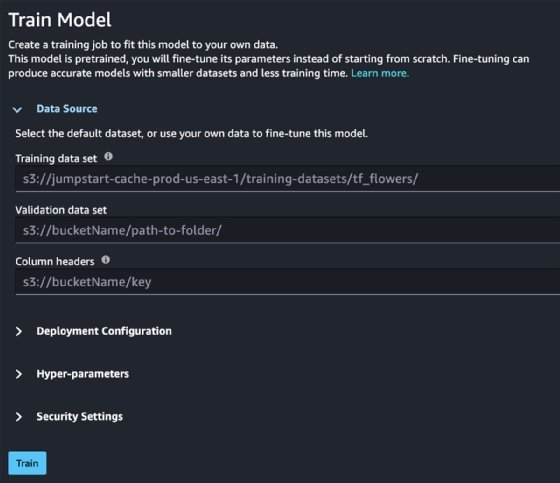
You can train the model with a default data set or with a custom one. JumpStart provides an interface to configure and start training jobs.
Once a task is finished, terminate all launched resources, particularly endpoints since they can result in significant cost if left running when not needed. For example, a common instance chosen by JumpStart -- ml.p3.2xlarge -- costs $3.825 per hour, approximately $2,754 per month. A smaller instance, such as ml.m5.xlarge, can cost $165 per month. Ensure you choose the right instance size for the tasks at hand and avoid overprovisioning.
Dig Deeper on Cloud provider platforms and tools
-
![]()
Sample Questions for AWS' Machine Learning Associate Certification
By: Cameron McKenzie
-
![]()
AWS Machine Learning Associate Practice Exams
By: Cameron McKenzie
-
![]()
AWS Machine Learning Associate exam topics, tips and practice exams
By: Cameron McKenzie
-
![]()
Prep data for machine learning with AWS analytics services
By: Ernesto Marquez