
Deploy and manage Azure Key Vault with Terraform
Terraform manages resources using configuration files within cloud platforms. Follow this step-by-step tutorial to learn how to deploy and manage Azure Key Vault with Terraform.

Azure Key Vault centrally stores secrets, keys and certificates. But how do you deploy and manage an Azure Key Vault? Most cloud providers offer administration portals, consoles, command-line interfaces, API endpoints and other tools. Many also offer automation capabilities to help deploy assets into their cloud service. You can use the Azure portal, but it is not the only option.
For those that prefer to use configuration files over the GUI, they can opt to use Terraform. Follow this tutorial to deploy and manage Azure Key Vault with Terraform.
Why use Terraform for Azure Key Vault?
Hashicorp's Terraform is an infrastructure as code (IaC) tool that enables users to define and manage resources using configuration files within multiple cloud platforms. Some everyday use cases for using Terraform are multi-cloud deployment, infrastructure or application scaling, and PaaS deployment. There are several benefits to using an IaC tool such as Terraform:
- Platform-agnostic. You can use it across multiple supported providers.
- Creates reusable configurations. It enables the creation of modules for reuse across platforms and projects.
- Agentless. There is no need to install and run an agent for processing configurations.
- Declarative. It enables you to specify states of resources without the need to define the exact steps.
With Terraform, you create and manage cloud platform resources using the provider's APIs. The core Terraform workflow consists of three stages:
- Write. Define resources across a single or multiple cloud providers and services.
- Plan. Create an execution plan describing the infrastructure you need to create.
- Apply. Terraform performs the submitted operations in order within the selected service.
Use Terraform to create an Azure Key Vault
To use Terraform, you must install and configure it. First, download the Terraform executable. To complete the installation, follow these instructions. Also, ensure you have the Azure command-line interface (CLI) installed -- this performs the authentication to the Azure tenant.
Step 1. Launch a PowerShell window, and use the following command:
Invoke-WebRequest -Uri https://aka.ms/installazurecliwindows -OutFile .\AzureCLI.msi; Start-Process msiexec.exe -Wait -ArgumentList '/I AzureCLI.msi /quiet'; rm .\AzureCLI.msi
You may need to close and reopen your PowerShell window to get it to resolve the az command.
Step 2. Authenticate the Azure tenant using az login, which returns the subscription details.
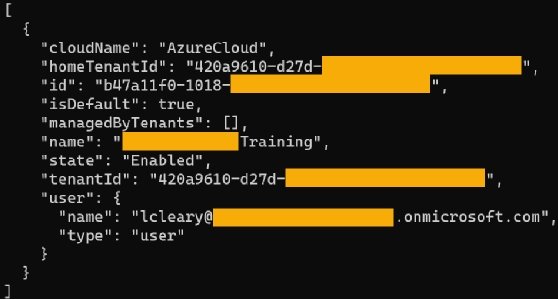
If there are multiple subscriptions, you need to set the subscription to use through the following command:
az account set --subscription "b47a11f0-1018-subscription-id"
Step 3. Create a service principal. This is an Azure Active Directory application with an authentication token that Terraform uses to perform actions on your behalf.
az ad sp create-for-rbac --role="Contributor" --scopes="/subscriptions/b47a11f0-1018-subscription-id"
Step 4. Copy the returned values; you need them when you create the Terraform variables.

At this point, you can either create environment variables or store these values within the Terraform configuration. For this example, you keep them directly within the Terraform configuration.
Step 5. To start the project, create a folder with files that contain the specific configuration values.
"C:\DevOps\Terraform\Azure\Key Vault."
Terraform uses files with the .tf extension for the required configuration. A collection of these files is called a root module. However, you can also create child modules and import local and remote modules.
Step 6. For module creation, you need to create a main.tf file within the directory and add the following code for the variables:
locals {
    subscription_id = "b47a11f0-1018-subscription-id"
    client_id = "cc884e38-67da-client-id"
    client_secret = "3t.8Q~C31mf-client-secret"
    tenant_id = "420a9610-d27d-tenant-id"
}
Step 7. Define the terraform section that tells the engine which provider and version to use. In this case, you use Azure.
terraform {
    required_providers {
        azurerm = {
            source = "hashicorp/azurerm"
            version = "~> 3.0.2"
        }
    }
    required_version = ">= 1.1.0"
}
Step 8. Add the provider configuration. This is where you reuse the already defined local variables.
provider "azurerm" {
    features {}

    subscription_id = local.subscription_id
    client_id = local.client_id
    client_secret = local.client_secret
    tenant_id = local.tenant_id
}
Step 9. Add the resources that you wish to create. For this first example, you create a resource group called rgTerraformRTQwpi, which contains other components you need to deploy, such as an Azure Key Vault.
resource "azurerm_resource_group" "rg" {
    name = "rgTerraformRTQwpi"
    location = "westus"
}
Step 10. Use the following commands to initialize, format, validate and then apply the configuration:
terraform init
terraform fmt
terraform validate
terraform apply
After executing the apply command, you can access the Azure portal or use Azure CLI to confirm the creation of the resource group.
az group list --query "[?name=='rgTerraformRTQwpi']"
Create a variable.tf file
Before doing this, create a new file called variables.tf containing all the variables you use. This enables you to override the default values, if needed.
The current variables list now looks like this:
variable "subscription_id" {
    description = "Azure Tenant Subscription ID"
    type = string
    default = "b47a11f0-1018-subscription-id"
}
variable "client_id" {
    description = "Service Principal App ID"
    type = string
    default = "cc884e38-67da-client-id"
}
variable "client_secret" {
    description = "Service Principal Password"
    type = string
    default = "3t.8Q~C31mf-client-secret"
}
variable "tenant_id" {
    description = "Azure Tenant ID"
    type = string
    default = "420a9610-d27d-tenant-id"
}
Step 1. Add variables for the Azure Resource Group and Azure Key Vault.
variable "rg_name" {
    description = "Resource Group Name"
    type = string
    default = "rgTerraformRTQwpi"
}
variable "rg_location" {
    description = "Resource Group Location"
    type = string
    default = "westus"
}
variable "kv_name" {
    description = "Azure Key Vault Name"
    type = string
    default = "kvTerraformRTQwpi"
}
variable "kv_location" {
    description = "Azure Key Vault Location"
    type = string
    default = "westus"
}
variable "kv_enabled_for_deployment" {
    description = "Azure Key Vault Enabled for Deployment"
    type = string
    default = "true"
}
variable "kv_enabled_for_disk_encryption" {
    description = "Azure Key Vault Enabled for Disk Encryption"
    type = string
    default = "true"
}
variable "kv_enabled_for_template_deployment" {
    description = "Azure Key Vault Enabled for Deployment"
    type = string
    default = "true"
}
variable "kv_sku_name" {
    description = "Azure Key Vault SKU (Standard or Premium)"
    type = string
    default = "standard"
}
Step 2. Update the current list of variables in the main.tf file.

Step 3. Use the following code to add the required code for creating the Azure Key Vault:
resource "azurerm_key_vault" "key-vault" {
    name = var.kv_name
    location = var.kv_location
    resource_group_name = var.rg_name
    enabled_for_deployment = var.kv_enabled_for_deployment
    enabled_for_disk_encryption = var.kv_enabled_for_disk_encryption
    enabled_for_template_deployment = var.kv_enabled_for_template_deployment
    tenant_id = var.tenant_id
    sku_name = var.kv_sku_name
}
Step 4. Validate the configuration before executing it, using the same commands.
terraform validate

There may be times when you want to see the changes you make within the cloud platform. Run the terraform plan command to see an output listing with all changes and values.
Create the Azure Resource Group and Azure Key Vault
Step 1. To create the Azure Resource Group and Azure Key Vault, execute the terraform apply command.
Step 2. Once the commands are complete, you can use Azure CLI to check if the Azure Resource Group and Azure Key Vault exist.
az group list --query "[?name=='rgTerraformRTQwpi']"
az keyvault list --query "[?name=='kvTerraformRTQwpi']"
Step 3. Now that you have created an Azure Resource Group and Azure Key Vault, you may need to add policies to control access and manage keys and secrets. To do this, delete the Azure Key Vault from the Azure portal.
Step 4. Modify the code in the variables.tf file to include the following:
variable "kv_secret_name" {
    description = "Azure Key Vault Secret Name"
    type = string
    default = "TerraformSecret"
}
variable "kv_secret_value" {
    description = "Azure Key Vault Secret Value"
    type = string
    default = "Terraform Secret"
}
Step 5. Update the main.tf file to include the following code:
resource "azurerm_key_vault_secret" "key-vault-secret" {
    name = var.kv_secret_name
    value = var.kv_secret_value
    key_vault_id = azurerm_key_vault.key-vault.id

    depends_on = [azurerm_resource_group.rg, azurerm_key_vault.key-vault]
}
Step 6. Validate the script, and then perform the execution. You may hit an "Access Denied" problem because there's no policy associated with the Azure Key Vault.
Step 7. To resolve your denied access, deploy a policy to allow the reading and creation of secrets and keys. Update the Azure Key Vault configuration.
Add the following beneath the provider section:
data "azurerm_client_config" "current" {}
Step 8. Update the Azure Key Vault creation code to add the access policy.
resource "azurerm_key_vault" "key-vault" {
    name = var.kv_name
    location = var.kv_location
    resource_group_name = var.rg_name

    enabled_for_deployment = var.kv_enabled_for_deployment
    enabled_for_disk_encryption = var.kv_enabled_for_disk_encryption
    enabled_for_template_deployment = var.kv_enabled_for_template_deployment

    tenant_id = var.tenant_id
    sku_name = var.kv_sku_name

    access_policy {
        tenant_id = data.azurerm_client_config.current.tenant_id
        object_id = data.azurerm_client_config.current.object_id
        key_permissions = ["Create", "Get", "List", "Purge", "Recover",]
        secret_permissions = ["Get", "List", "Purge", "Recover", "Set"]
        certificate_permissions = ["Create", "Get", "List", "Purge", "Recover", "Update"]
    }

    depends_on = [azurerm_resource_group.rg]
}
Now, you can validate and execute the script. When it completes, you will see an access policy and a key within the Azure Key Vault.