
Sergey Nivens - Fotolia
Create a backup image in 7 easy steps
Learn how to generate an image-based backup using our step-by-step instructions. Just remember to perform this activity in a test system to avoid wiping out source data.

Image-based backups are an efficient and speedy way to get quality, highly portable backups. Restoration of a backup image is orders of magnitude quicker than a standard backup restoration that involves installing the OS and then restoring a file over the top of the newly rebuilt server.
For a simple introduction, I'm going to use Clonezilla (free) to create a backup image of a local physical development machine. This is not a production-based setup, but it is designed to demonstrate how image-based backups work and their ease of use. Please note that this process should be done within a test system, not a live system. Done wrong, you can wipe out the source data, so proceed with caution.
Creating the image-based backup
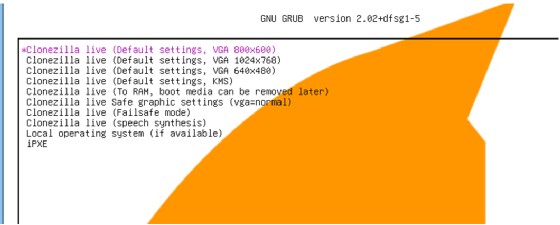
Configure a Windows system as desired. Linux works as well; such is the beauty of image-based backups. Once the system has been configured, power off the virtual machine, and mount the Clonezilla image, making sure to select the boot from CD option.
At this point, Clonezilla should boot up and present a menu that will allow you to create the image-based backup file. Follow the menu, selecting the appropriate language, source and destination.
Most of the questions are self-explanatory, but at this point, an administrator can plug in an external USB drive to use in order to be able to safely remove and store the image. Clonezilla will detect the drive, and it should show up during the destination discovery.
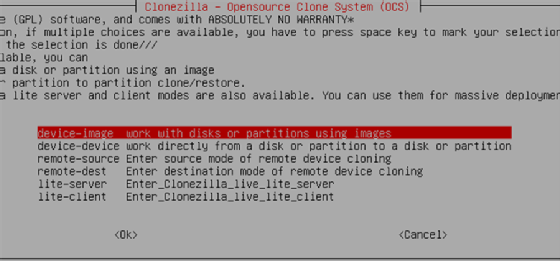
The next important step is to choose the type of backup, as shown below. Select device-image, as highlighted in the screenshot.
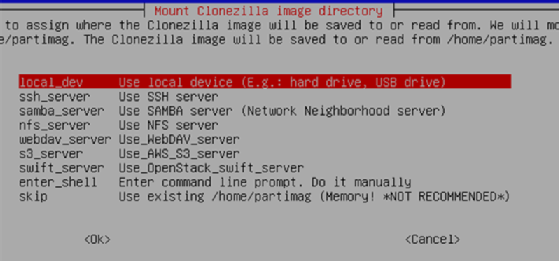
The next screen in the backup image process asks for the destination. Select local_dev, as shown below.
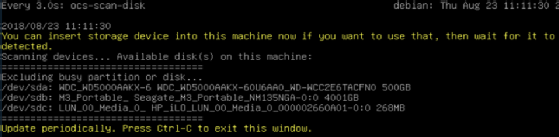
During a physical backup situation with external media, the system will invite you to plug in the USB external disk; in this example, the backup disk (the 100 GB disk) is already included in the configuration.
The next screen allows you to detect and select the destination media. In this case, it is a 4 TB external disk.
Once the disk is detected, use Ctrl + C to exit. In this example, I'm using sdb as the destination. Select this on the next screen as shown.

The system may warn you that it is not using a mount point and ask if you want to modify this. Confirm the details, and press yes.
The last set of options asks which mode should be used. For now, select beginner, followed by savedisk, which takes a block-for-block copy of the entire source disk selected earlier. Finally, give the image a name. By default, the date will be used as the file name.

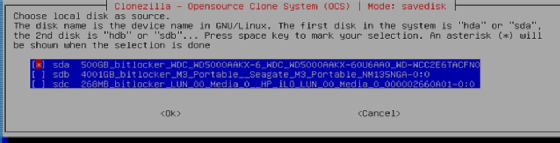
The disk to select for the source is sda. Unless there is an overriding requirement to perform an integrity check, you do not have to check the source file system.
The other options are equally as safe to use. For the sake of simplicity, I also selected the power off option upon completion.
Restoring the backup image
Once the configuration is complete, the backup will start to stream the image to the secondary disk. Upon completion, it becomes a trivial task to deploy (restore) an exact copy of the server.
To restore, you just need to boot from the Clonezilla backup image and select the option to restore. Once restored, it will be an exact copy of the system you backed up.
While this may not be the most realistic of scenarios for regular image-based backup, it is an extremely efficient way to back up your own workstation and machines that can be taken offline. Using image-based backups means there are no forgotten files or dependency issues when a system is restored. Simply put, taking a backup image is the golden standard for backups. The more advanced enterprise products enable all these items to be automated, along with image-based snapshots, without taking the server offline.