
Fotolia
A Red Hat Satellite tutorial to install an update server
With Red Hat Satellite, IT ops can deploy an update server to simplify patching. Follow this step-by-step tutorial to install the server, attach subscriptions and devise a sync plan.

Is server patch management the best part of your job? Stop reading here. Many IT organizations struggle with OS patching processes. For Red Hat administrators who are willing to invest some initial energy to simplify later tasks, Satellite provides infrastructure lifecycle management, including capabilities for provisioning, reporting and configuration management. To this end, follow this Red Hat Satellite tutorial to set up a simple server for updates. Once we review how to install the basic update server, we'll create one example client.
Prerequisites for Red Hat Satellite
A Satellite 6.2 server, as used in this tutorial, must have a static IP address and a working forward and reverse domain name system. Verify that it is synchronized with a reliable time source.
Check the minimum requirements from official documentation against the server you'll spin up. In this Red Hat Satellite tutorial, the virtual Satellite server is allocated 4 CPUs, 16 GB RAM and 200 GB disk space -- barely above the minimum resource limits.
For simplicity, this tutorial also shows the admin using the root account, but do not use direct root logins in production.
Set up the server
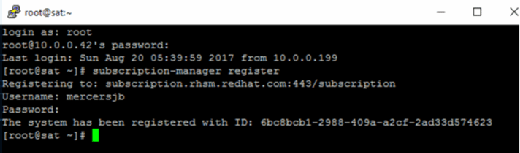
To start, register the Satellite server with Red Hat on the back end. Log in to the target server using Secure Shell.
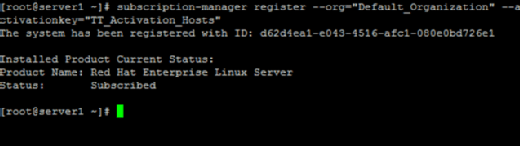
Once logged in, use subscription-manager register to register the system with the Red Hat licensing portal. It will prompt you for credentials, which you can enter. Use username and password switches if desired.
This will associate the Red Hat Enterprise Linux (RHEL) VM with the Red Hat Subscription Manager.
Use subscription-manager list --available to see all available repositories.
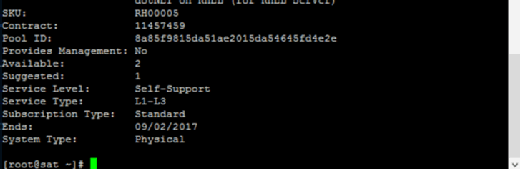
The next step is to subscribe to the pool of subscriptions available. Copy the pool ID. Subscribe using subscription-manager subscribe --pool=8a85f9815da51ae2015da54645fd4e2e, substituting your pool ID for the example one shown.
Use subscription-manager release --set=7Server to restrict the pool to only RHEL 7 repositories.

Reboot to ensure that the instructions you've entered thus far come up properly. Use the following command to configure the required ports:
firewall-cmd --add-port="53/udp" --add-port="53/tcp" \
--add-port="67/udp" \
--add-port="69/udp" --add-port="80/tcp" \
--add-port="443/tcp" --add-port="5647/tcp" \
--add-port="8140/tcp" \
&& firewall-cmd --permanent --add-port="53/udp" --add-port="53/tcp" \
--add-port="67/udp" \
--add-port="69/udp" --add-port="80/tcp" \
--add-port="443/tcp" --add-port="5647/tcp" \
--add-port="8140/tcp"
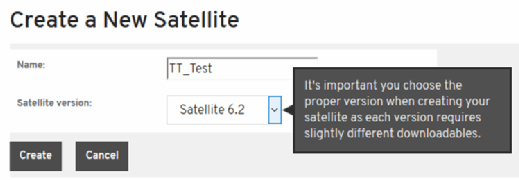
Many new users perform the next step in this Red Hat Satellite tutorial incorrectly: You must attach the Satellite entitlement, which ensures licensing compliance for the system. Open the Red Hat Customer Portal, navigate to Satellite Organizations and click Create Satellite. Give it a name, and set Satellite to version 6.2.
Once configured, select Attach a subscription, then follow the prompts.

Once the Satellite setup completes, download the manifest to the local PC.
Update the available repositories:
subscription-manager repos --enable rhel-7-server-rpms \
--enable rhel-server-rhscl-7-rpms \
--enable rhel-7-server-satellite-6.1-rpms
It's time to install Satellite:
yum clean all
yum install -y satellite
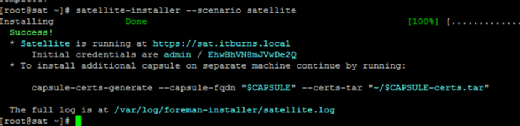
It takes a while to install the prerequisites and tools needed for Satellite. Take a coffee break, then implement the Satellite management server via satellite-installer --scenario satellite.
This too will take a long time to complete. Eventually, the installer will provide the URL, username and password to use on the portal. Log in, then create a product, which is essentially a compilation of repositories and configuration settings.
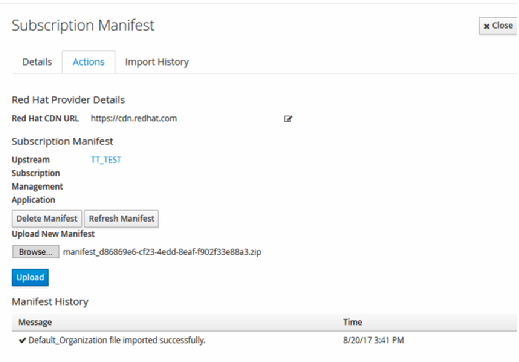
In the portal details, click Content, then Red Hat Subscriptions. Click Manage Manifest. Browse for the manifest zip that downloaded earlier, and click Upload.
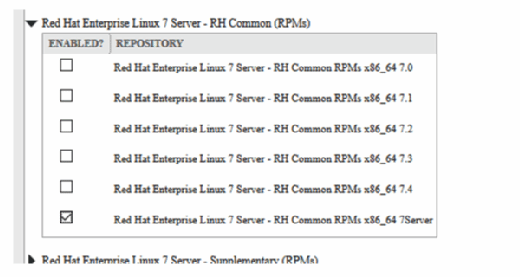
Enable the required repositories to fill the content setups. Go to Content, Red Hat Repositories, RPMs. This example only uses RHEL 7, so select RHN Tools for Red Hat Enterprise Linux 7 Server RPMs x86_64 7.4.
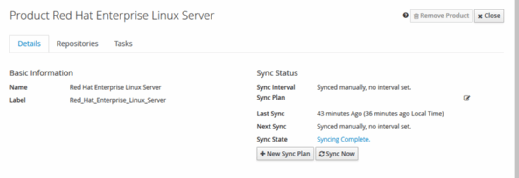
This work goes into a RHEL Server content package. Navigate to Content and then Products to see a default entry for Red Hat Enterprise Linux Server.
Next, select Content, Sync Status from the topmost menu bar. Sync Status displays all the selected repositories. Highlight all the entries, and click Synchronize Now to update the repository. Depending on your connection speed, this could also take a significant amount of time; the base repository is around 22 GB in size.

The update server frequently runs a sync plan to get updated items from the Red Hat repositories, so devise one that fits your IT operations needs. Go to Content, Products, and click on the hyperlink for Red Hat Enterprise Linux Server. Click on the Details tab, and select New Sync Plan.
Give the sync plan a name and, optionally, a description, then save it. Go back to Content, Sync Plans, and attach the plan to the product.
Activation keys
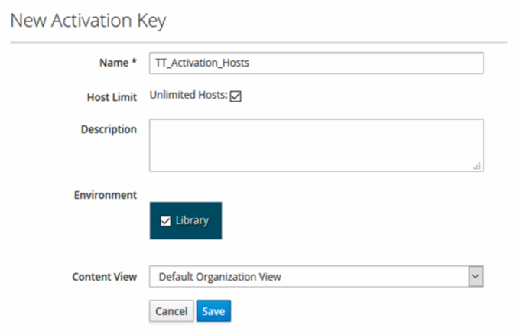
To avoid usernames and passwords, create an activation key to replace them. Start at Content, Activation keys, and fill out a new activation key.
Host registration
The term content host has no meaning in relation to a host machine. Content hosts are merely hosts that are attached to the Satellite system.
Register the host, and add an additional client server to use the Satellite functionality. Go to Hosts, Content host and Register new host.
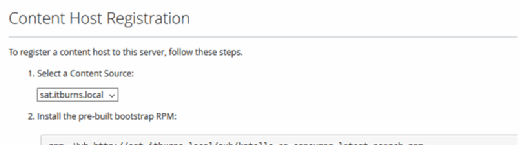
The content host registration page gives a list of commands to register it. Enter the commands into the second host.
Once completed, the second host will be visible in the Satellite portal, and you can click on it to reveal information about that system. If the administrator runs yum update, Satellite takes the local host as the provider.
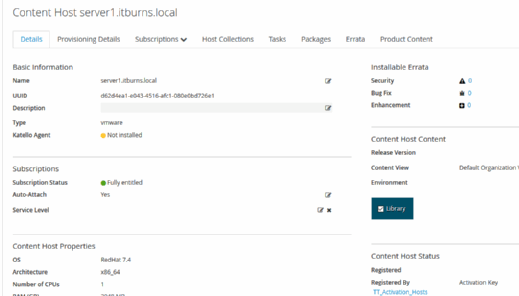
Follow the best practice to configure the host so that it receives yum updates from itself.