
Getty Images/iStockphoto
How to perform a dual-boot with Windows and Linux
Adding Linux alongside Windows enables dual‑boot setups that maximize hardware, support specialized apps and give administrators and developers a flexible multi‑OS workflow.

Dual‑booting Windows and Linux lets one machine run both OSes natively. This offers flexibility, hardware access and a cost‑effective way to use the best tools from each platform.
A standard enterprise workstation has a single OS installed. The OS is usually Windows 11, but there are many cases in which Linux distributions would be helpful to administrators, developers and other power users. Dual-booting involves installing two OSes on the same hardware, then using a bootloader menu to select the desired OS when the system starts up. Changing to the other OS requires you to reboot and change your selection at the bootloader menu.
Why perform a Linux dual-boot?
Dual-boots are complete installations that take full advantage of the system's native hardware capabilities. While alternatives like VMs can be useful, they don't fit in every use case.
Adding a Linux operating system to an existing Windows installation offers a capable and flexible option for using applications. Benefits include the following:
- It enables one hardware investment to be used for testing multiple apps, drivers or other software components on different OSes.
- It offers access to specialized hardware from multiple OSes, which might not be possible using VMs.
- It enables access to OS-specific applications from a single piece of hardware. For example, you can use Kali Linux for penetration testing on an admin workstation while also using Windows-only applications, all from one laptop.
How to dual-boot Windows and Linux
Before starting the dual-boot configuration, you must take a few preliminary steps. The following tasks are necessary:
- Back up essential data on the system using the Windows backup utility.
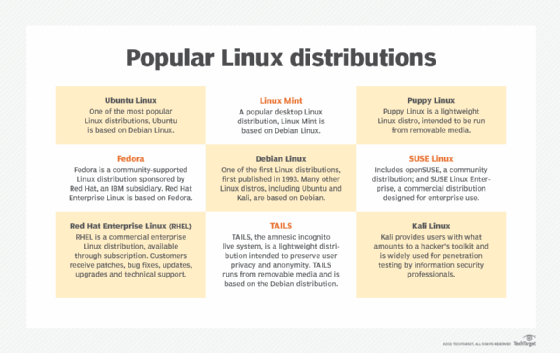
- Select a Linux distribution. Common choices include Ubuntu, Mint, Fedora and Rocky.
- Choose a USB flash drive large enough for the Linux distribution image you selected. The standard recommendation is at least 8 GB.
- Have your Windows install/repair media handy in case you need to recover the OS.
Familiarize yourself with all steps in this procedure before starting.
The following steps can help simplify this process:
- Install Windows before installing Linux. Linux typically accepts alternate OSes more easily than Windows.
- Verify your hardware meets the minimum standards for each OS. Linux is usually more forgiving of older hardware.
- Go through the process slowly and read each prompt carefully. This is especially important when creating partitions to avoid overwriting your Windows installation.
- Confirm Linux drivers exist for any custom or uncommon hardware. Today's Linux distributions typically have a solid list of available drivers, but it's best to check before beginning the installation.
You can also use this process to install more than just two OSes. In theory, you can install as many as your storage disks can support. However, two or three OS installations are usually sufficient. For example, you might have a desktop computer with the following combinations:
- Windows 11, Ubuntu Linux and Kali Linux.
- Windows 11, Fedora Linux and Kali Linux.
- Windows 10, Linux Mint and Rocky Linux.
Once you confirm the prerequisites are in place and you've backed up your data, it's time to get started.
Prepare the existing Windows installation
Your existing Windows installation probably consumes the entire storage disk on the system. If so, you'll need to free up disk space for your new Linux installation. Shrink the Windows partition(s) using the native Disk Management utility. Requirements vary by distribution, but assume you'll need around 30 GB. Remember that your Linux distribution needs room for updates, applications and any data you generate. It also requires free disk space for virtual memory and other system operations.
Take the following steps to shrink the partitions:
- Back up your data.
- Open the Windows 11 Disk Management utility.
- Right-click a partition and select Shrink Volume.
- Enter the amount of space to shrink. Be careful to leave some room for additional data.
- Select Shrink to begin the process.
Leave the resulting unallocated space for your new Linux installation. The Linux installer will see this space once you begin the installation process.
You could also use other tools, such as the open source GParted partition editor.
Disable the Windows Fast Startup and Secure Boot features to avoid startup issues while installing Linux. The Fast Startup feature improves Windows boot times by combining the hibernation and shutdown processes. However, it also locks the partition, interfering with some dual-boot configurations.
You might also need to disable Secure Boot, though most modern Linux distributions use signed drivers and bootloaders, so it might not be an issue. Consider disabling it during the installation procedure and then testing it after you finish the dual-boot configuration.
Create Linux installation media
You must create media containing the Linux distribution you've selected. This step typically involves using a USB drive. Make sure the drive is 8 GB or larger.
Use the following steps to configure the bootable USB drive:
- Download the latest ISO image for your chosen Linux distribution from the distribution's official site.
- Install either Etcher or USBImager on your Windows OS. You only need one of these tools.
- Open the selected tool and browse to the ISO file. Then, select the target USB drive.
- Select Write if using USBImager, or Flash! if using Etcher.
The USB drive is ready once the process completes.
Next, boot from the USB installation media to bypass Windows. Be careful during the partitioning phase. If you overwrite the Windows partition, you'll lose access to Windows and any data stored on that partition.
Install Linux
Thousands of Linux distributions exist, but most follow a similar installation process. The following steps should work for any of the more popular distributions.
The Linux installer application should recognize the existing Windows bootloader and OS. It will prompt you to "Install alongside Windows Boot Manager" or possibly display a "Something else" option. A mistake here could overwrite your Windows installation.
Use the following basic steps:
- Start the installer and select Install Linux.
- Choose your language, region and desired keyboard layout.
- Configure network settings, including DHCP client status or a static IP address. You might also adjust network settings after the installation process.
- Select your partition options. Do not select "Erase the disk" or similar options. Select the option for custom partitions. Use the available free space for Linux, and do not delete the partitions where Windows resides.
- Create a user account and grant it administrative privileges.
- Some distributions let you select additional software, such as LibreOffice, Apache or security tools.
Update Linux and the installed applications once the system reboots.
Once the Linux installer prompts you to install the Grub2 bootloader, accept the prompt. Grub2 should detect the Windows installation and generate a menu entry for it. It displays the menu during the startup process, enabling you to select the Windows or Linux entry.
On some systems, you might need to modify the boot options in the BIOS. To do this, boot to the BIOS, select the Boot Menu option and click UEFI NVMe Drive BBS Priorities. Then, set Linux as Boot Option 1. The process or wording might vary slightly depending on the system.
Update Linux and install applications
Don't forget to update your new Linux installation. The updates provide current drivers, applications, kernel improvements and other essential patches that keep Linux secure and efficient.
You'll maintain Linux software using package managers. There are two main package manager choices, and they're related to various distributions:
- If your distribution is Fedora, Red Hat Enterprise Linux, Rocky, AlmaLinux or similar, your command-line package manager is DNF.
- If your distribution is Debian, Ubuntu, Mint, Kali or similar, your command-line package manager is APT.
If you installed a GUI with your Linux distribution, you should also have access to a GUI-based software maintenance app. Install tools like web browsers, word processors, games, databases and other programs using these package managers.
Select an OS
After configuring the dual-boot setup, you'll select an operating system each time the computer boots up. The bootloader presents a menu during the startup process that lets you choose your Windows or Linux installation. Select the OS you need for your current tasks. Reboot the computer when you want to switch platforms.
Alternative ways to run Linux alongside Windows
Dual-booting Windows and Linux can help maximize the usefulness of one workstation without purchasing or maintaining additional hardware. It frees you to use the best applications for the job at hand, whether they're Windows or Linux programs.
If, for whatever reason, dual-booting a computer isn't viable, you can consider the following alternative options:
- Virtual machines can run almost any Linux distribution, enabling a wide range of application platforms without buying additional hardware. Your host system needs to be fairly high-performance, and you'll need to select a virtualization platform.
- Windows Subsystem for Linux enables admins and developers to run Linux apps natively, including an isolated file system and support for graphical applications.
- Containers can run specific apps using Docker or similar container platforms on your local workstation and OS.
- Raspberry Pi and other single-board computers run Linux well and require only a minimal hardware investment.
A dual‑boot configuration offers native performance and full hardware access for both OSes, making it a strong option for mixed‑environment workloads. Evaluating this approach alongside virtualization, containers and other tools helps ensure the system design aligns with your operational and administrative needs.
Damon Garn owns Cogspinner Coaction and provides freelance IT writing and editing services. He has written multiple CompTIA study guides, including the Linux+, Cloud Essentials+ and Server+ guides, and contributes extensively to Informa TechTarget, The New Stack and CompTIA Blogs.