
Getty Images
How to build a virtual router with VMware Workstation
Virtual networks in testing and development setups require virtual routers. In this step-by-step tutorial, use VMware and Windows tools to set up a virtual router.

Virtual networks help admins evaluate new network security or monitoring options in a test environment, or assess how a new workload will affect the live network. Successful virtual network testing uses virtual routers to direct test environment traffic. VMware Workstation is a tool admins can use to build these virtual routers.
As handy as a lab-based virtual network might be, it is a complex undertaking to build. Physical networks often consist of multiple segments. If a virtual network should accurately mimic an organization's physical infrastructure, it generally requires multiple segments, which routers provide.
For production infrastructure, physical routers direct traffic between network segments. In a test and development setup, physical routers might not be feasible, and if all network segments are virtual, then the physical router cannot connect to anything. In these scenarios, virtual routers are helpful.
Like a physical router, a virtual router orchestrates network traffic between subnets. The difference is that a virtual router is software-based, which fits test and development use.
Create a virtual router in VMware Workstation
One easy way to create a virtual router is to set up a VM and then configure the VM to act as a router. There are numerous software options to create a virtual router on top of the VM.
The following tutorial assumes that admins can create a VM with VMware Workstation and install Windows Server as the guest OS. The procedure to configure Windows Server to act as a virtual router is valid for all currently supported Windows Server versions at time of publication.
1. Set up virtual network adapters
First, provision the VM with a virtual network adapter for each network that will communicate with the router. These network adapters must use static IP addresses so that they are easily discoverable and must have a reliable data connection. Align each address with the subnet that the virtual network adapter connects to.
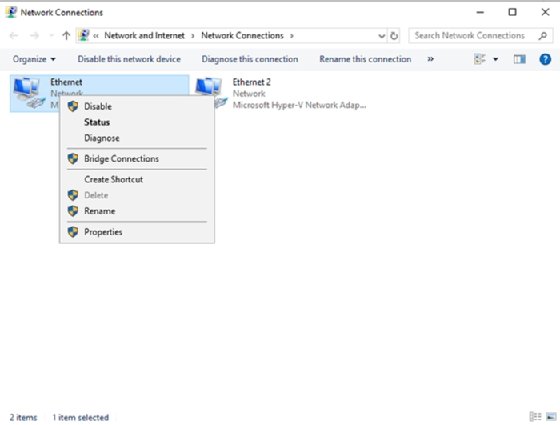
To make the overall process easier, label each individual network adapter within Windows. This helps you to identify specific adapters during management and addresses security concerns from more traditional naming schemes.
Enter the Control command at the Windows Run prompt. This opens the Windows Control Panel.
Click on Network and Internet, followed by Network and Sharing Center, then Change Adapter Settings. This screen displays all virtual network adapters. Right-click on an adapter and choose Rename from the shortcut menu, as shown in Figure 1. Repeat the process for each adapter.
2. Configure the VM
The next step is to configure the VM to act as a router.
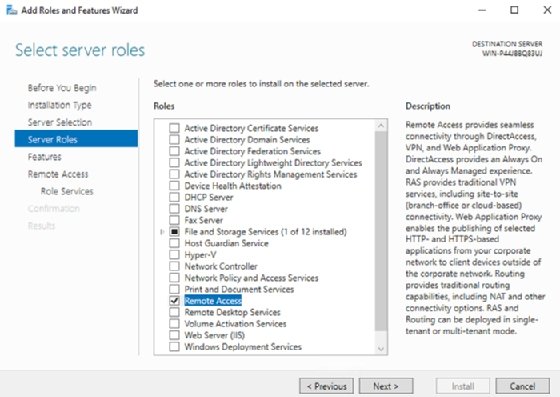
To begin the configuration process, open Server Manager and select Add Roles and Features from the Manage menu. Windows then launches the Add Roles and Features Wizard. Follow the wizard's prompts until the Server Roles screen appears. Select the Remote Access option, as shown in Figure 2.
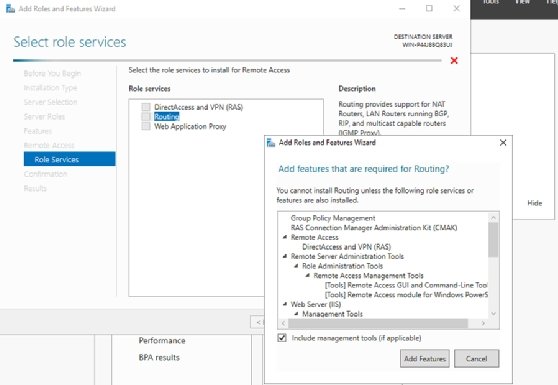
Click Next until the Select Role Services screen appears. Then select the Routing option from the list of role services. Install the required role services, as shown in Figure 3.
Click Next, followed by Install to install the required role and services.
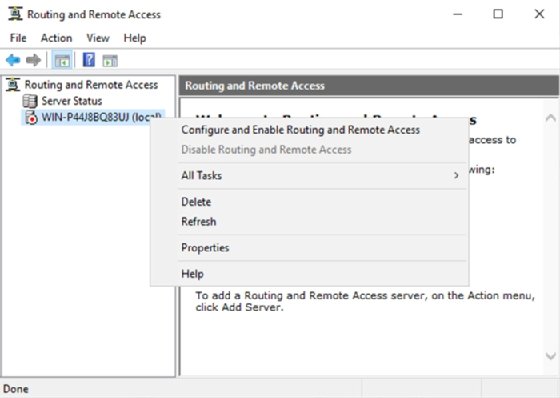
Once the installation process completes, select the Routing and Remote Access option from Server Manager's Tools menu. This causes Windows to open the Routing and Remote Access console. Right-click in the server and choose the Configure and Enable Routing and Remote Access option from the shortcut menu, as shown in Figure 4.
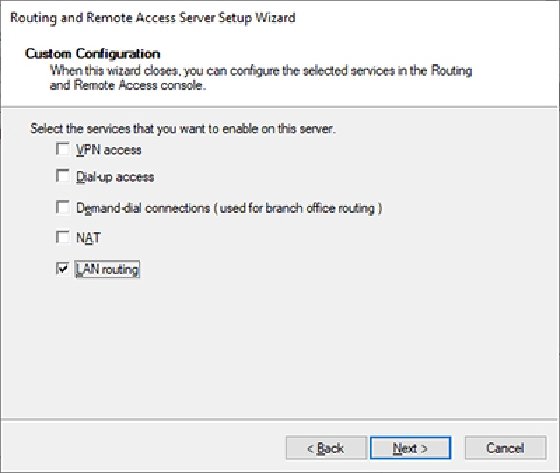
When the setup wizard begins, click Next to bypass the wizard's welcome screen. When you arrive at the configuration screen, choose the Custom Configuration option and click Next. When prompted, choose the LAN Routing option from the list of available services, as shown in Figure 5.
Click Next, followed by Finish to complete the wizard. When prompted, click the Start Service button. The virtual router should now be ready to use. Verify TCP/IP settings to ensure the VMs are connected to the network.