An overview of multi-tenancy in Remote Desktop modern infrastructure (RDmi)
RDS MVPs explain why multi-tenancy is so important, how it works in RDmi, and how to set it up.
By Kristin L. Griffin and Benny Tritsch, with help from Freek Berson
In June, we published an article on Remote Desktop Modern Infrastructure (RDmi). In that article, we explained the concept behind RDmi, and we talked about some of the major advantages it brings to the table. One feature, Multi-tenancy, is a big deal. Today, we’ll tell you why and show you how it works.
The multi-tenancy challenge
The original RDS infrastructure was not created with multi-tenancy in mind, and using it to deliver Win32 applications securely to multiple customers comes with challenges.
To save costs, hosting providers try to share RDS infrastructure components (RD Gateway, RD Web Access, RD Connection Broker) amongst multiple customers. However, these were not really meant to be shared.
Security is also challenging, as hosting providers need to keep customers’ (tenants') data completely separate from each other, and internet-facing RDS roles (RD Gateway and RD Web Access) need to be domain-joined in order to provide a smooth single sign-on experience.
Because of these obstacles, some CSPs and MSPs elect to deploy completely separate RDS environments for each customer. This solves security issues, but now you have much higher admin overhead and you are stuck paying for the extra resources to support all the RDS roles for each customer.
So, as we mentioned, some providers try share some of the roles among multiple customers. They use a single Active Directory, and then share the RD Web Access, Gateway, and Broker roles. However, this is challenging: on the management side, the hosting provider has to be very strict about securing access to customer-specific data; and on the customer side, businesses might not be able to use their own corporate branding or have a smooth single-sign-on experience.
Other issues for multi-tenant deployments include role-based access control (RBAC) for admins, as well as multi-factor authentication (MFA) integration, as these both rely on Active Directory. RBAC requires all tenants to be part of the same AD (or in multiple connected ADs), and MFA also uses a customer’s AD or Azure AD.
In a nutshell, this is about compliance, trust, and control. Customers want their own isolated AD, and they don’t want MSPs to create trust relationships to other ADs (some customers’ security policies may not even allow trust relationships).
The RDS team recognized all these hardships and decided to do something about it in the next iteration of RDS, Remote Desktop modern infrastructure (RDmi).
Benefits of RDmi
One of the biggest differences with RDmi is that it uses Azure AD instead of conventional Active Directory. This is great because you can instantly leverage cloud-based identities, MFA, and RBAC without having to perform any complex setup. (For example, in RDS 2016 you can also use Azure MFA, but it requires a separate Network Policy Server and a complicated setup for RD Gateway.)
The move to Azure AD also means that the RD infrastructure components (RD Broker, RD Gateway, and RD Web Access) are no longer domain-joined. For the RD Gateway and RD Web Access roles, this is a huge step forward in terms of security.
You may have heard or taken part in long-running discussions about not exposing domain-joined machines to the internet, as it increases your attack surface. Until RDmi, people tried to limit their RD Gateway/RD Web Access exposure by:
- Creating a DMZ for RD Gateway with read-only domain controllers;
- Using third-party reverse proxy appliances; or
- Running RD Gateway server in workgroup mode.
Some of these solutions fixed some of the issues in some use cases, but none of them were a 100% bulletproof solution, and they usually sacrificed a smooth single SSO experience. With RDmi, this hardship is history.
And again, multi-tenancy is one of the best RDmi features, and a key part of this comes from the fact that infrastructure components are not domain-joined. The infrastructure is deployed and managed in the provider’s subscription using the provider’s Azure AD, while the Session Hosts are deployed in the tenant’s subscription (or datacenter) using the tenant’s Azure AD for authentication. Because of this architectural split, RBAC also works to allow customer administrators to manage their own resources while giving MSPs/CSPs access to the specific VMs the customer wants them to manage.
Lastly, another big benefit of RDmi is that the RD infrastructure roles are .NET services, running as Azure Web App Services. The obvious benefit here is that admins don’t have to manage virtual machines for these anymore. A less obvious (but super important) benefit is that Azure Web Apps scale automatically. You can set up two scale rules (up and down), and in a few minutes, you have an auto-scaling infrastructure.
RDmi requirements
To set up RDmi, you need:
- An Azure subscription and Azure AD for RDmi infrastructure hosting provider.
- An Azure subscription and Azure AD for each tenant. This can be created by the hosting provider, or the tenant can bring their existing Azure subscription and Azure AD.
- Each tenant’s Azure AD should be synced to Active Directory Domain Services (in the cloud or on-premises). (This is because the Session Hosts are domain-joined.)
Our example buildout
Now we’ll take a look at setting up the multi-tenant infrastructure in RDmi, based on the latest Private Preview that was available to us. We will also show you the user experience from the customer perspective.
For this article, we built a multi-tenant environment made up of:
- One “cloud service provider” (rdsgurus.com) hosting the RDmi infrastructure roles in Azure.
- Two separate tenants (rdsgurus.cloud and rdmi.cloud).
- Rdsgurus.com also has its Session Hosts sitting in its on-premises datacenter, so it also functions as a tenant.
Each tenant has their own subscription, Azure AD, and Active Directory Domain Services.
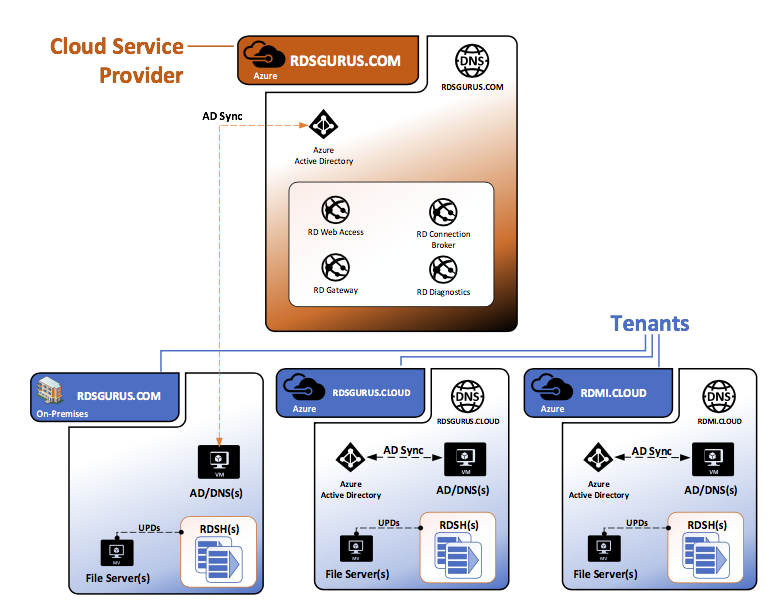
For the hoster/cloud service provider, we set up an Azure Subscription with Azure Active Directory, and we synced it with Active Directory Domain Services running on premises, so that we could show a hybrid design example.
The tenants’ subscriptions must have Azure AD to be able to connect them to the RDmi deployment, and this is part of the subscription by default). You need to sync Azure AD to AD in order to work with domain-joined Session Hosts and to use AD accounts to access the deployment.
Here are some helpful links if you’re doing this on your own:
- Setup an Azure subscription here. You will need a Microsoft account (MSA account), not a corporate account
- Add a domain to Azure AD. This is for your corporate branding.
- Sync Azure AD with ADDS (in the cloud or on premises) so that user accounts sync up from ADDS to Azure AD.
RDmi infrastructure deployment
Currently, RDmi is in Technical Preview. We will not describe every single detail because the exact commands and steps are subject to change. However, we will describe the process on a functional level.
To deploy the Rdmi infrastructure, you have to have the bits. For now, the bits are not publicly available, but they consist of several JSON and PS1 files. When they are available, you will access them from the PowerShell Gallery. Next, you pick a location in the subscription to house the deployment—you create a resource group in which to deploy the RDmi infrastructure. Then you are ready to import the needed PowerShell modules and run the required PowerShell commands.
Import modules and login
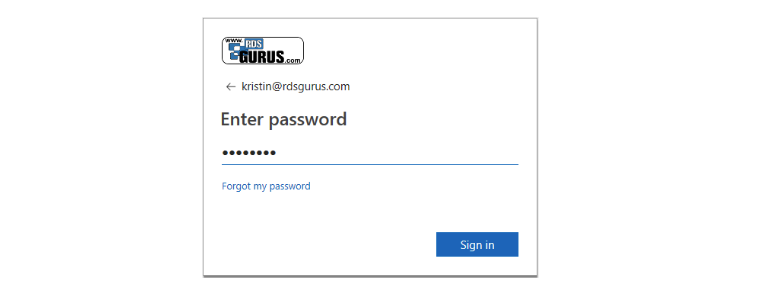
Import the necessary modules (AzureRM and AzureAD) and log in to the hoster’s Azure Subscription using Login-AzureRmAccount. You will get screens for your username and password.
The PowerShell output will look something like this:
Account: [email protected]
SubscriptionName: MySubsciptionName
SubscriptionId: xxxxxxxx-xxxx-xxxx-xxxx-xxxxxxxxxxxx
TenantId: yyyyyyyy-yyyy-yyyy-yyyy-yyyyyyyyyyy
Environment: AzureCloud
Create the RDmi infrastructure
Now you are ready to create the RDmi infrastructure. You run a series of PowerShell commands that:
- Create an Azure key vault with initialized certificates and client/web apps in Azure AD.
- Create the RDmi Infrastructure roles as Azure Application Services. It uses an ARM template and references zipped packages for each role. Because the RD Broker uses SQL, you also specify SQL credentials here (SA, not AD).
When the script runs successfully, it will output the URLs for RD Web, RD Broker, RD Gateway, and RD Diagnostics. It also gives you the admin UPN, and the InitializeDBSecret. It looks like this:
RDWeb: https://rdweb-some-random-digits.azurewebsites.net
RDBroker: https://rdbroker-same-random-digits.azurewebsites.net
RDGateway: https://rdgateway-same-random-digits.azurewebsites.net
RDDiagnostics: https://rddiagnostics-same-random-digits.azurewebsites.net
RDWebClient: https://rdweb-same-random-digits.azurewebsites.net:443/webclient/index.html
AdminUPN: [email protected]
InitializeDBSecret: zzzzzzzz-zzzz-zzzz-zzzz-zzzzzzzzzzzz
Map custom domain name
Mapping a custom domain name to the RDmi infrastructure roles is optional, but highly recommended for production environments because this integrates your corporate branding. Right now, it only works for the RD Web Access role, but we expect this to work for all roles once RDmi is GA. Basically, you:
- Create a DNS record to map your custom domain name to the RD Web address you got as the output from deploying the infrastructure. We used a CNAME to map rdweb-some-random-digits.azurewebsites.net to rdmi.rdsgurus.com.
- Add this mapping to the web app in Azure, and bind an SSL certificate for that custom domain name to the web app. We bound a wildcard certificate for rdsgurus.com.
Follow this article to see how we did it for the RD Web Access web app.
Tenant deployment
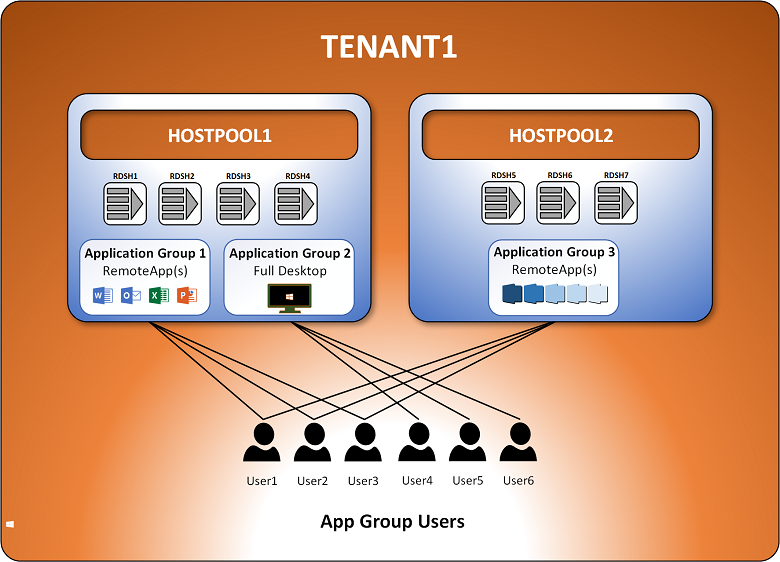
Now that you have the RDmi infrastructure deployed, it’s time to set up your tenants. In order to do this, you need to understand what you are building. The tenant deployment consists of:
- The Tenant: A “Tenant” is the customer’s designated space in the RDmi deployment. It is hooked to the customer’s Azure subscription and Azure AD, but is completely separate from other customers. Inside the tenant deployment you create “HostPools."
- HostPools: A HostPool is a collection of Session Hosts (living in the tenant’s Azure subscription or datacenter) that have the same application landscape.
- Application Groups: A HostPool houses “Application Groups” (AppGroups) that describe what applications will be published and how they will be published (full desktop access or RemoteApp). Each Session Host can belong to only one HostPool, and all Session Hosts assigned to the HostPool host all the connections to all the AppGroups created in that HostPool.
- App Group Users: Then you assign “AppGroup Users” who will have access to each AppGroup. Users can only be assigned to one AppGroup in the same HostPool, but they can be assigned to AppGroups residing in multiple HostPools.
Now, we will cover how you create the tenant deployment.
Allow RDmi access to the tenant’s Azure AD
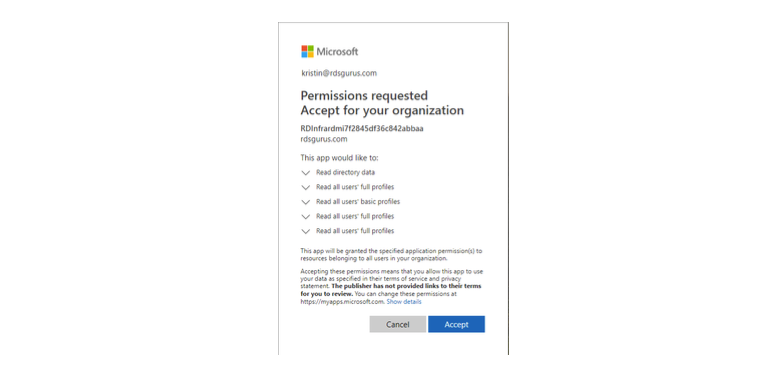
To allow the RDmi infrastructure on the hosting provider side to work with tenants, each tenant must give consent to allow the RDmi back-end web app and front-end client web app to read their Azure AD. You do this twice, once for the Server App consent option and then for the Client App consent option. Do this by logging onto the RDmi RD Web Access website, selecting each consent option, and granting the appropriate permissions.
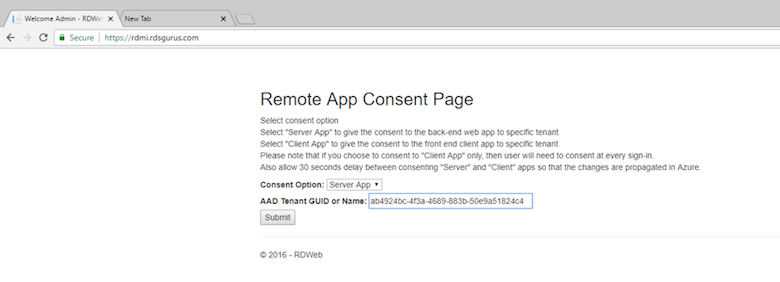
It will ask you to log in, using a user account from the tenant’s Azure AD that has permission to grant the consent. It then shows you the permissions you are granting to the RDmi infrastructure.
Create the tenant
Next, the hoster creates the tenant in the RDmi infrastructure, and designates tenant user accounts as administrators.
At this point, the tenant can create their deployment, or they can allow the hoster access to take the following steps on their behalf:
Connected to the RDmi infrastructure, in PowerShell you:
- Add other tenant admins and assign specific roles as needed. (Existing tenant admins can do this.)
- Create a HostPool and tell it to use “Reverse Connect.” Using Reverse Connect (which is optional but highly recommended), the Session Hosts only use an outbound 443 port to communicate with the RDmi infrastructure. No other holes need to be punched in the firewall!
- Create the registration information (a hash, in text format, tied to the HostPool) which you will need to add Session Hosts to a particular HostPool.
In the customer’s subscription, you:
- Create Session Hosts.
- Add a License Server and tell the Session Hosts to use it.
- Register Session Hosts with a HostPool and set them to use Reverse Connect.
- Set up a File Share for UPDs. (This is optional, but we do it in all our tenant examples.)
Connected to the RDmi infrastructure, in PowerShell, you:
- Create the AppGroups for each HostPool.
- Assign users to the AppGroups.
- Create RemoteApps for the AppGroups that publish RemoteApps.
- Set the HostPool(s) to use UPDs.
Now for the important part—the end-user experience.
End-user experience for the RD Client
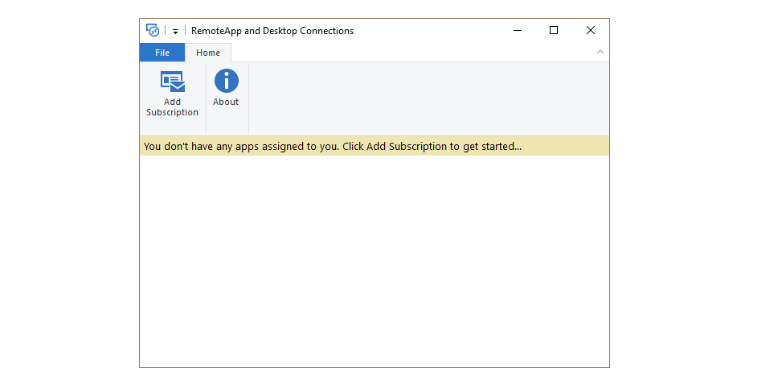
When you start the RD Client, it is blank, so you need to add a subscription.
Enter the RD Broker service address (for example, https://rdmi.rdsgurus.com), and then you will get prompted for the user credentials. Once the user logs on, the feed is entered into the registry at HKEY_CURRENT_USER\Software\Microsoft\Terminal Server Client\Default\FeedURLs.
Apps that are assigned to the user appear in the window:
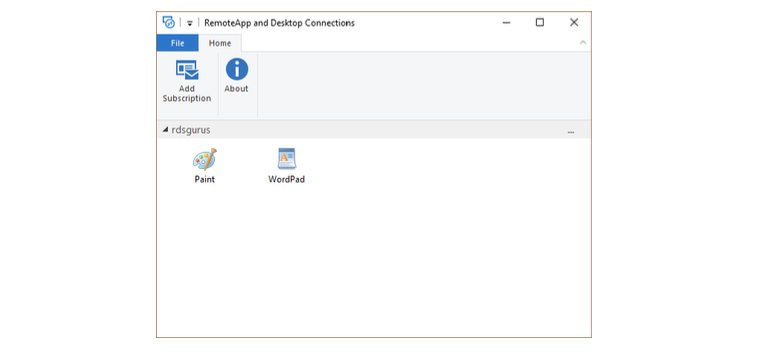
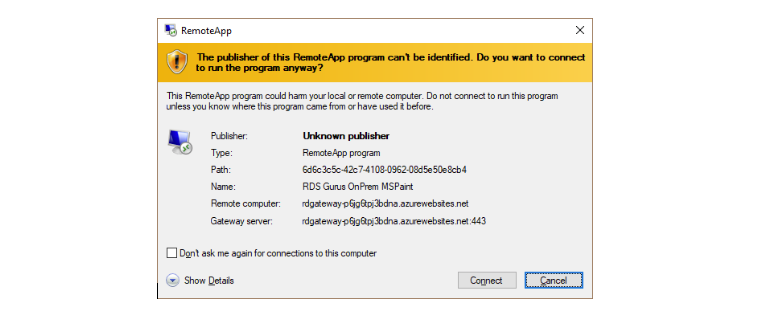
Click on app icon to start the RemoteApp (or full desktop if one was assigned). Single sign-on does not work yet, so custom hostnames are not applied; however, this is expected to be available in GA. For now, you get the “unknown publisher” warning. Check the option “Don’t ask me again for connections to this computer” for a better user experience.
(Note: To undo the check box, delete the registry key at: HKEY_CURRENT_USER \Software\Microsoft\Terminal Server Client\LocalDevices.)
You are prompted to enter your credentials again (this step will be eliminated with SSO) and the app launches (as a RemoteApp in this case). Here’s our example app:
End-user experience for the web client
The web client end-user experience is slightly different as all the work takes place in the web browser.
Open a browser and go to the RD Web Access website for the web client. In this example, the URL is: https://rdmi.rdsgurus.com/webclient.

This redirects you to login at login.microsoftonline.com. Azure AD then determines what identity provider is used for authentication (i.e. Azure AD, ADFS, etc.).
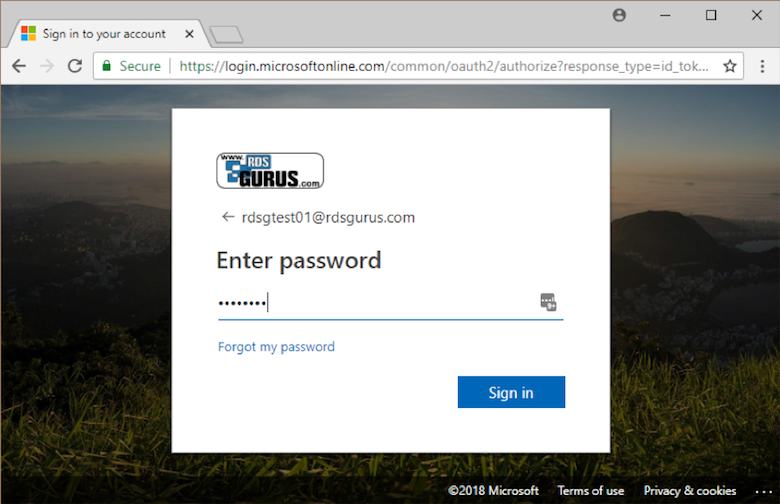
Once you log in at your actual identity provider, Azure AD sends your browser back to the original site (the RD Web client) with a token. The website parses the token and you get your feed—your assigned apps appear in the browser window.
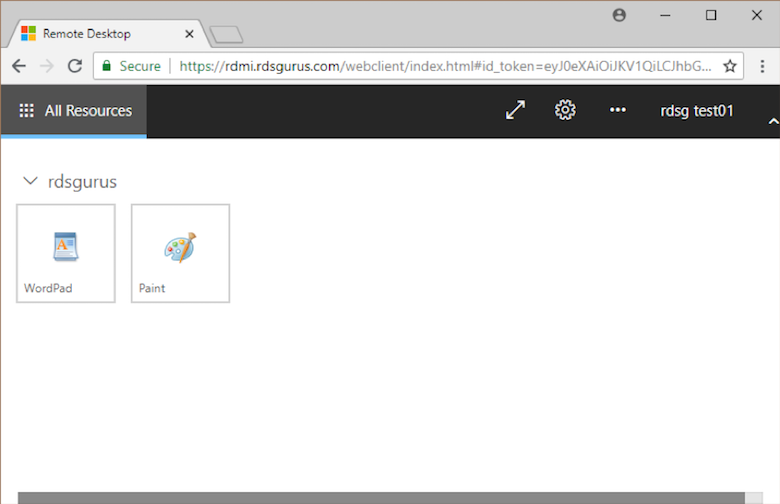
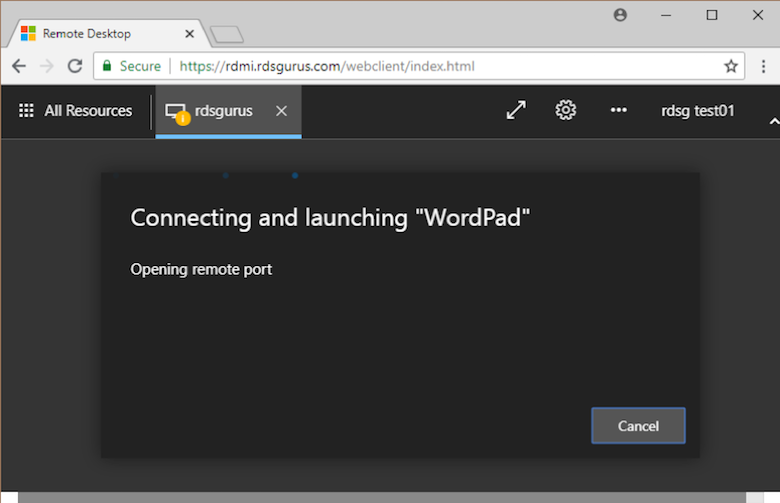
Click an app icon to start the app. In this case, you are prompted to allow clipboard and printer redirection.
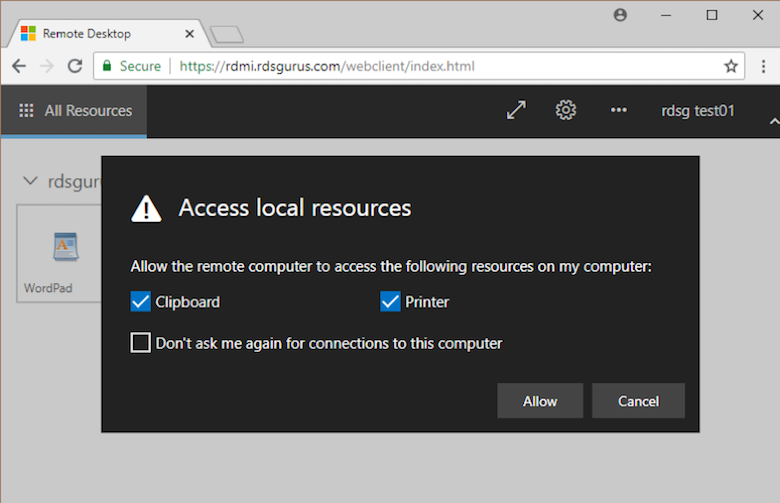
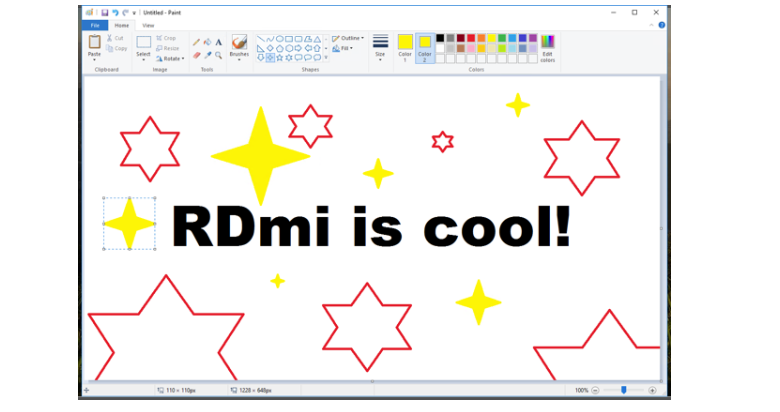
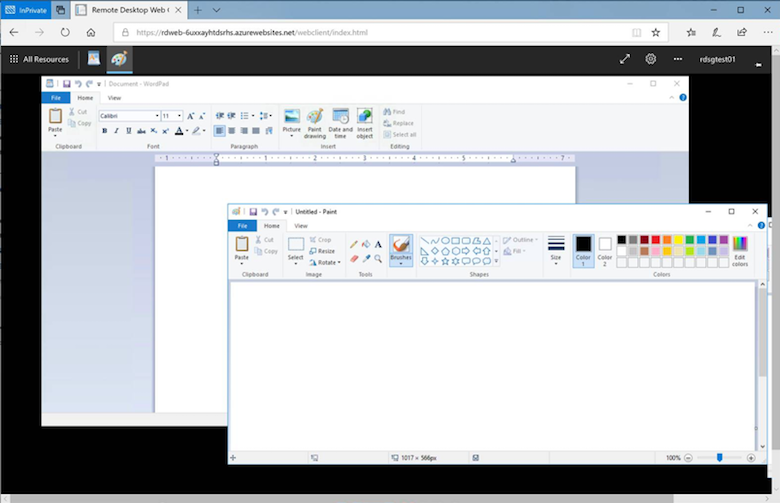
Then the app starts inside the browser window.
And it functions within the browser window:
Video demos
You can see the RD Web Client at work on our video demos. We made one for the RemoteApp experience and one of the full desktop.
Summary
RDmi is not just an upgrade to an existing platform—Because it is built to leap the multi-tenancy hurdle, it’s really like a new product. The infrastructure works with Azure AD, no longer needs to be domain joined, requires less management of resources, and auto-scales. Tenants keep their AD resources secure, and also have control over their own deployment within the RDmi infrastructure.
We showed you the end-user experience using both the new RD Client and RD Web Client (and we expect this user experience to become much smoother once SSO is enabled). Stay tuned for our next article, where we will add MFA to the RDmi multi-tenant deployment and again show the end-user experience!