How to build visual workflows in SharePoint
Editing workflows in SharePoint has become more intuitive, with Visio integration that makes it easier to alter the structure of business processes.

Using workflows in SharePoint can help automate business processes, but building and editing them has a reputation for being much more complicated.
SharePoint 2013 makes designing workflows more manageable by simplifying visual editing. In SharePoint 2010, Microsoft made it possible to export a workflow to Visio for visual editing. SharePoint 2013 however, allows Visio-style drag-and-drop editing of workflows from directly within the SharePoint designer, so long as Visio is installed on the same computer as the SharePoint Designer.
It's important to note that while you can visually edit individual elements within the workflow, you will likely find yourself switching back and forth between the visual editor and the text-based editor as you build the workflow. The easiest approach is often to build the workflow design visually and then use the text designer to add in task-specific information.

To create a workflow using the SharePoint Visual Designer, open the designer, then open the site for which you want to build a workflow. Workflows are commonly attached to SharePoint lists, so when the site opens, select the Lists and Libraries container and then verify the existence of the list for which you want to build a workflow, as shown in Figure 1. If the list does not currently exist, you can create it from within the Lists and Libraries container.
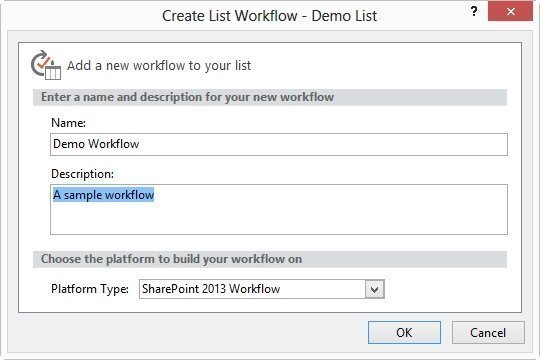
Now, select the Workflows container. Since we are building a list workflow, click on the List Workflow button on the toolbar and then choose the list for which you want to build the workflow from the resulting dropdown. You will now be prompted to enter a name and a description for the workflow. You will also need to choose a workflow platform. As shown in Figure 2, choose the SharePoint 2013 Workflow option. If you don’t see the SharePoint 2013 option, it means that the Workflow Manager is not installed. Click OK and the workflow will be created.
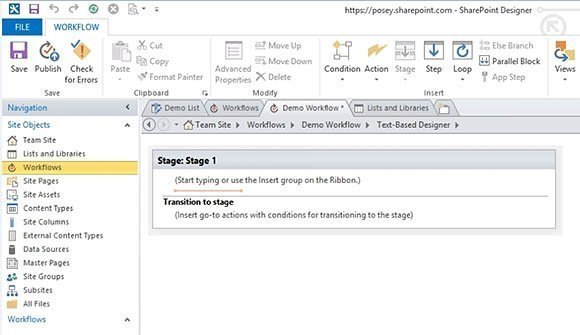
As Figure 3 shows, the SharePoint Designer will now display a screen that allows you to begin building a multi-stage workflow. You can add conditions, actions, stages, steps and loops by choosing the appropriate option from the toolbar.
As previously mentioned, the designer allows you to build visual workflows in SharePoint so long as you have Visio installed on the same computer as the SharePoint Designer. The workflow editor that is shown in the previous screen capture is the text-based designer. If you want to design a workflow visually, click on the toolbar’s Views icon and then choose the Visual Designer option from the dropdown menu. You can see what the visual designer looks like in Figure 4.
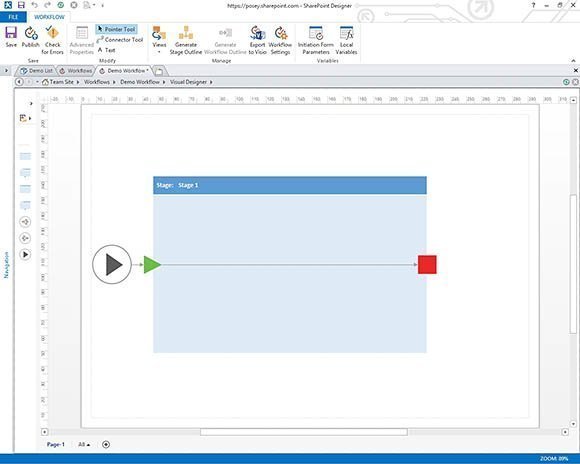
Right now there isn’t a lot to see in the workflow because it hasn’t been configured to do anything. You can easily change that however, by dragging the workflow building blocks from the left side of the screen and placing them within the workflow. The SharePoint Designer gives you several different building blocks to work with. The choices that are available on the left side of the screen include:
- Stage: A collection of steps that work together to perform a collective task.
- Loop with condition: A loop that exists until a condition is met or while a condition is true.
- Step: A single task.
- Loop n times: A loop that executes a specific number of times.
- Start parallel process: A function that launches parallel steps within the workflow.
- End parallel process: A function to end parallel task streams.
As previously mentioned, you can build the workflow by dragging any of these building blocks to the workflow designer. By doing so, you can establish the general structure of the workflow, as shown in Figure 5.
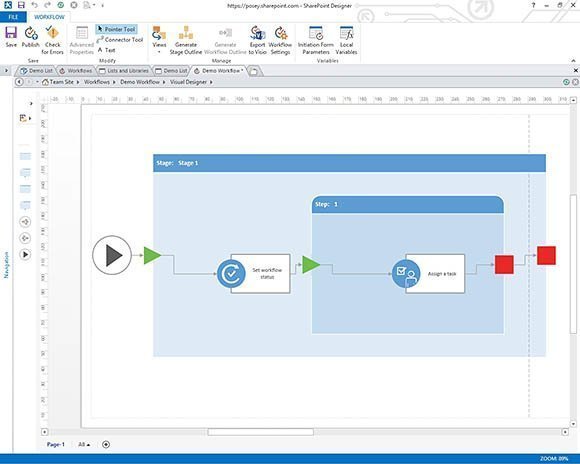
Before you save your workflow (which you can do by clicking the Save button on the task bar), check the workflow for errors. As the previous figure indicates, the taskbar includes a Check for Errors button. If you click this button, it will show you all errors within your workflow. If you are building a workflow visually, it is easy to accidentally fail to connect the shapes properly, which causes the workflow to malfunction. The error check can alert you to these types of connection errors and other problematic conditions.