
Alex - stock.adobe.com
How to use Masscan for high-speed port scanning
Masscan delivers a quick assessment of open ports and listening services, but it helps to pair the utility with other scanning tools, such as Nmap.

Port scanners are important tools that enable administrators and security personnel -- and malicious actors -- to identify open and listening services on a network and, therefore, determine potential entry points into computers.
One popular open source is Masscan. Unlike Nmap, arguably the most popular port scanner, Masscan is a fast scanner that identifies open ports but provides little additional information, making it optimal for large networks, including the internet.
Let's look at how to use Masscan for penetration testing, network auditing and general troubleshooting.
The importance of port scanning
Port scanning is a crucial part of system administration and security. Using port scanners enables IT professionals to determine the following:
- Open ports and available services.
- Potential vulnerabilities related to misconfigurations or outdated policies.
- Network device and asset inventories.
- Firewall settings.
- Changes to network configurations.
Masscan is among several port scanners available, including Nmap, which can be more detailed, complex and slower than some use cases require, and Angry IP Scanner, a fast, user-friendly port scanner tailored to identify open ports and live hosts on smaller networks.
Masscan's speed on large networks makes it an attractive option for admins who want a quick and basic scan of available hosts and open ports. It avoids more in-depth analysis, such as OS detection or scan scripting, which enables it to achieve basic scanning goals.
How to compile and run Masscan
Masscan works on Linux, macOS and Windows. Depending on your preferred OS, you might need to compile it yourself. Expect the best performance on Linux, especially for very large scan jobs. According to the vendor, macOS and Windows only send around 300,000 packets per second, while Linux can send 1.5 million packets per second.
You have several options for getting Masscan. If you're not confident in compiling it yourself, you can find precompiled versions online. Be sure you trust the source and always look for the current version.
To compile it on a Linux system, type:
sudo apt-get --assume-yes install git make gcc
git clone https://github.com/robertdavidgraham/masscan
cd masscan
make
make install
Use similar processes on macOS and Windows. Since the application is written in C, it's portable. You can also use Kali Linux, ParrotOS or BlackArch to run Masscan.
Example Masscan scans
Masscan's simplicity means there aren't many options or variations to learn. When learning how to use Masscan, you'll find that running it mainly requires specifying target addresses and ports. You can also redirect the standard output to a file.
Use the following examples to construct your own scans.
How to scan a single port
Scan a single port on an IPv4 network segment by typing:
masscan -p80 10.0.0.0/8

Results appear on the screen, though you can redirect the output to a file for later analysis (more on this below).
How to scan multiple ports
Target multiple ports by using the -p option and separating the desired port numbers with commas. For example, to scan for web services, type -p80,443.
masscan -p80,443 10.0.0.0/8
How to scan a range of ports
Scan a range of ports by using a value such as -p6000-7000 to cover all ports between 6000 and 7000. This feature is particularly useful if you have multiple applications using custom or nonstandard ports.
masscan -p6000-7000 10.0.0.0/8
How to use a configuration file for repeatable scans
Masscan offers several basic options to modify scan capabilities. For example, set a --max-rate value to define the number of packets per second sent in the scan. The default is a lowly 100 packets per second, so it might be worth modifying that to --max-rate 100000 or more. Remember that Windows and macOS are more limited than Linux in this respect.
You could also use a text file to exclude particular ports if you need to conduct very specific scans or avoid particular ports. Be especially careful if you're scanning the internet because your scan could get you denylisted.
Specify an exclude.txt file by using the --excludefile flag.
masscan 0.0.0.0/0 -p-65365 --excludefile exclude.txt
Again, carefully update that file to specify areas of the internet to avoid. Avoid scanning the internet itself and instead conduct more targeted assessments within your own network's boundaries.
Since network scanning is often a recurring task in auditing and vulnerability detection, you might want to specify detailed settings in a configuration file and then call the file when you're ready to scan. You could even schedule that task using cron, a time-based scheduler in Unix-like OSes that enables you to schedule commands to run at specific dates and times.
Begin by creating the configuration file:
# Basic scan ports 0-1023 for my internal network
rate = 100000
output-format = xml
output-status = all
output-filename = internal-scan.xml
ports = 0-1023
range = 0.0.0.0-255.255.255.255
excludefile = exclude-ports.txt
Name the file customscan.conf -- or whatever you prefer.
Next, specify the configuration file as part of your masscan command:
masscan -c customscan.conf
IPv6 compatibility
You can use Masscan to scan IPv6 address ranges without any additional flags, even in the same scan. Remember that IPv6 networks can be immense, so carefully plan and limit your scans.
How to define output formats
Masscan can output results in several common formats. Use the following summary to determine which option best suits your needs:
- Binary. The default format, which is readable using the --readscan option.
- Grepable. Use the -oG <filename.txt> option to render the output in a format easily searched with grep and similar tools.
- List. Use the -oL <filename.txt> option to render output as a line-by-line list containing the host and a port.
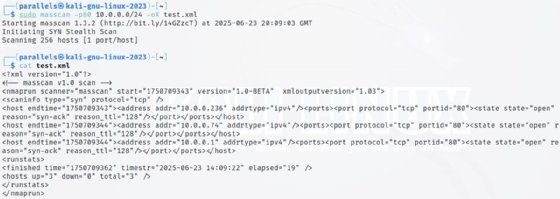
- XML. Use the -oX <filename.xml> option to render output in XML.
- JSON. Use the -oJ <filename.json> option to render output in JSON.
Remember that these files could be large depending on the scan options selected.
Masscan vs. Nmap
Most network and security professionals have used Nmap; Masscan deliberately mimics this ubiquitous tool. Nmap has far more options and flexibility, but Masscan relies on many parallel settings and approaches. Consider the following:
- Nmap is capable of name resolution; Masscan is not.
- Masscan requires the -p<port-number> parameter.
- Output options, such as -oX or -oG, are the same.
Use the masscan --nmap command to see a list of specific settings shared between the two.
Masscan offers high-speed, simple scans of large networks. While tools like Nmap provide more options, they are also slower and more complex to use. Most network and security professionals will likely use both tools, maximizing the strengths of each.
Damon Garn owns Cogspinner Coaction and provides freelance IT writing and editing services. He has written multiple CompTIA study guides, including the Linux+, Cloud Essentials+ and Server+ guides, and contributes extensively to Informa TechTarget, The New Stack and CompTIA Blogs.