virtual network adapter
What is a virtual network adapter?
A virtual network adapter is software that operates like a physical network adapter within the host operating system (OS) or through an application installed on the endpoint or server. Applications and services on the device or server can access the virtual network adapter when a second network interface is needed but no physical adapter is available.
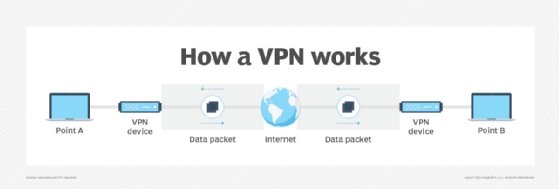
A virtual network adapter can be used with a virtual private network (VPN). A VPN is a service that creates a secure network that extends a private network across a public network, such as the internet. It provides remote offices or users with secure access to the company network. A virtual network adapter separates the data flows that should be sent across the VPN tunnel from the data flows that should be sent from the local, physical network adapter.

Virtual network adapters are a foundational component within hypervisor environments, such as the following:
- VMware's vSphere and ESXi
- Microsoft's Hyper-V
- Citrix Xen or Xen Server
- kernel-based virtual machine
Each virtual server or desktop is a software copy of a physical server or desktop. These virtual machines must contain one or more virtual network adapters to talk to other devices on either logical or physical networks that reside outside the VM.
How does a virtual network adapter work?
Virtual network adapters are created in one of three ways. The first method uses tools within the device OS to create a virtual adapter. For example, Windows 10 has built-in functionality to create VPN virtual network adapters. A virtual network adapter for VPN purposes requires only a few bits of information regarding the connection name, the VPN head-end name or IP address, the VPN type the head-end VPN server uses to communicate, and a pre-shared key or similar authentication mechanism depending on how the VPN tunnels are configured.
Windows Device Manager can also be used to manually configure virtual network adapters for a variety of reasons, including the loopback adapter -- now called Microsoft KM-TEST Loopback Adapter in Windows 10 -- for testing purposes or to manually configure hypervisor-specific adapters.
Another way to create virtual adapters is with a third-party application. This type of application automatically builds a virtual network adapter within the device OS on the user's behalf. It is useful when the adapter serves a single purpose and does not require any special network configuration settings.
Finally, in a virtualized desktop or server environment, the administrator can configure virtual networks and virtual network adapters to enable the VMs to communicate outside their virtual instance. The configuration of the adaptors is performed through the hypervisor management interface during the VM setup processes. Additionally, additions, deletions or changes can be performed using hypervisor management tools as needed.
What are the benefits of a virtual network?
Virtual network adapters provide an additional network interface on a device without the need for a physical network interface card (NIC).
By enabling an OS system to create new virtual interfaces, complex network designs and routing can occur within the OS, which was previously impossible without physical NICs. Segmenting traffic for security and link sharing are the most common use cases for virtual network adapters in desktop or ad hoc scenarios. Virtual network adapters are a requirement in virtualized architectures.
Installing a virtual network adapter in Windows 10
There are several ways to install virtual network adapters, depending on need and purpose. For example, loopback virtual network adapters are commonly used for troubleshooting and testing. In Windows 10, a loopback adapter can be installed using the following steps:
- From the Windows 10 search interface, type in Device Manager, and click on the result. Network adapters appears on the list.
- Click on the Action drop-down menu, and select Add legacy hardware.
- Click on Next on the Add Hardware Wizard, choose the manual install process radio button and click on Next. Select Network adapters from the list, and click on Next.
- Select Microsoft on the Manufacturer list and then Microsoft KM-TEST Loopback Adapter.
- Click on Next to confirm the installation and then Finish.
Once completed, a new adapter will be visible in the Windows 10 Network Connections portion of the Control Panel, and the adapter can be modified as needed. For example, the loopback adapter is set to use Dynamic Host Configuration Protocol by default. This can be easily modified to configure an IP address manually, the same way a physical interface is modified.


