Windows 7

What is Windows 7?
Windows 7 is the Microsoft Windows operating system (OS) released commercially in October 2009 as the successor to Windows Vista.
Windows 7 is built on the Windows Vista kernel and was intended to be an update to the Vista OS. It uses the same Aero user interface (UI) that debuted in Windows Vista. As a result, to many end users, the biggest changes between Vista and Windows 7 were faster boot times, new UIs and the addition of Internet Explorer (IE) 8. The OS is widely available in three retail editions: Windows 7 Home Premium, Professional and Ultimate. Starter, Home Basic and Enterprise editions are available in some markets.
In development, Windows 7 was known by the code names Blackcomb and Vienna.
Key features
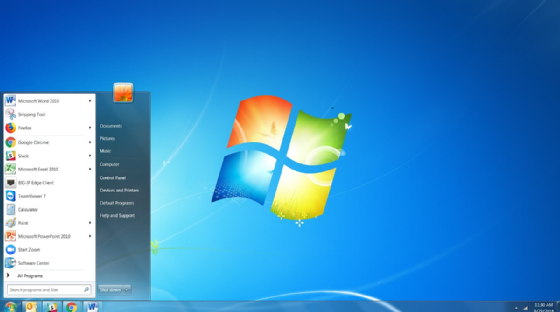
With Windows 7, users can pin applications to the taskbar. In addition, users can rearrange the applications on the taskbar in any order they see fit. Other additions include libraries for storing files. The default library folders include Documents, Pictures and Videos, each of which has a public and private version. In addition, Windows 7 was the first version of Windows to support multitouch capabilities. It also features more accurate handwriting recognition.
Windows 7 introduced the Snap and Shake capabilities. Snap enables a user to drag an open window to the left or right side of the screen and have it automatically resize to take up half the screen. If a user pulls the window off the side, it reverts to the size and shape it was before he snapped it to the side of the screen. A user can automatically maximize a window by dragging it to the top of the screen.
With Shake, users can hide all inactive windows to reveal the desktop by clicking the top of an open window and quickly dragging it back and forth. Users can also easily reach the desktop with the Show Desktop button on the bottom right of the screen, which minimizes all open windows.

Other feature additions include:
- HomeGroup is a network of devices that enables users to share files and folders with the group or on an individual basis. Users require a password to join a group.
- Jump Lists are designed to take users to the files and tasks they work with most in an application. They appear in the Start menu or the taskbar. With Microsoft Word, for example, the Jump List would display the last few files the user worked with.
- DirectAccess for Mobile Workers enables IT administrators to update Group Policy settings and distribute software updates any time the mobile device has internet connectivity, whether or not the user is logged on. DirectAccess supports multifactor authentication and encryption.
- XP Mode enables older applications designed for Windows XP to use a virtualized version of the XP OS. To the end user, the applications seem to be running right on the Windows 7 desktop.
- BranchCache optimizes WAN bandwidth through more effective use of local, read-only caches.
- BitLocker To Go extends on-disk encryption and key management techniques to portable storage devices.
- Virtual hard disk support enables IT to mount a VHD and interact with it as if it were a physical drive.
- Enterprise Search extends search to remote document repositories, Microsoft SharePoint sites and web applications.
- AppLocker enables IT administrators to use Group Policy to specify rules about what applications can run on a user's desktop.
- Enhanced virtual desktop infrastructure enables administrators to use the same master image to manage remote desktops running through VDI and traditional desktop computers.
Windows 7 has the following hardware requirements, according to Microsoft:
- 1 GHz processor (32- or 64-bit)
- 1 GB of RAM (32-bit)/2 GB of RAM (64-bit)
- 16 GB of available disk space (32-bit)/20 GB of available disk space (64-bit)
- DirectX 9 graphics device with Windows Display Driver Model 1.0 or higher driver
History
In July 2007, Microsoft announced it was developing a new OS that would become Windows 7. The company revealed the name Windows 7 in October 2008. Microsoft released Windows 7 to manufacturing in July 2009 and made the OS generally available on Oct. 22, 2009. It served as the successor to Windows Vista and the predecessor to Windows 8.
Throughout its lifetime, Windows 7 has had five major updates:
- Service Pack 1 (SP1), which Microsoft released in February 2011, included additional identity federation services, as well as support for Advanced Vector Extensions. SP1 also introduced 256-bit instruction set extension for processors.
- The Platform Update in February 2013 added IE 10 and enhanced several graphics application programming interfaces (APIs) and video decoders.
- The Disk Cleanup Update delivered a wizard that users and IT administrators could use to delete outdated Windows updates from the OS.
- Windows Management Framework 5.0 included Windows PowerShell improvements and Windows Remote Management capabilities. It debuted in February 2016.
- The Convenience Rollup was the last major update to Windows 7 in May 2016. It contained every security patch and feature update since Microsoft released SP1 in a single package. Microsoft made all future Windows 7 updates cumulative in October 2016.
Microsoft ended mainstream support for Windows 7 on Jan. 1, 2015 and extended support for the OS expired on Jan. 14, 2020.