What is VMware Aria Suite (formerly vRealize Suite)?
VMware Aria Suite, formerly called vRealize Suite, is a software platform designed to help IT administrators build and manage heterogeneous, hybrid cloud environments. The suite was originally called the vCenter Operations Management Suite, but in August 2014, VMware rebranded the suite and its related products to vRealize. In April 2023, VMware changed the name to Aria.
VMware mixed things up again in December 2023 when the company announced that the Aria Suite, along with the rest of the Aria product line, would no longer be available as standalone products. The same fate also befell many other VMware products, while some were discontinued altogether.
The Aria Suite's capabilities were rolled into the VMware Cloud Foundation and VMware vSphere Foundation platforms, along with a number of other existing VMware products. The move was part of a larger effort to consolidate and simplify VMware's product portfolio after Broadcom completed its acquisition of VMware at the end of 2023. The company also offers two other platforms -- VMware vSphere Essentials Plus Kit and VMware vSphere Standard -- but these are basically pared-down versions of vSphere Foundation for smaller organizations and don't include any of the Aria Suite features.
Aria Suite feature availability
As a result of VMware's sweeping changes, the Aria Suite's product capabilities are now available only as part of the Cloud Foundation and vSphere Foundation platforms. When VMware adopted its simplified product structure, it also moved from a perpetual licensing model to a subscription model, which means that Cloud Foundation and vSphere Foundation are available only as subscription software.
Although Aria Suite and its individual products are no longer available as standalone products, the Cloud Foundation and vSphere Foundation documentation continues to use the suite's product names to identify which features are available to which platform. Before VMware launched its new product strategy, Aria Suite included the following five products:
- Aria Suite Lifecycle. An application lifecycle and content management tool that simplifies application deployment, patching and upgrading, while minimizing the ongoing management of Aria Suite components and configurations.
- Aria Operations. An analytics and diagnostics tool that provides IT teams with full-stack visibility into their physical, virtual and cloud infrastructure, enabling them to troubleshoot issues, optimize performance, plan capacity and perform other operations.
- Aria Operations for Logs. A scalable log aggregation and indexing tool that collects log data, centralizes log management, and uses advanced analytics to provide operational visibility and troubleshoot issues across physical, virtual and cloud environments.
- Aria Automation. A private cloud that enables self-service consumption and delivery in an on-premises data center or public cloud environment, with support for cloud-native technologies and DevOps methodologies.
- Aria Automation Orchestrator. An orchestration tool that simplifies and automates complex IT tasks and supports Agile and DevOps development models, while providing a rich library of plugins that extend Aria Automation's core capabilities.
Features from all five products have been incorporated into the Cloud Foundation platform, which has received the "full breadth of Aria's functionality," according to VMware. In contrast, the vSphere Foundation platform includes only Aria Suite Lifecycle, Aria Operations and Aria Operations for Logs.
Some VMware documentation indicates that vSphere Foundation also incorporates a basic version of Aria Automation Orchestrator or makes a vague reference to some VMware Aria Operations capabilities being part of vSphere Foundation. Other VMware documentation suggests that vSphere Foundation contains no Aria Automation features, including Aria Automation Orchestrator.
In addition, multiple VMware resources indicate that Cloud Foundation includes features from the Enterprise edition of Aria Operations, while VMware Foundation gets its Aria features from the Advanced edition.
Prior to VMware's product restructuring, the Aria Suite was available in three editions:
- Standard. Included most of the basic operational functionality common to all three editions, such as log analysis, visualization, capacity management, workload balancing and policy management.
- Advanced. Built on the Standard edition, but added features related to business and automation, such as consumption analysis, data center optimization, custom reporting, self-service provisioning, resource lifecycle management and extensibility.
- Enterprise. Built on the Advanced edition, but added advanced automation features, such as multi-cloud capabilities, code streaming for DevOps, application provisioning and Kubernetes support.
Although some VMware sources refer to the original Aria editions in describing Aria features in Cloud Foundation and vSphere Foundation, other sources don't make this distinction.
VMware's product and licensing overhaul is relatively new, so it's not surprising that many VMware resources are still inconsistent, incomplete or inaccurate. It will likely take VMware some time before its documentation and marketing material catch up with all the changes that have occurred since December 2023. Until then, customers should contact their VMware sales representatives for specific details about which Aria Suite features are included in which platform.
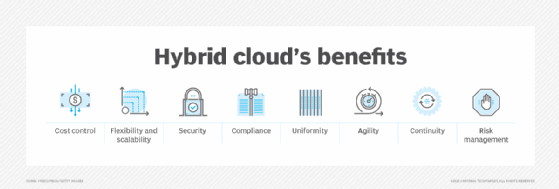
Choosing the right server virtualization management software is critical to meeting your organization's current and future needs. See how to find the best server virtualization management software for your environment. Also, get to know the benefits, challenges, similarities and differences between hybrid cloud and multi-cloud.