How to restore system state backup in Windows Server 2008 R2
Use this chapter excerpt to find out how to perform a bare-metal recovery and system state recovery in Windows Server 2008 R2, including how to use Windows system recovery tools.
Solutions provider takeaway: In this chapter excerpt, you will get the steps required to perform both a bare-metal recovery and system state recovery in Windows Server 2008 R2. There is also information on recovering system state data containing Active Directory data and how to use Windows system recovery tools.
|
||||
Recover Your Data
I hope recovering your data is not a daily task. However, you should know how to recover data just in case. Fortunately, the recovery tool is straightforward to use presuming you have performed a proper backup. The method used to back up your data will always determine what recovery method you will need to perform. Your desired outcome will impact what and how you need to perform your recovery.
Restore Specific Files or a Full Volume
If the time comes that you need to recover the files, it is just a matter of knowing what files and what time frame you need to restore.
- Start Windows Server Backup by selecting Start ⇒ Administrative Tools ⇒ Windows Server Backup.
- To launch the recovery wizard, in the Actions pane on the right, select Recover.
- Select where you have stored the backup, and click Next. If the backup is stored locally on an internal hard drive, verify This Server is selected, click Next, and proceed to step 7. If the backup is stored elsewhere, select A Backup Stored On Another Location, and click Next.
- Depending on the location of the backup, click Local Drives or Remote Shared Folder, and click Next. If you specified Remote Shared Folder, you will need to type in the UNC name for the backup in the form of \\servername\sharename.
- On the Select Backup Location screen, verify your backup set, and click Next.
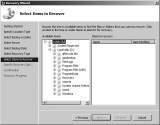
- Select the server data you want to recover, and click Next.
- On the Select Backup Date screen, select the date and possible time for the backup set you want to recover from, and click Next.
- On the Select Recovery Type page, select what you want to recover.
- Select Specific Files Or Folders if you trying to recover a specific file or folder. When you select this option and click Next, you will see a screen similar to Figure 8.15, allowing you to expand the tree to recover the file from.
- Select Volumes if you need to recover the entire volume from a backup set. When you select this option and click Next, you will be provided with a list of volumes to select from.
- Select System State if you want to recover system state.
-
Figure 8.15: Recovering a specific file
Note: You may also notice a choice called Applications. Depending what applications you have installed on your server, some may have registered with Windows Server Backup. If they have, you have the ability to recover those applications as well.
- After you make your selection for the recovery of files, click Next.
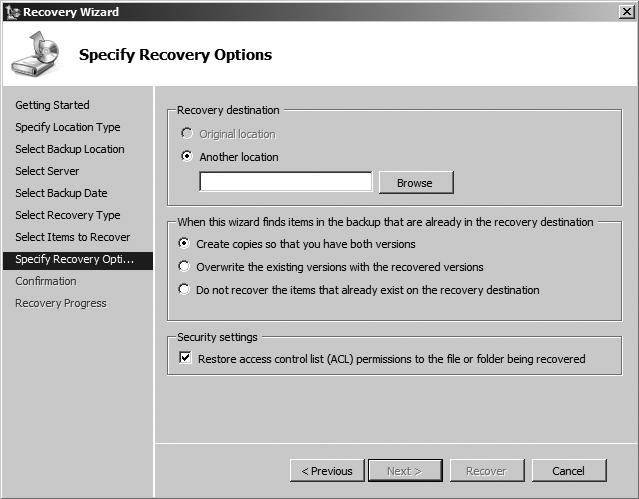
- The Specify Recovery Options screen will look like Figure 8.16. This screen gives you a few options on how you want to recover the file. You can recover to the original location or an alternative location. You can also control whether you create a copy of the file to make sure you have both versions, overwrite any existing version of the file, or do not recover the file if one already exists. You can also bring back any security permissions on the file. After you make your selection, click Next.
- Review the Confirmation screen, and click Recover.
- After the recovery process is complete, review the results, and click Close.
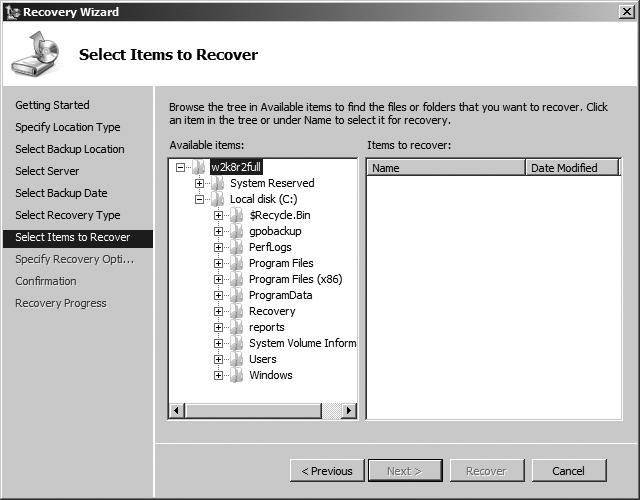
Figure 8.16: Recovery options
Perform a System State Restore
When you want to recover system state data, you need to take an extra bit of precaution and planning when recovering this data. Because of the nature of the data being recovered, you have the potential to render your system unbootable. Specifically, when this restore process is started, it cannot be stopped or interrupted. If it is, this process could render your server unbootable. In other words, use caution when recovering the system state. Of course, if you are using this process, chances are you are not too far from having to rebuild your server anyway.
- Start Windows Server Backup by selecting Start ⇒ Administrative Tools ⇒ Windows Server Backup.
- To launch the recovery wizard, in the Actions pane on the right, select Recover.
- Select where you have stored the backup, and click Next. If the backup is stored locally on an internal hard drive, verify that This Server is selected, click Next, and proceed to step 7. If the backup is stored elsewhere, select A Backup Stored On Another Location, and click Next.
- Depending on the location of the backup, click Local Drives or Remote Shared Folder, and click Next. If you specified Remote Shared Folder, you will need to type in the UNC name for the backup in the form of \\servername\sharename.
- On the backup location screen, verify your backup set, and click Next.
- Select the server data you want to recover, and click Next.
- On the Select Backup Date screen, select the date and possible time for the backup set you want to recover from, and click Next.
- On the Select Recovery Type screen, select System State to recover the system state information, and click Next.
- Select the area you would like to recover your system state data to, either the original location or an alternate location. If you are trying to recover, make your selection, and click Next.
- On the Summary screen, review your selections, and then click Recover.
- After the recovery process is complete, review the results, and click Close.
Restore System State Backup Data Containing Active Directory Data
If your system state backup contains Active Directory information, you will not be able to recover the data via the recovery wizard unless you specify an alternate location to recover to. If you try to recover the data in the Windows Server Backup tool, you will see an error message similar to the one shown in Figure 8.17.
Figure 8.17: System state with Active Directory data error

To perform a system state recovery of your Windows Server 2008 R2 server containing Active Directory information, you need to boot the operating system into Directory Services Restore Mode (DSRM). Specifically, you will be performing an authoritative restore.
Before you can boot into DSRM, you need to configure your boot process:
- Click Start, type msconfig, and click the Msconfig program under Programs.
- Click the Boot tab.
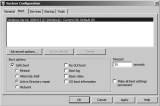
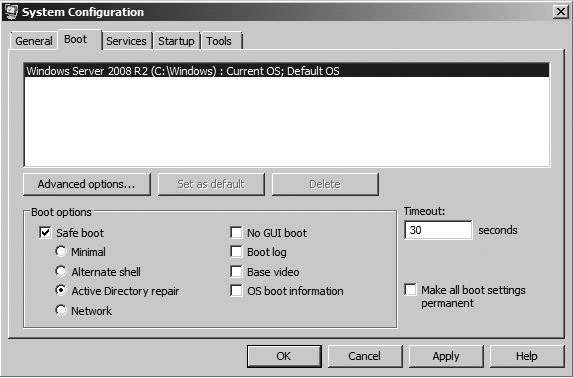
- In the Boot Options section, select the Safe Boot check box, and select the Active Directory Repair option. Click OK. Your screen should look like Figure 8.18.
-
Figure 8.18: Booting into DSRM
- Restart the server.
- Log on to the server with the local administrator ID and the DSRM password you created while installing the server.
- Start Windows Server Backup by selecting Start ⇒ Administrative Tools ⇒ Windows Server Backup.
- To launch the recovery wizard, in the Actions pane on the right, select Recover.
- Select where you have stored the backup, and click Next. If the backup is stored locally on an internal hard drive, verify that This Server is selected, click Next, and proceed to step 12. If the backup is stored elsewhere, select A Backup Stored On Another Location, and click Next.
- Depending on the location of the backup, click Local Drives or Remote Shared Folder, and click Next. If you specified Remote Shared Folder, you will need to type in the UNC name for the backup in the form of \\servername\sharename.
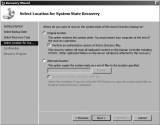
- On the Specify Backup Location screen, verify your backup set, and click Next.
- Select the server's data you want to recover, and click Next.
- On the Select Backup Date screen, select the date and possible time for the backup set you want to recover from, and click Next.
- On the Select Recovery Type screen, select System State to recover the system state information, and click Next.
- Select Original Location, and select Perform An Authoritative Restore Of Active Directory files, as shown in Figure 8.19.
-
Figure 8.19: Authoritative restore
- You will receive a warning noting that all replicated content on the server will be resynchronized and that this can cause potential latency on your server and network. Acknowledge the message by clicking OK.
- On the Summary screen, review your selections, and then click Recover.
- You will receive another warning message stating that system state recovery cannot be paused or canceled once it has started. Click Yes to proceed with the recovery, or click No to complete the recovery at a later time.
- After the recovery process is complete, review the results, and click Close.
- Before you restart the server, you need to turn off DSRM.
- Click Start, type msconfig, and click the Msconfig program under Programs.
- Click the Boot tab.
- In the Boot Options section, deselect the Safe Boot check box. Click OK.
- Restart the server, and log on with your normal domain credentials.
- If you see a command prompt window notifying you the status of your recovery, review the message, and press the Enter key.

Perform a Bare-Metal Restore
Sometimes you run into problems that a simple file restore or a system state recovery cannot fix. If you have created a bare-metal recovery image, then you can recover your full server using the recovery process. This recovery process is different from recovering just files or the system state. The bare-metal recovery process is part of the Windows Recovery Environment, and to get to it, you need a Windows Server 2008 R2 DVD to boot the operating system to, and you need access to the drive containing the bare-metal backup. Typical USB drives can work really well in this scenario presuming your BIOS supports USB at boot.
Additionally, this recovery process is destructive, meaning when you run a bare-metal recovery all the data on your drives will be replaced with data from the system image. You also have the potential during the recovery process to partition and format the drives, in other words, restoring the server completely to a previous working state.
- Make sure your backup media is attached to the server, and insert and boot to your Windows Server 2008 R2 DVD.
- Select your language preferences, and click Next.
- In the Install Now window, click the Repair Your Computer option located in the lower left of the installation window.
- To recover from your bare-metal backup, select the Restore System Using A System Image You Created Earlier radio option, and click Next. You can also get to the image via the Recovery Tools option.
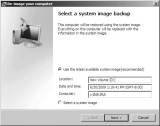
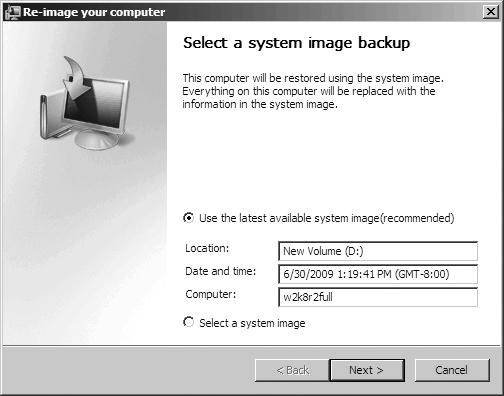
- The system image will scan your system's drives for an image for you to restore from; you will see a screen similar to Figure 8.20. You can select the image provided to, usually the most current, or you can select a different image by selecting Select A System Image. When you have the proper image selected, click Next.
-
Figure 8.20: Bare-metal image selection
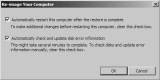
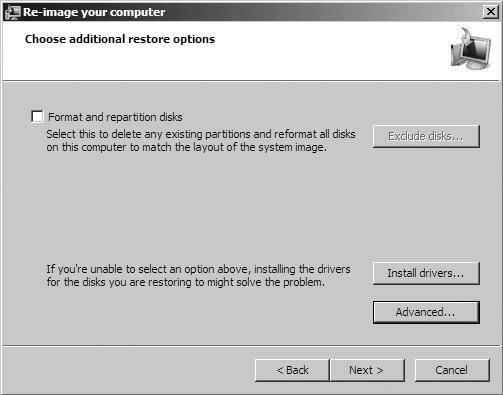
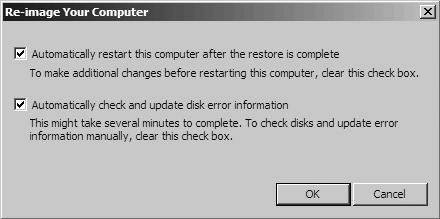
- On the Choose Additional Restore Options screen, you have the ability to control how your drives and partitions are handled, as shown in Figure 8.21. You can repartition and format the drives. You can also exclude drives from the partition, which is particularly useful when you want to keep other drives intact. By clicking Advanced, you will see a window similar to Figure 8.22. This window allows you to control whether you want restart upon completion. It will also allow you to perform a hard disk scan to check and possibly repair errors. After you're done, select your options, and click Next.
- Review your selections, and click Finish to begin the bare-metal restoration.
-
Figure 8.21: Bare-metal recovery options
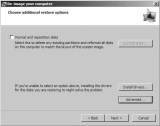
Figure 8.22: Advanced options
- You will be presented with a warning reminding you that the process will replace existing data from the bare-metal backup image. If this is what you want to do, click Yes to finalize the restoration process. This process could take a long time to complete based on how much data you need to recover.
- When the recovery is complete, you will prompted to restart, or the system will restart automatically (the default option).
Windows System Recovery Tools
During the bare-metal restore process, you saw an option to load the Windows system recovery tools. The Windows system recovery tools provide you with three options to further troubleshoot your environment:
- System Image Recovery will take you to the bare-metal recovery wizard to allow you to fully recover your system.
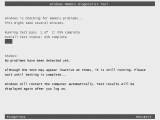
- Windows Memory Diagnostics will perform diagnostic checks on the memory of your system to see whether faulty memory is to blame for any system errors. When you select this option, you will asked to either restart the system immediately to check for problems or schedule the memory check for the next time you restart the system. Pressing F1 will allow to control the types and number of memory tests you can perform. When the test is running, you will see a screen similar to this one.
-
- Command Prompt will load a command prompt to allow you to perform a variety of command prompt actions.

|
||||
Recover via Shadow Copy
Recovering files via a shadow copied shared volume is something you can teach your users to do. It is very straightforward to work with when it is enabled and as easy to access as right-clicking the file or folder you want to perform the recover. To access the shadow copies on your Windows Server 2008 R2 server, the users must be running an operating system that supports the Shadow Copy Client. Windows Vista, Windows 7, Windows Server 2003, Windows Server 2008, and Windows Server 2008 R2 all have built-in support for the Shadow Copy Client. For Windows XP or Windows Server 2000 SP3 or later, you need to download the client located from this location:
http://support.microsoft.com/kb/832217
Using the Shadow Copy Client to recover a file is just a matter of knowing where the file is located and knowing how you want to recover the file. Shadow copies are great if a user has accidentally deleted a file or folder or inadvertently overwritten a file, such as by choosing Save instead of Save As. You can work with the shadow copy files or folders just like you would any regular file or folder.
When restoring with shadow copies, you have three options, as listed in Table 8.3.
Table 8.3: Shadow Copy Options
|
|
|
| Open | Allows you to open a shadow copy of the file or folder to view any changes. You can copy and paste between the shadow copy and the original file or folder. This method is very useful when you want only to recover a file from a folder instead of the whole folder. |
| Copy | This will make a copy of the shadow copy and store it in a different location. This is also useful when you want to compare files or folders side by side. |
| Restore | This will restore the file in the original location. Be careful if you restore a folder with this method because it will restore all the contents of the folder. |
You can access the shadow copies either locally if the shadow copy has been enabled on your local volume or via a network share after you have opened the folder or share where you want to recover data from.
- Right-click the file or folder you want to restore with the shadow copy. You can also right-click the whitespace of an opened folder.
- Select Properties.
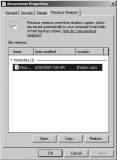
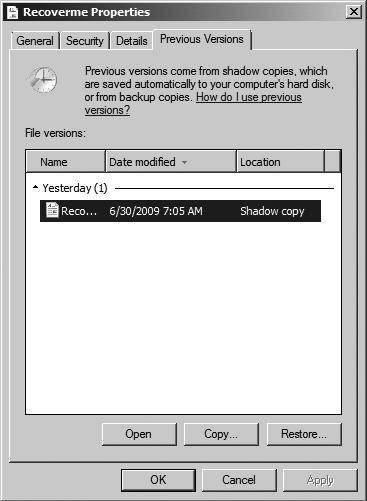
- Click the Previous Versions tab; your screen will look similar to Figure 8.23.
-
Figure 8.23: Shadow copy restore
- Select the shadow copy you want to use; they are stored by date and time.
- Select Open, Copy, or Restore.
- When you are finished, click OK.
Note: If you do not see any shadow copies listed, the most likely cause is that the file has not changed. Remember, shadow copies store only the changes for the files, and if there are no copies listed, the file is the original.
It is important you also know that shadow copy is not retroactive. The feature will not protect you until the feature is enabled. In other words, if a user makes changes to files or deletes a file prior to enabling shadow copy, the act of enabling shadow copy will not allow you to retroactively make copies of files and folders.
![]()
![]() Backing Up and Recovering Your Server
Backing Up and Recovering Your Server
![]() Windows server backup in Windows Server 2008 R2
Windows server backup in Windows Server 2008 R2
![]() Bare-metal, system state recovery in Windows Server 2008 R2
Bare-metal, system state recovery in Windows Server 2008 R2
Printed with permission from Wiley Publishing Inc. Copyright 2010. Microsoft Windows Server 2008 R2 Administration Instant Reference by Matthew Hester and Chris Henley. For more information about this title and other similar books, please visit Wiley Publishing Inc.